Portable Studio for Bats in Flight
Portable Studio photography of bats in flight Contributed and Written by Piotr Naskrecki
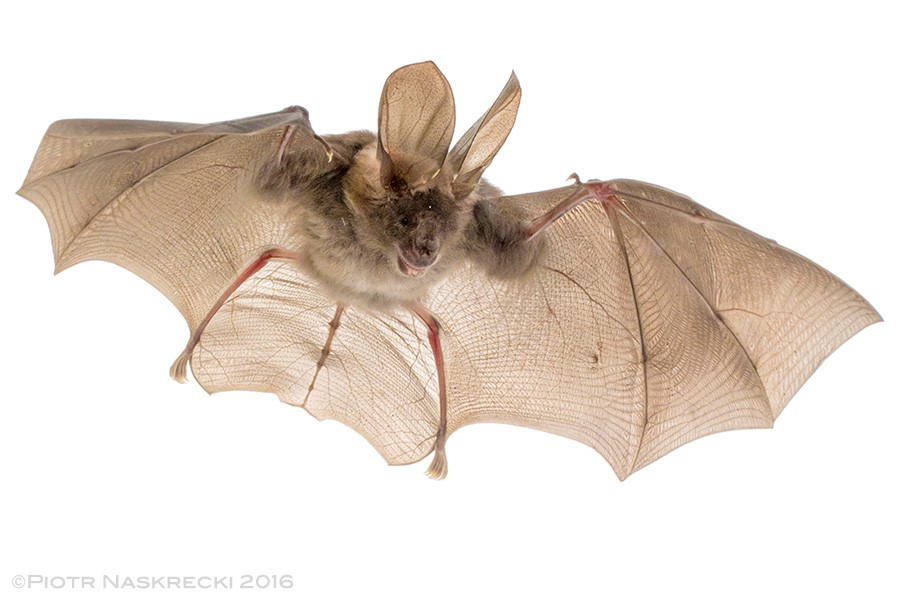
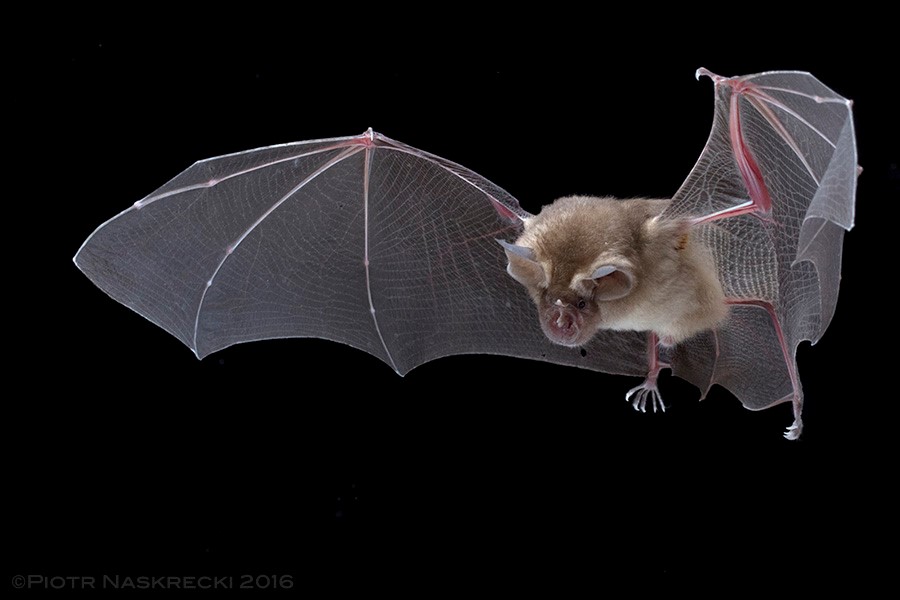
Bats are elusive creatures – difficult to see and photograph, fragile yet potentially dangerous to handle. They are nocturnal, high flying, and agile – not exactly a combination of characteristics that would endear a photographer to them. My experience with capturing bats on camera had always been limited to snapshots of static animals hanging on cave walls, or documenting my biologist colleagues capturing bats in mist nets. But I found neither particularly satisfying, and thus when I was asked to help document the diversity of bats of Gorongosa National Park in Mozambique I immediately accepted the challenge. They were to be photographed alive and in flight. A particularly appealing aspect of this assignment was that most bat species found in Gorongosa had never been photographed before. In fact, few bats in Africa have ever been photographed in flight, and knowing that my images would be the first of their kind only made the project more exciting.
The biologist documenting Gorongosa bats, Jen Guyton of Princeton University, required images that were not only technically good but also taxonomically diagnostic. This means that they needed to show all the details of the bats’ bodies that allow for positive identification of the species. This requirement made me decide to photograph them in a studio setup, rather than attempting to shoot them in caves or at roosting sites. Since Jen was catching bats in a mist net almost every night to take measurements and DNA samples I knew that I would have no shortage of subjects. The difficulty was that the bat documentation was taking place in multiple, often very remote locations in Gorongosa, and thus I had to be able to photograph the animals in the field, far from access to electricity and other amenities of civilization. I had to build a photo studio portable enough to be able to take with me wherever the biologists were working, yet capable of capturing images of the highest quality.
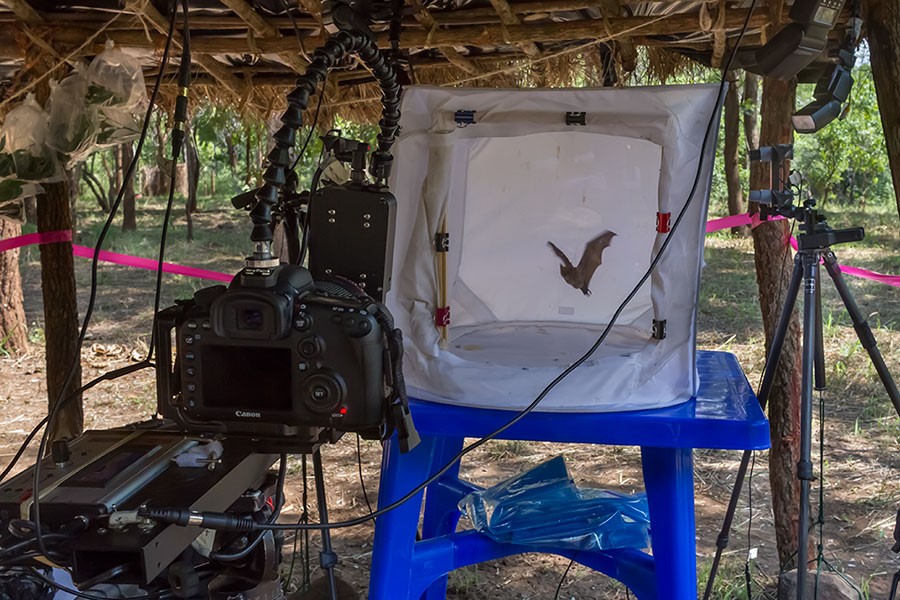
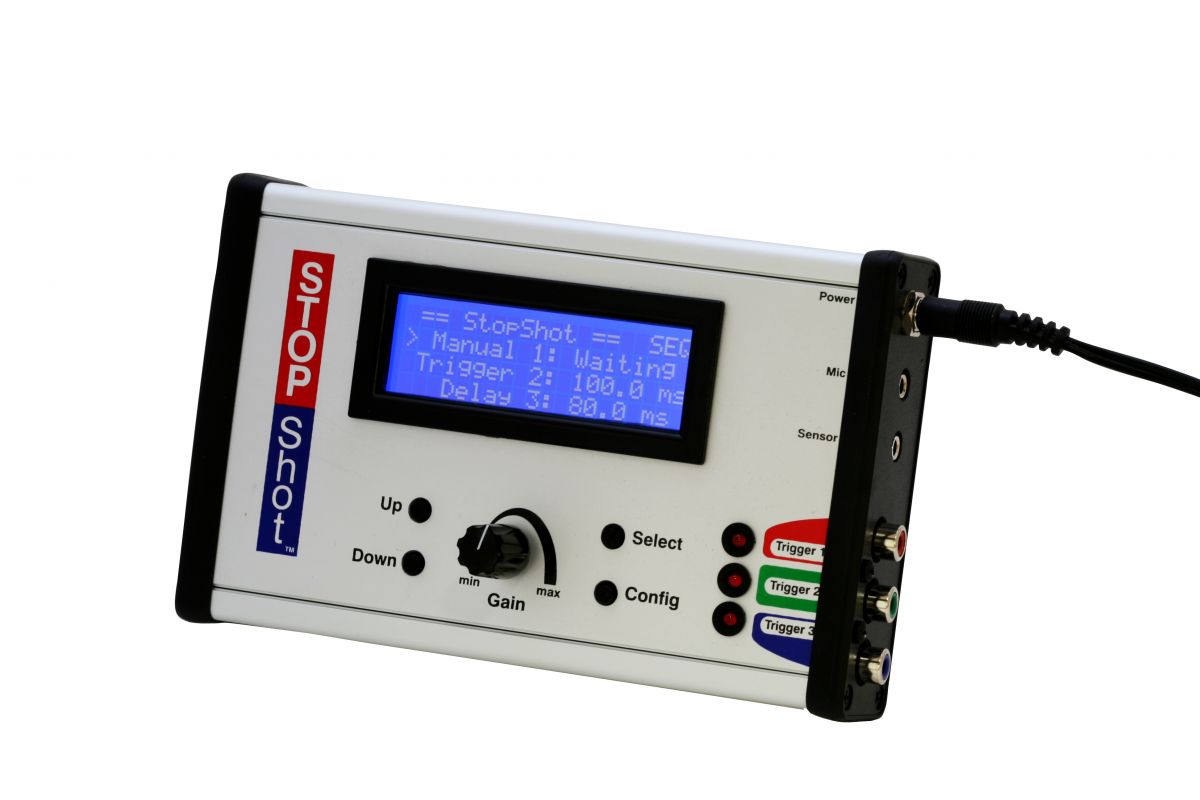
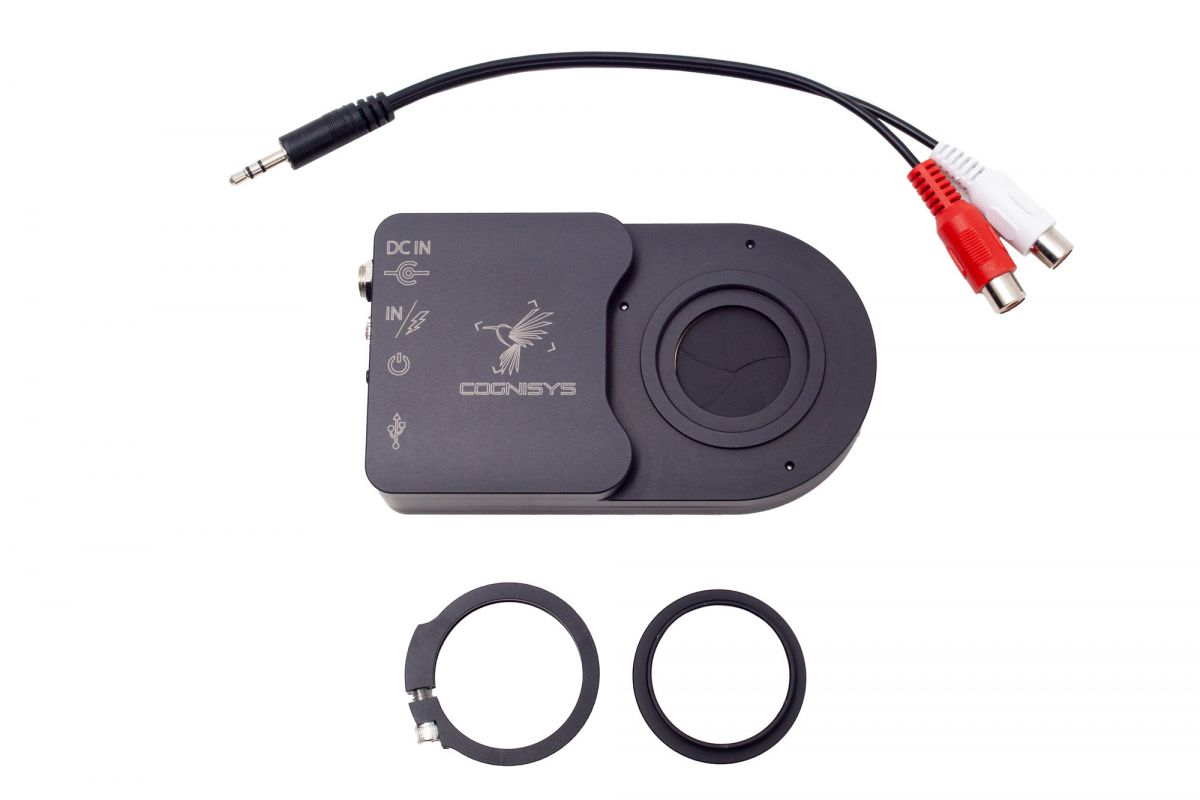
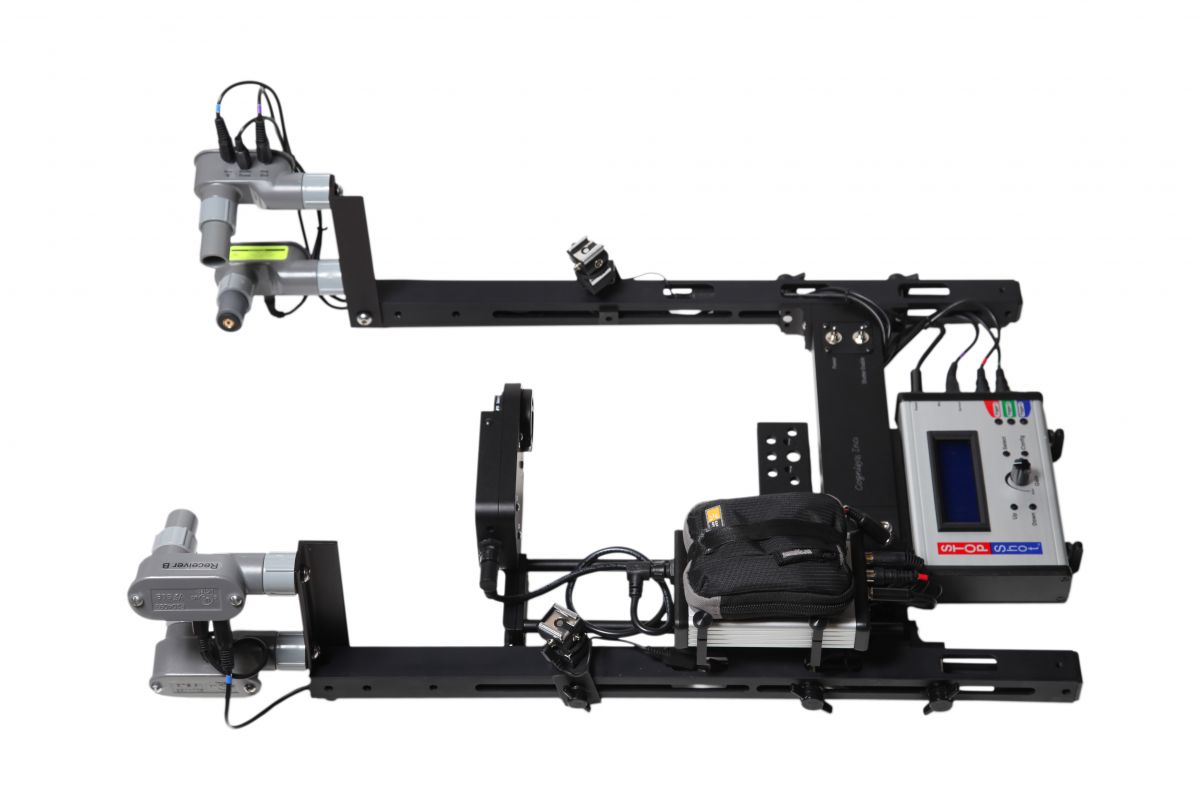
After researching the field of high-speed bat photography the choice became clear – the Cognisys StopShot controller, combined with the High Speed Shutter, and a pair of mini laser transmitters was the best system available for this type of work. The entire setup easily packs in a small Pelican case, takes about 30 minutes to assemble and calibrate, and can be powered by a rechargeable lithium battery (in a pinch I could also use a set of 8 regular AA batteries). Even more importantly, the entire system was affordable to a field biologist. The studio was built around a medium (24 x 24 x 36") white tabletop shooting tent (Impact Digital) and used six inexpensive flashes (Yongnuo YN560-III) connected to the StopShot controller via PC-to-RCA cables. These flashes provided light pulses short and powerful enough to freeze even the fastest bats in flight.
Although I had purchased the entire Cognisys Insect Rig, which provides sturdy support for all the elements of the system, the High Speed Shutter turned out to be small and light enough to allow me to mount it directly on the lens (Canon EF 100mm f/2.8L Macro IS USM), using a short, flexible arm (a modified Wimberley Plamp) attached to the camera’s hot shoe. The camera (Canon 7D MkII) and the StopShot controller were mounted on the transverse bracket of the Insect Rig, which contains two flip switches that control the supply of power to the controller and the shutter. These switches made it easy to align the lasers and receivers, and test the system before releasing a bat into the studio.
But first I had to modify the shooting tent to allow the laser beams of the trigger to intersect, and to stop the bat from escaping the moment it was placed inside. I solved the first problem by cutting two openings on the opposite sides of the tent and attaching translucent windows made of thin Perspex. I could then freely manipulate the mini lasers and their receivers, mounted on tripods outside the tent, to find the perfect spot of intersection inside the tent. To prevent bats from leaving I inserted a square pane of glass onto the front of the tent, fastened with clips to the edges. And I knew that I did not need to worry about bats bumping into the glass – their ability to echolocate made the glass as visible to them as a brick wall would be to us.
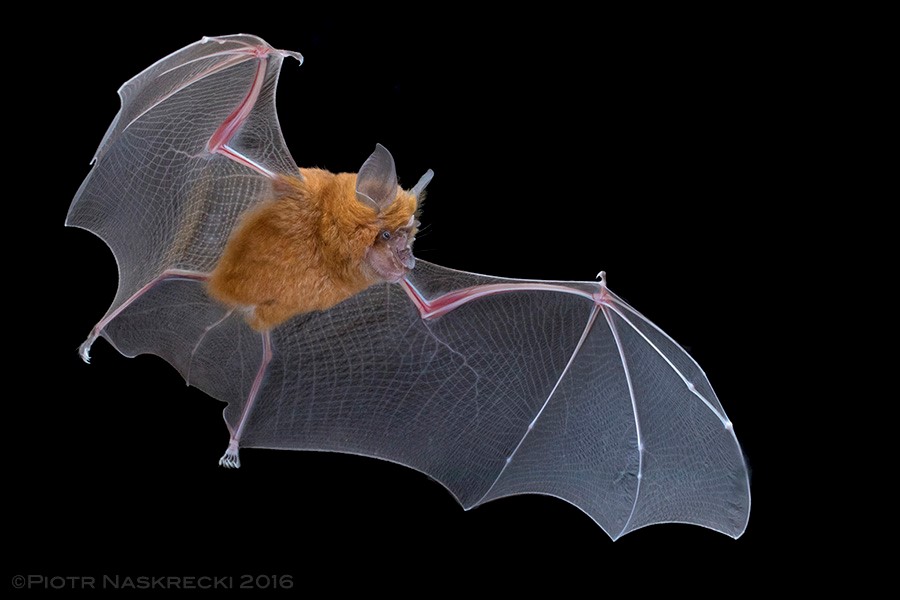
To photograph bats in flight in my portable studio, and later also using it to shoot flying insects and birds, I used the “Insect Rig” preset on the StopShot controller. The camera was in the B (bulb) mode, set to ISO 400, and the lens was closed down to f16. All six flashes were dialed down to 1/64th of their maximum power, which produced enough light to illuminate flying bats when shooting from a distance of about 1.5 m while light pulses were short enough to eliminate any motion blur from the wing movement. Once calibrated for correct exposure and focus the system worked like a point-and-shoot camera, only that I did not even have to press the shutter. All I had to do was to place a bat in the tent and a few minutes later I had a set of perfectly sharp, beautiful shots of the bat, triggered by the flying animal. The bat was then removed and released unharmed. I experimented with both white and black backgrounds, which allowed me to highlight different aspects of the bat morphology. White background is good for showing the structure of the wings, while the black background (I used black velvet, draped over the back of the tent) was good to highlight the hair on the animal’s body.
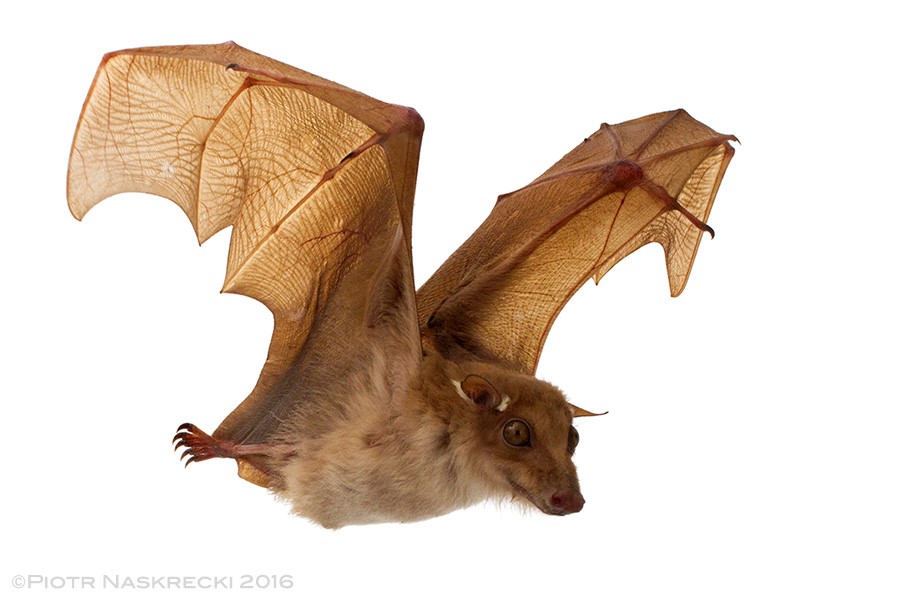
The tabletop tent worked great for smaller bat species but it could not be used for large fruit bats. It should also not be used for birds, which lack the bats’ echolocation sense and would crash against the front glass. In those cases I used a large walk-in tent, moved the mini laser further apart, and hung a white sheet at the back of the tent. The transition from the tabletop to a stand-alone setup took no more than 20 minutes, and all I had to do was to adjust the point of laser beam intersection and pre-focus my camera on it. The StopShot controller allows you to turn on the lasers without triggering the shutter, making it easy to locate the point of intersection.
As somebody who grew up reading about trailblazers of high-speed photography, such as Harold Edgerton or Stephen Dalton, I have never imagined that I would be able to do it myself, using equipment that can be packed in a small case and taken to the most remote corners of the globe. For a nature photographer who wants to document all that takes place in a blink of an eye the times could not be more exciting.
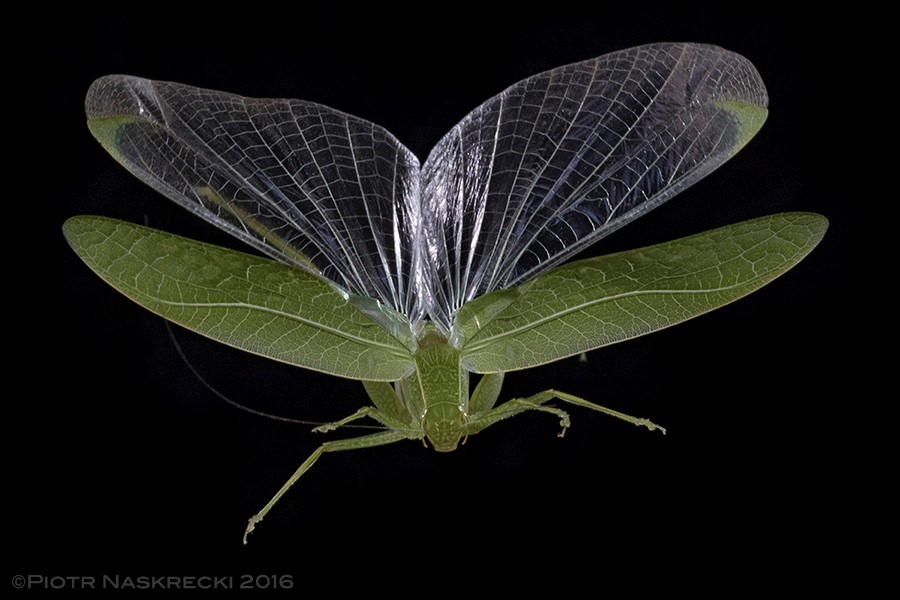
Leaf katydid (Eurycorypha lesnei)
Many thanks to Piotr Naskrecki who contributed this article. You can see more of Piotrs's work on his web page www.insectphotography.com
 Discontinued