Insects in Flight
Photographing Flying Insects
Contributed and Written by John and Kendra Abbott
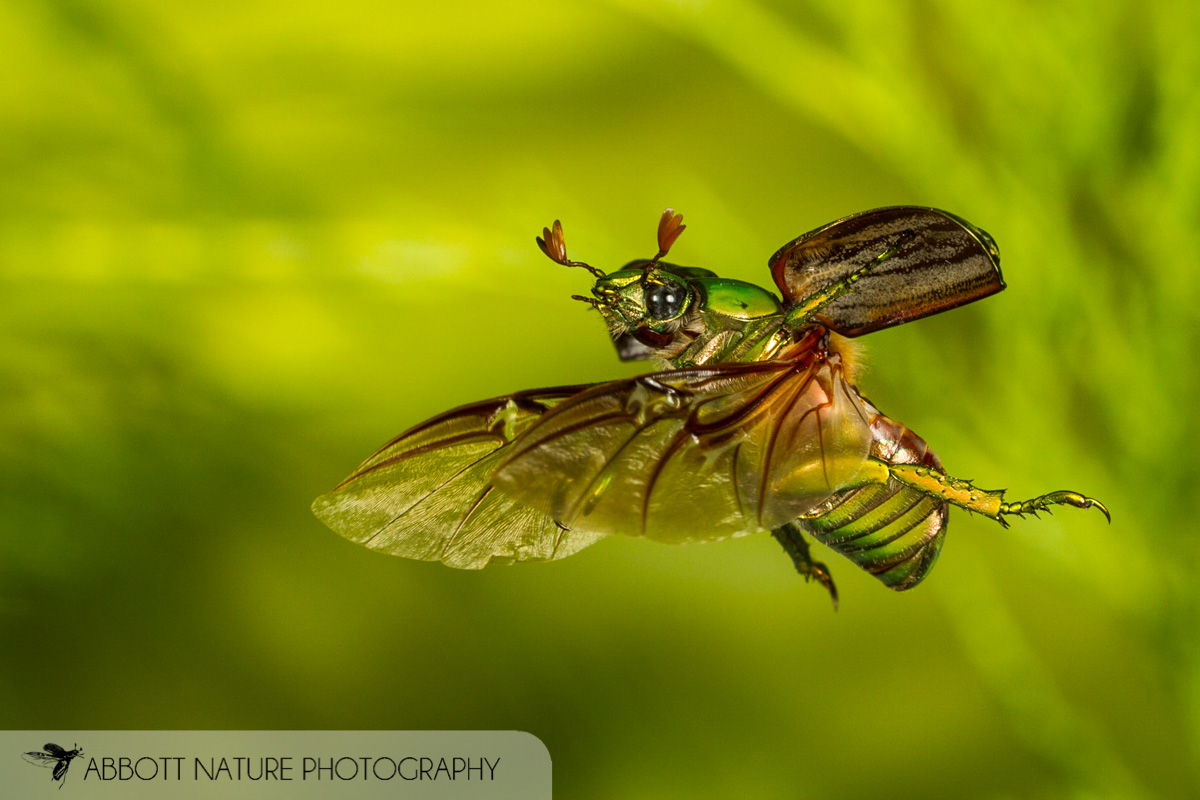
Most insects are capable of flight, but capturing it can be quite a challenge. Different groups of insects not only exhibit morphological differences in their wings resulting in different ways in which they fly, but they have different motivations for flight as well. One of the biggest tips for this type of photography is, know your subject.
The Setup
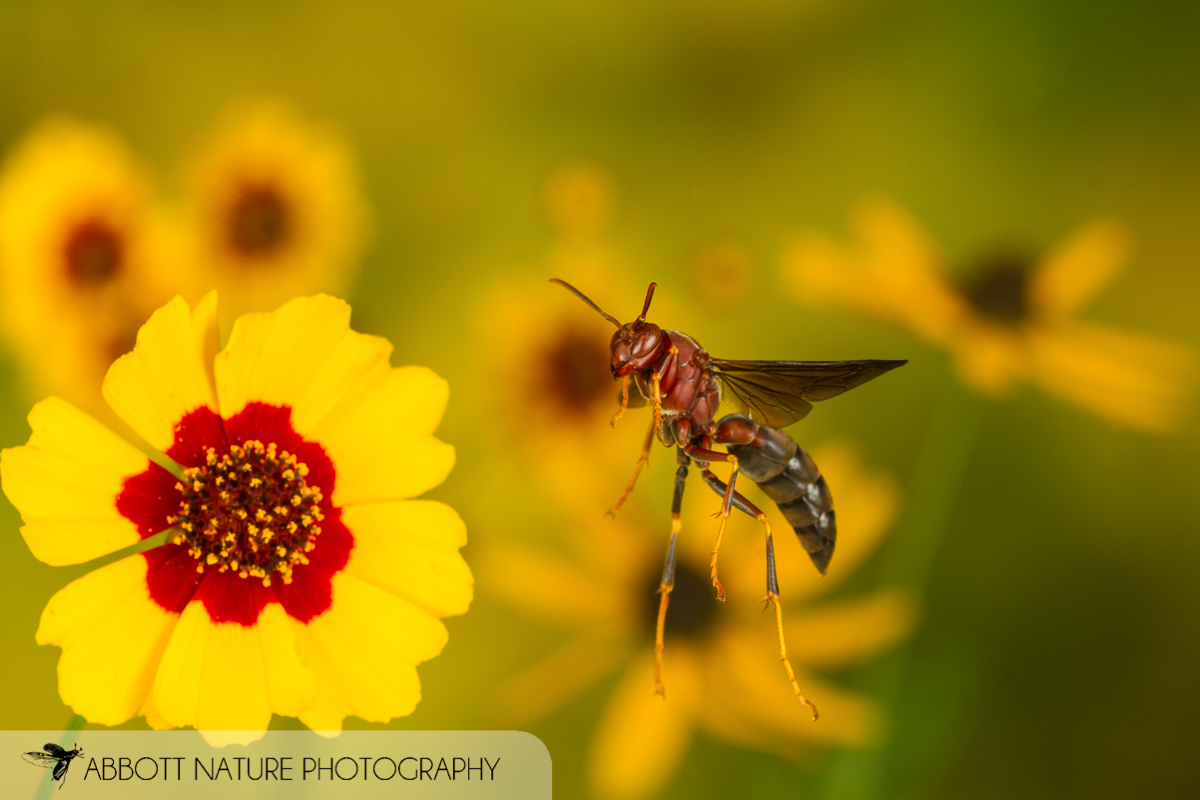
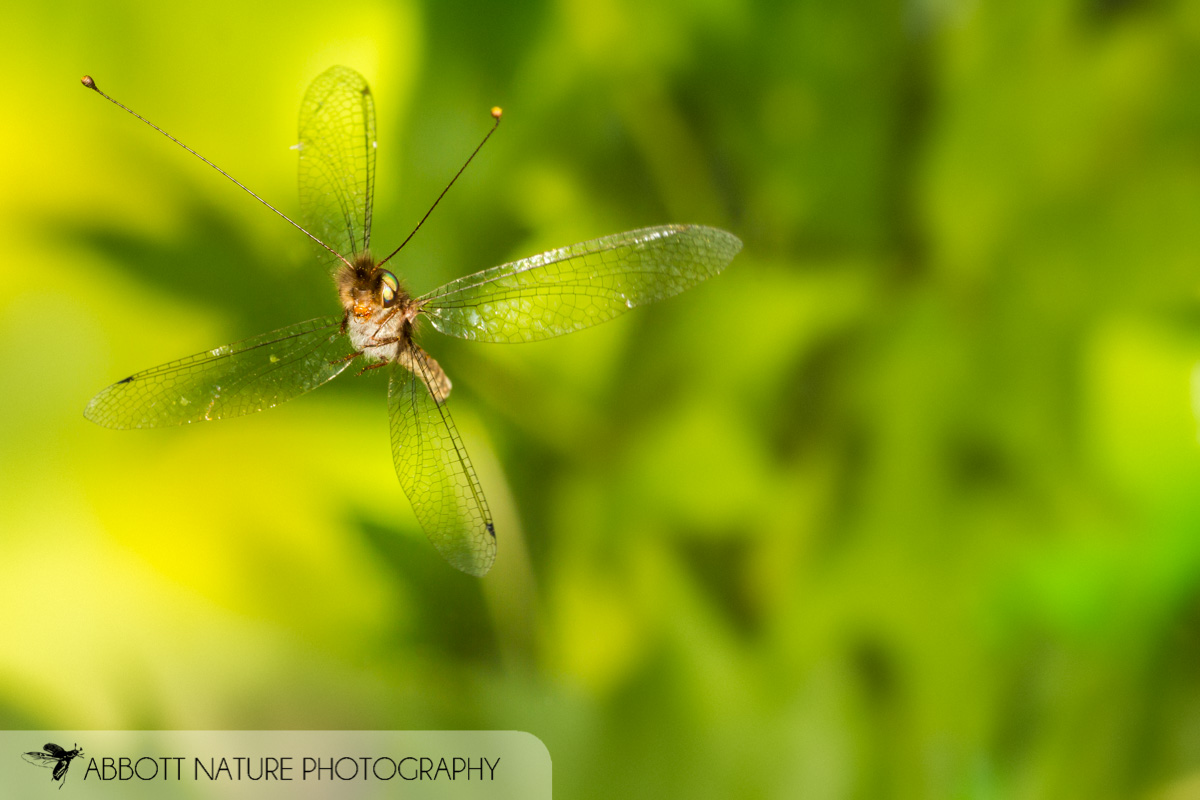
It may seem obvious, but the easiest insects to photograph in flight are those that are “flighty!” Wasps and bees tend fly readily and are good subjects to start with. You can photograph insects in flight either in situ or in a flight chamber. For insects in situ, you need to go after those that are predictable, or at least have a predictable path to their flight. Nesting insects make good subjects to start with.
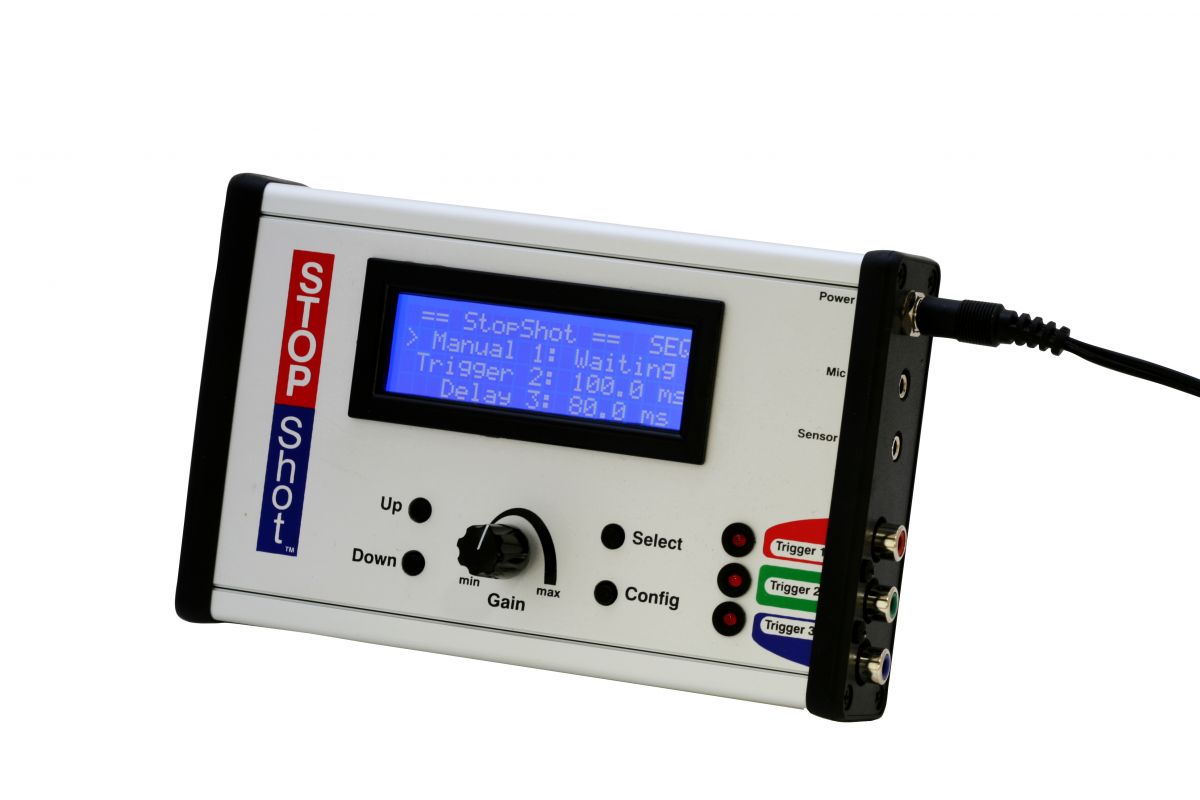
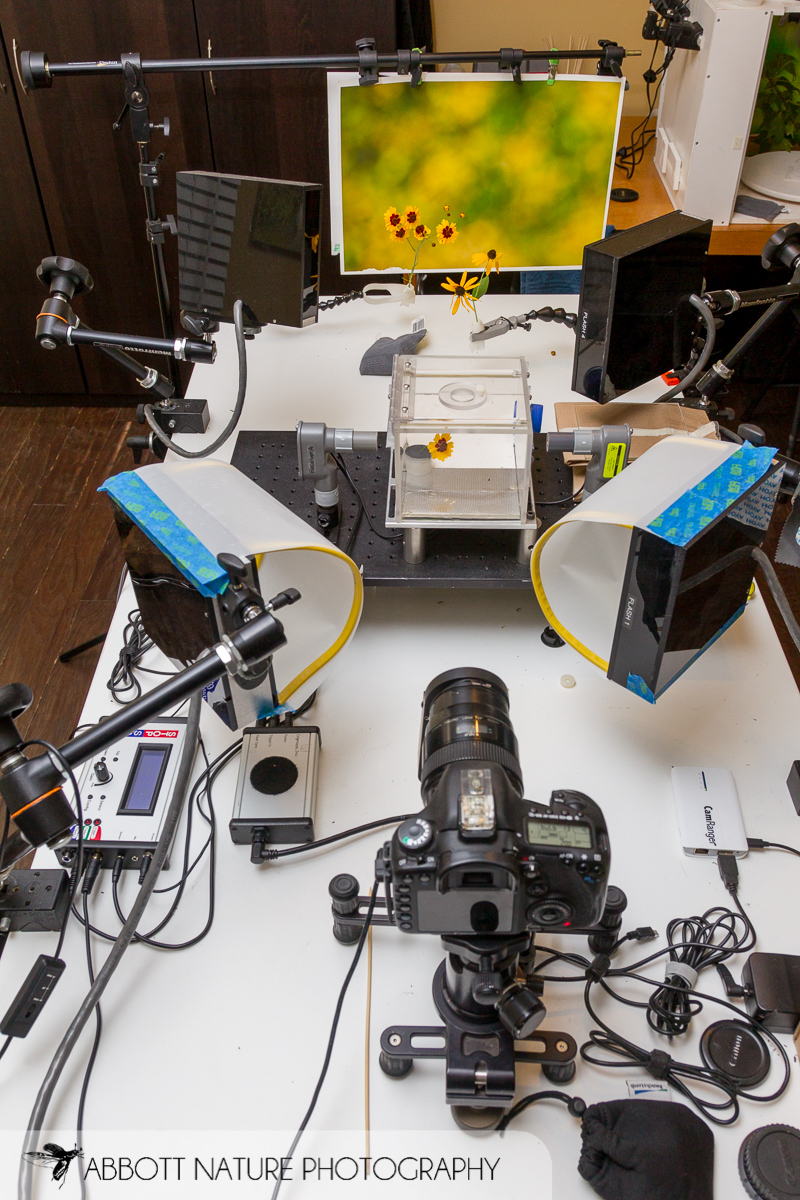
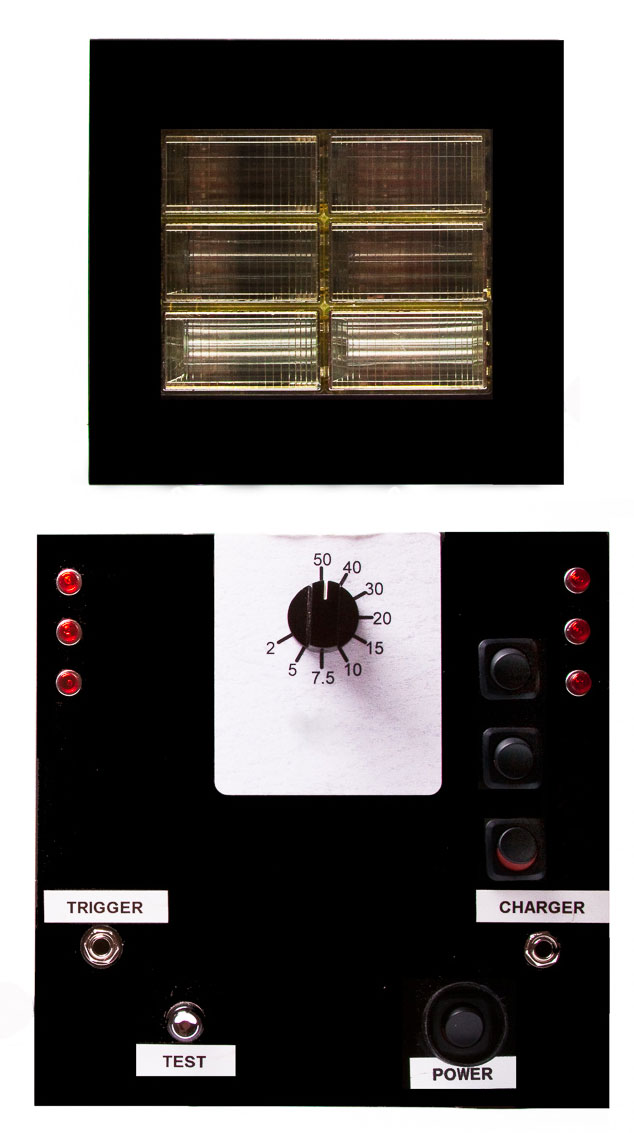
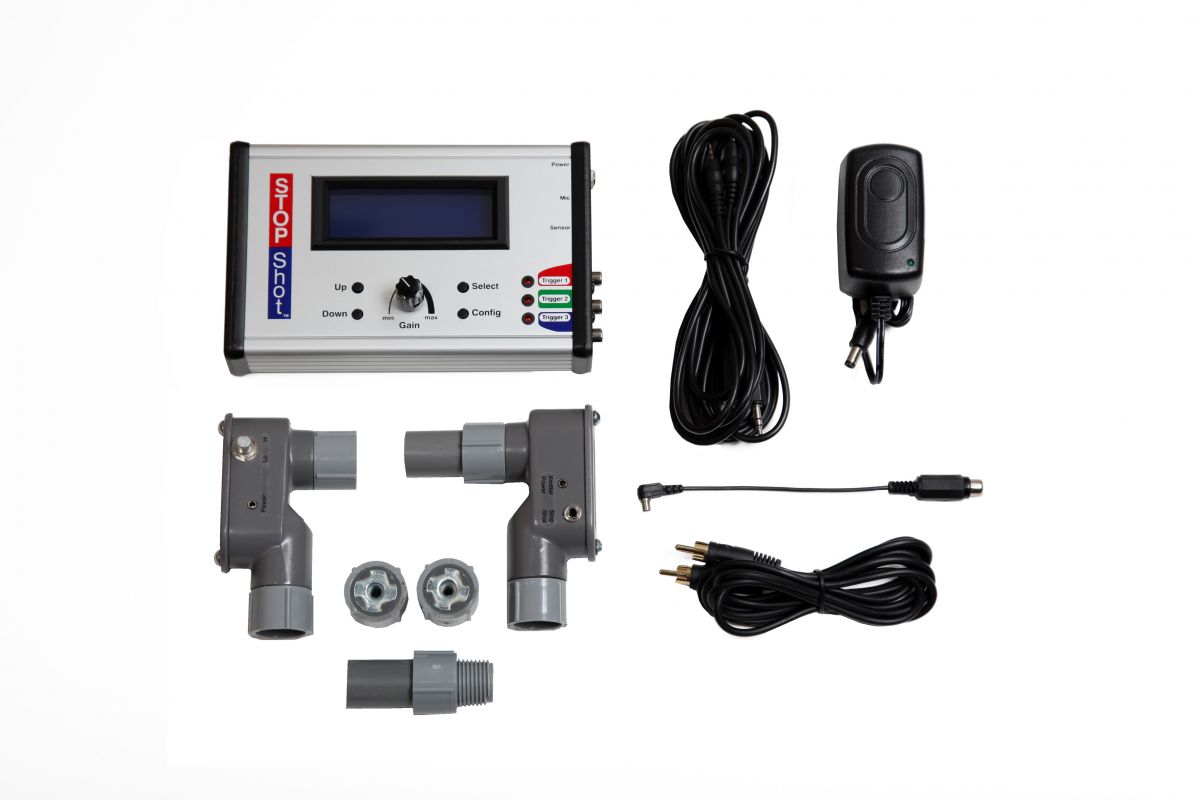
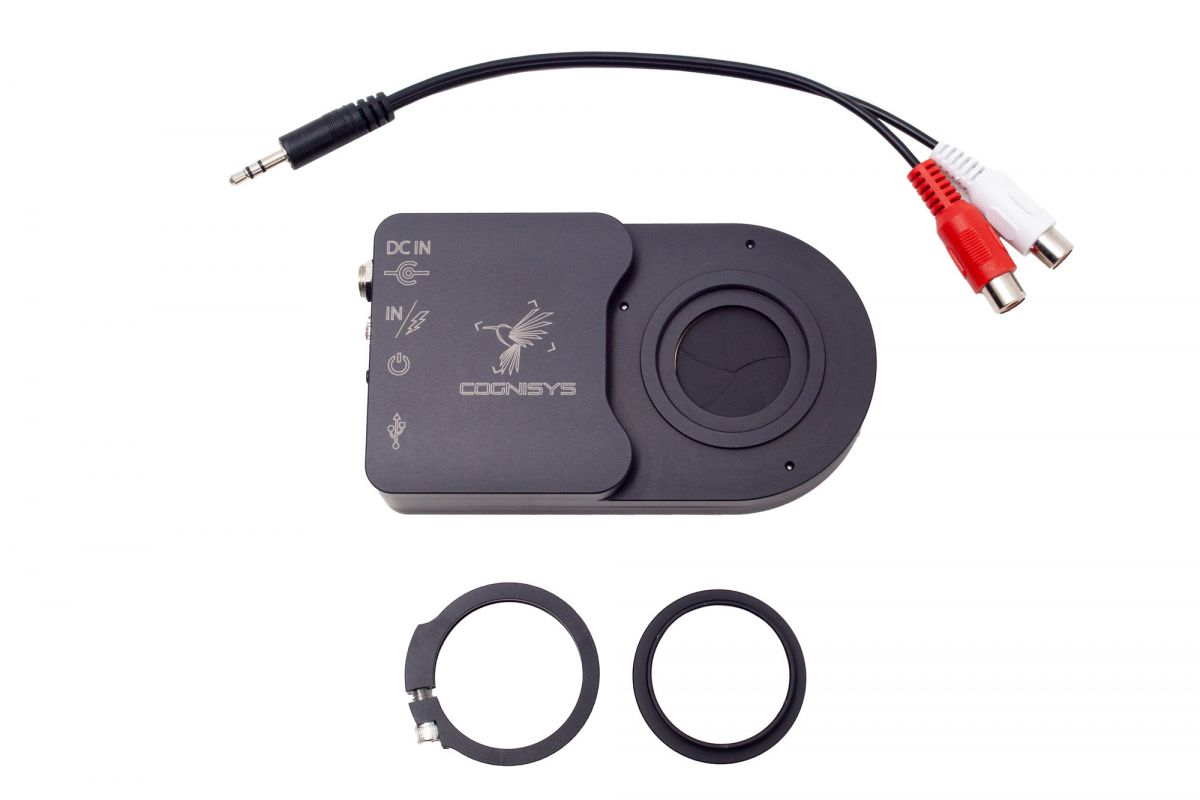
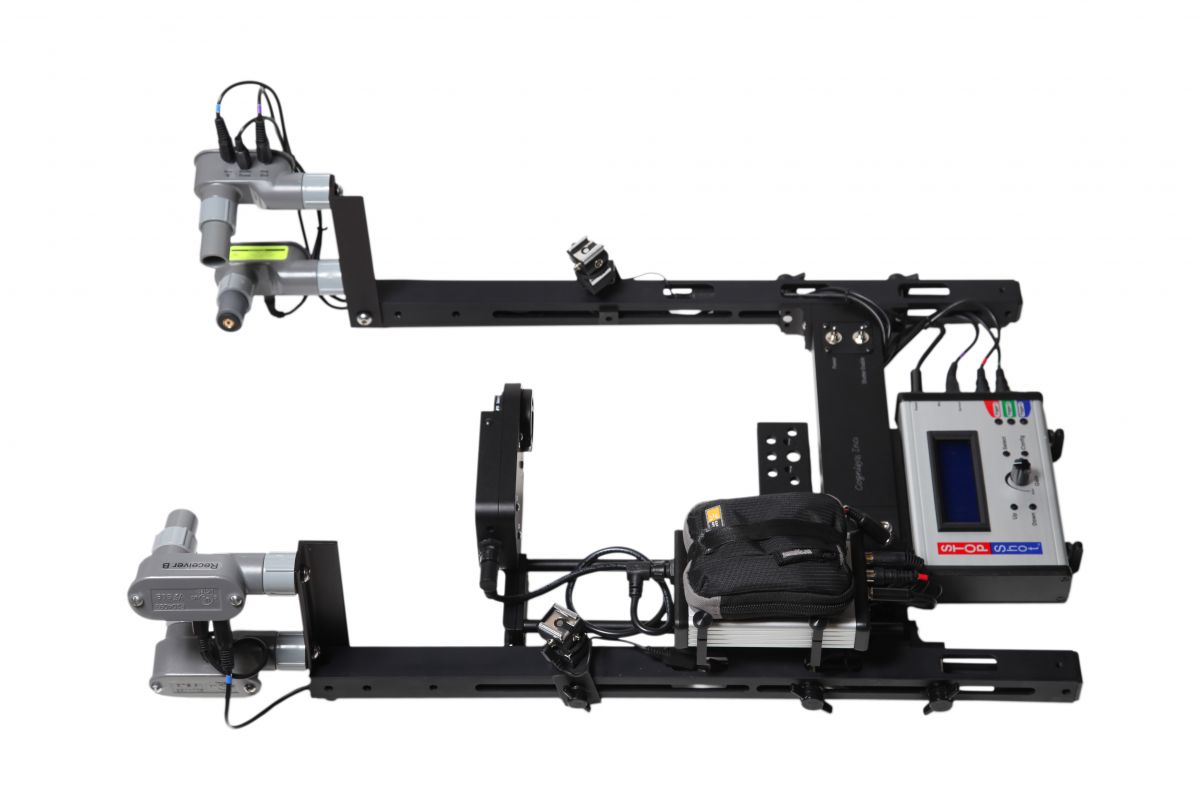
We often use a flight chamber; much like Stephen Dalton describes in his various books. It is nothing more than a box with a glass front and back. We setup a single laser as the trigger. While using crossbeams reduces the number of junk shots, it also reduces the number of total shots and thus the opportunity for interesting possibilities. The flashes we typically use in the studio are homemade, cannibalized and reassembled Vivitar 283 units. We took the flash heads from 6-283s and mounted them in a single flash head (flash head and controls shown below). These are great flashes because they are simple, powerful and easily adjustable. We typically use four sets of these, each of which has the flexibility to only use 2, 4 or all 6 banks of lights. If you don’t want to breakdown flashes (this can be dangerous), most speed lights will work out of the box. Another good light source are the Paul C. Buff Einstein’s. You can use RCA cords to gang the flashes together. The Cognisys shutter is then attached to the end of the lens using filter threads and the flashes are connected to the shutter driver. Connect the camera to the StopShot using one of their camera cables. The lasers, the shutter driver and the camera are then all connected to the StopShot, which acts as the brains of the operation.
To create a realistic looking scene, place an out of focus background behind the flight chamber. You will need to light the background with flashes (note the two in the back of our setup) and then of course use flashes to stop the motion and light the scene of the insect itself. For these, you may want to use diffusion to improve the quality of light and reduce reflections off the insect. You can then further build a scene for the shot, by including flowers or other objects. The Wimberly Plamp works well for holding flowers and other objects.
The Concept
When we first got into photographing flying insects, Cognisys wasn’t around, when the StopShot and subsequent high-speed Shutter became available, it simplified things greatly. One of the most common questions we get when someone sees our shots of flying insects, is “what camera did you use?” The camera in fact, is the least important part of the setup. Insects are moving so quickly, that to fully stop their movement, you need to use a short duration flash burst to expose the image. Most speedlights allow you to reduce the power of the flash to as much as 1/128th, which equates to an exposure of greater than 1/40,000th of a second. The trade off however, is the reduction in power means a reduction in light, which means you need to have multiple flashes and get them close to the subject. Another issue is shutter lag, or the time between depressing the shutter button, and the shutter being fully open. This is around 50ms for most modern cameras and too slow to capture the insect in flight without ghosting effects. The solution is to use a faster external shutter attached to the end of the lens and set your camera to bulb. The next crucial piece is a trigger. Insects are flying so quickly that you can’t react fast enough, so you use a trigger, such as lasers or infrared beams to trigger the shutter and flashes. The last piece is the StopShot, which controls all of these components and resets the camera.

Settings
First, we need to setup the StopShot. This is outlined in detail on the Cognisys website. This assumes you have the camera connected to Trigger 2 and the Shutter to Trigger 2 (Trigger 3 is not used). See StopShot Settings for how to configure the StopShot. You can also load in the insect rig preset from the StopShot memory. These are the basic settings that will get you going if you are using a crossbeam setup. For a single laser, you need to change the T2 mode to Trigger. This will result in the shutter opening and the flashes firing anytime the single laser beam has been broken. Next open up the external shutter and use a small dowel, or something similar, placed in the path of the laser to prefocus the camera. Once your have focused on the laser, you need to close the shutter and make any final adjustments on your scene and the lighting. Because you are often taking long exposures (I usually have the StopShot reset the camera every 30 seconds), I try to keep the ISO no higher than 400. If your camera does not already have wireless ability, you can use the CamRanger to view the photos you are getting without having to stop the setup and potentially risk missing a shot.
It will likely take some time to get your initial setup going, but once you do, with a little practice, the door to capturing insects in flight is wide open.
The Results

If you want to see more of our insects in fight, check out our website at www.AbbottNaturePhotography.com. We have to thank Michael Durham (www.DurmPhoto.com) for also being so generous with his knowledge of high speed flash photography.
Many thanks to John and Kendra Abbott who contributed this article.
Related Products
As low as $389.00
 Discontinued