Focus Stacking How To
Focus Stacking How To:
What is Focus Stacking. Wikipedia defines focus stacking as "a digital image processing technique which combines multiple images taken at different focus distances to give a resulting image with a greater depth of field (DOF) than any of the individual source images. Anyone that has taken a close up photo knows that as the magnifcation gets larger the in focus area gets smaller. With focus stacking we can create high magnification photos without the limited in focus area (Depth of Field) We do this by collecting several images with whatever depth of field our lenses will provide and digitally combine them to increase the in focus area.
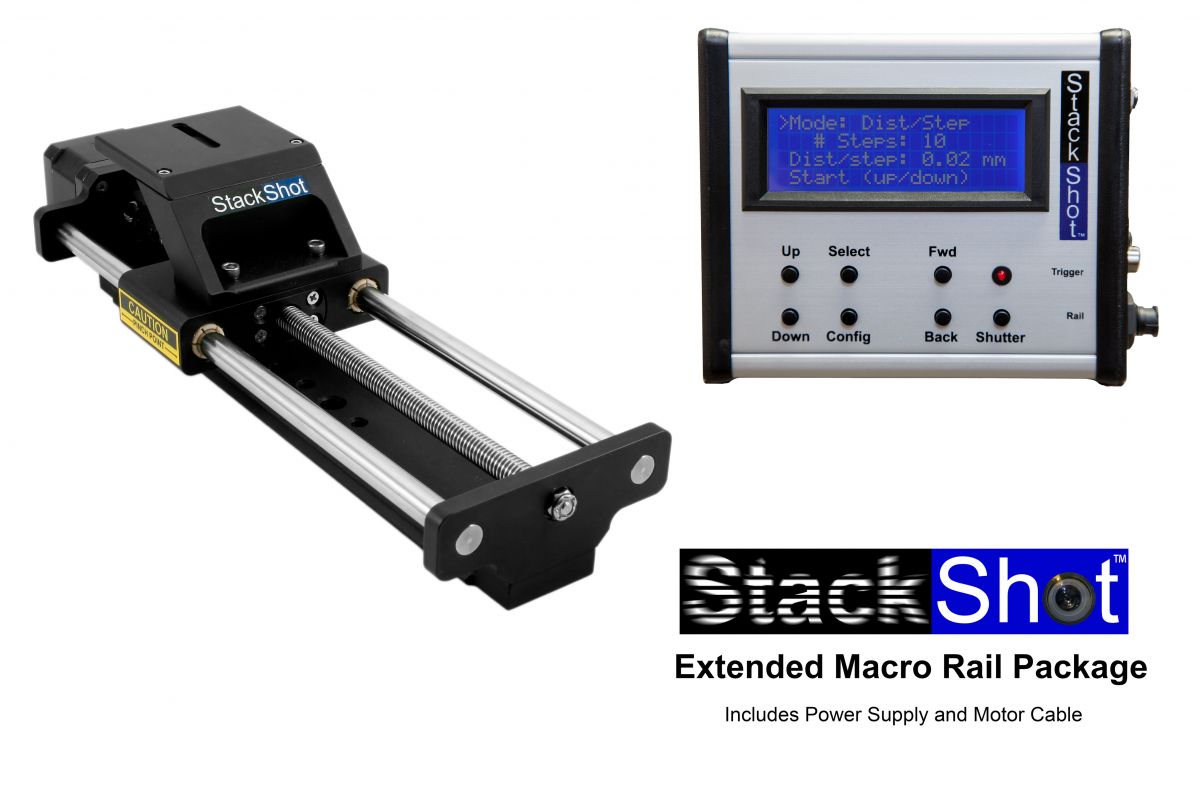
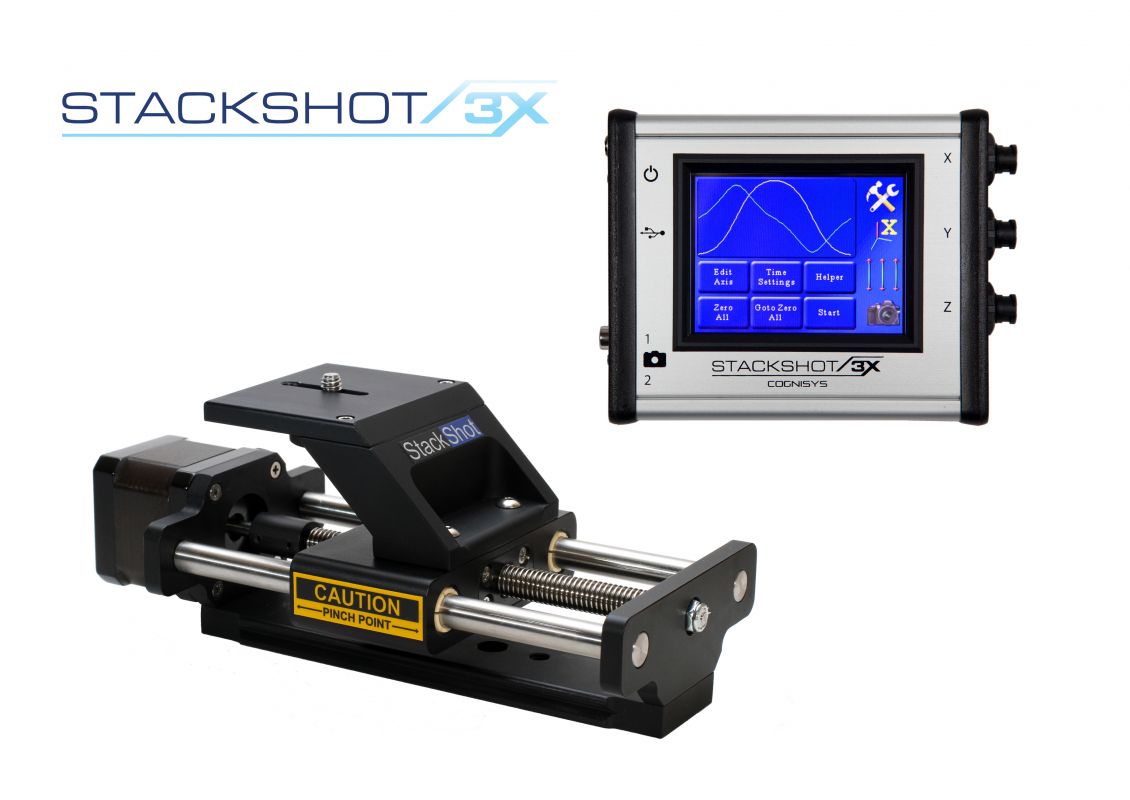
The Overview. There are several different ways to create a stack of photos. You can move the camera, the subject, or change the distance between the lens and the camera. Typically the camera's position is adjusted in relation to the subject of interest by using a macro-rail. The macro rail allows finely controlled movement of the camera to change the distance between the camera and the subject. This movement slides the in-focus part of the image through the subject. There are more educational links about focus stacking at the bottom of the page. If you've done this before you know it can be a slow and tedious task. Take picture, move the rail slightly, take a picture (ugh! Did I just bump the camera?), move the rail a little more, it is a fairly tedious process. So what does Cognisys have to offer the world of focus stacking? StackShot. StackShot automates the movement of the rail and the triggering of the camera's shutter. This precision controlled rail will take as many pictures you want at whatever step size you'd like (down to 2 um). So how does it work? Let's first start off with mounting options and the electrical connections.
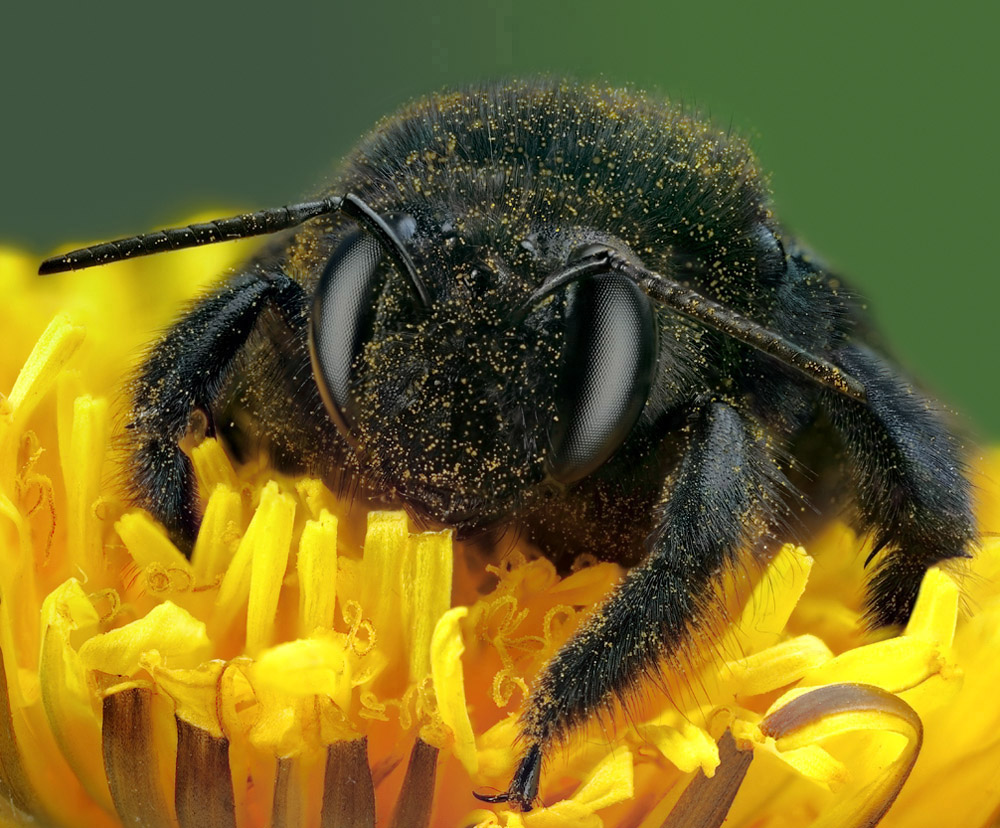
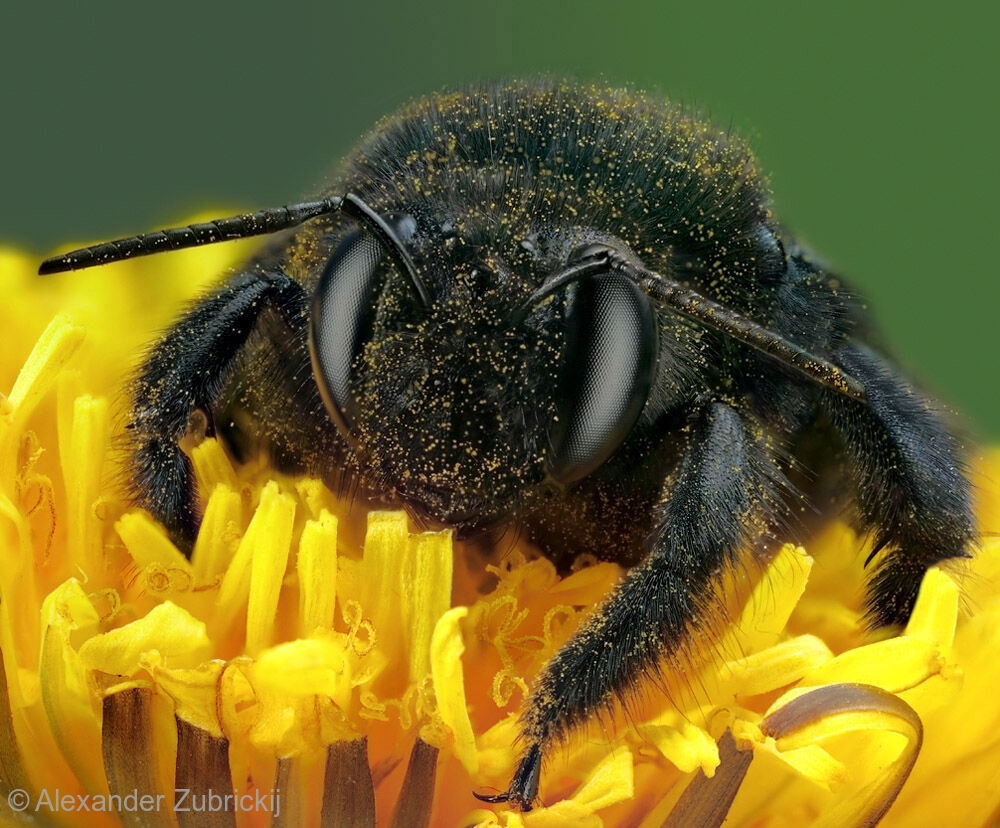
Focus Stacked Carpenter Bee courtesy of Alexander Zubrickij
Attaching StackShot to a Tripod.
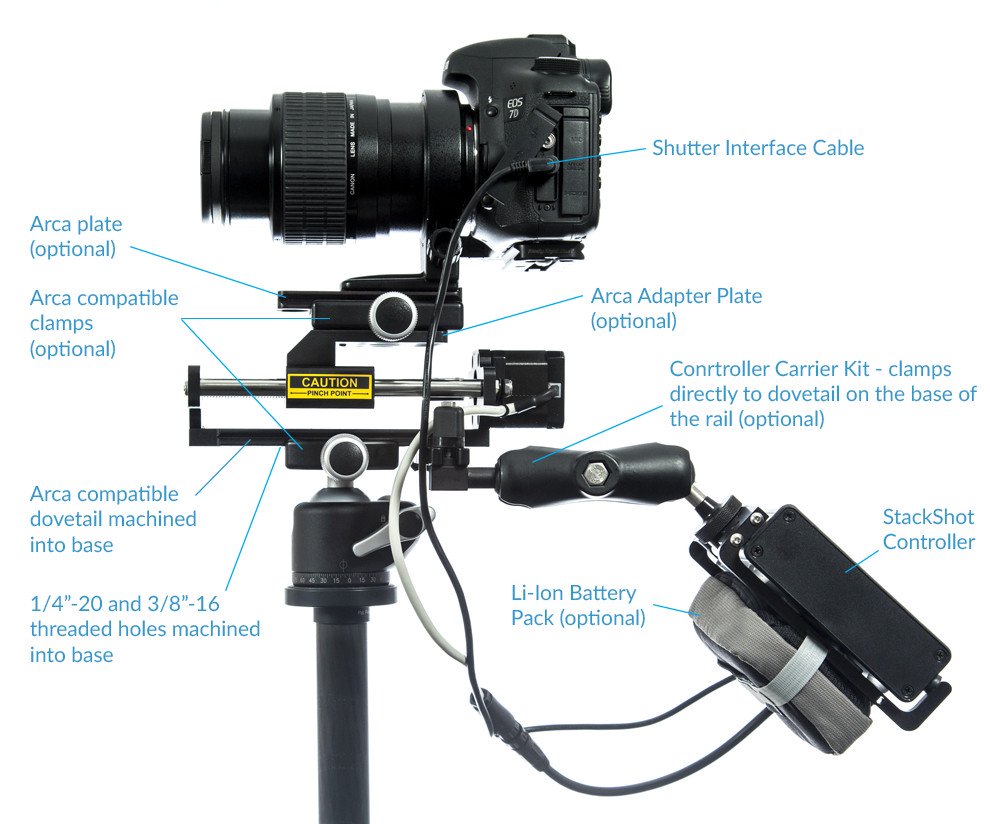
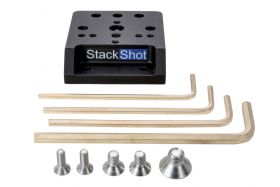
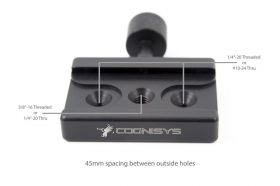
There are a lot of options for mounting StackShot, these include a tripod, optical bench, copy stand etc. The most common of these options is a tripod. If you are an Arca Swiss clamp user the image below shows the most flexible setup with all of the extras. StackShot has a dovetail machined into the base as well as both 1/4-20 and 3/8-16 threaded holes. There is a drawing showing the position of the holes here. In the case you are not an Arca Clamp user you would mount your tripod plate of choice to the base of the rail with one of the threaded holes in the base of the rail and then mount the rail to the tripod. To mount the camera to the top of the rail, it comes standard with a 1/4-20 stud that will thread into the base of your camera. No additional hardware is required.
If you are an Arca Swiss user you would attach StackShot to the tripod as shown below. You will need the optional Arca Adapter Plate to firmly secure the clamp to the rail. The Arca Adapter Plate has mounting holes so you can mount the clamp in either orientation. The Arca Adapter plate drawing can be downloaded here. The image below also shows the optional Controller Carrier Kit and Li-Ion Battery for a complete field setup. Using the Arca Clamps and Plates has the advantage of giving the user the option to quickly add or remove the StackShot from the tripod without any threaded connections.
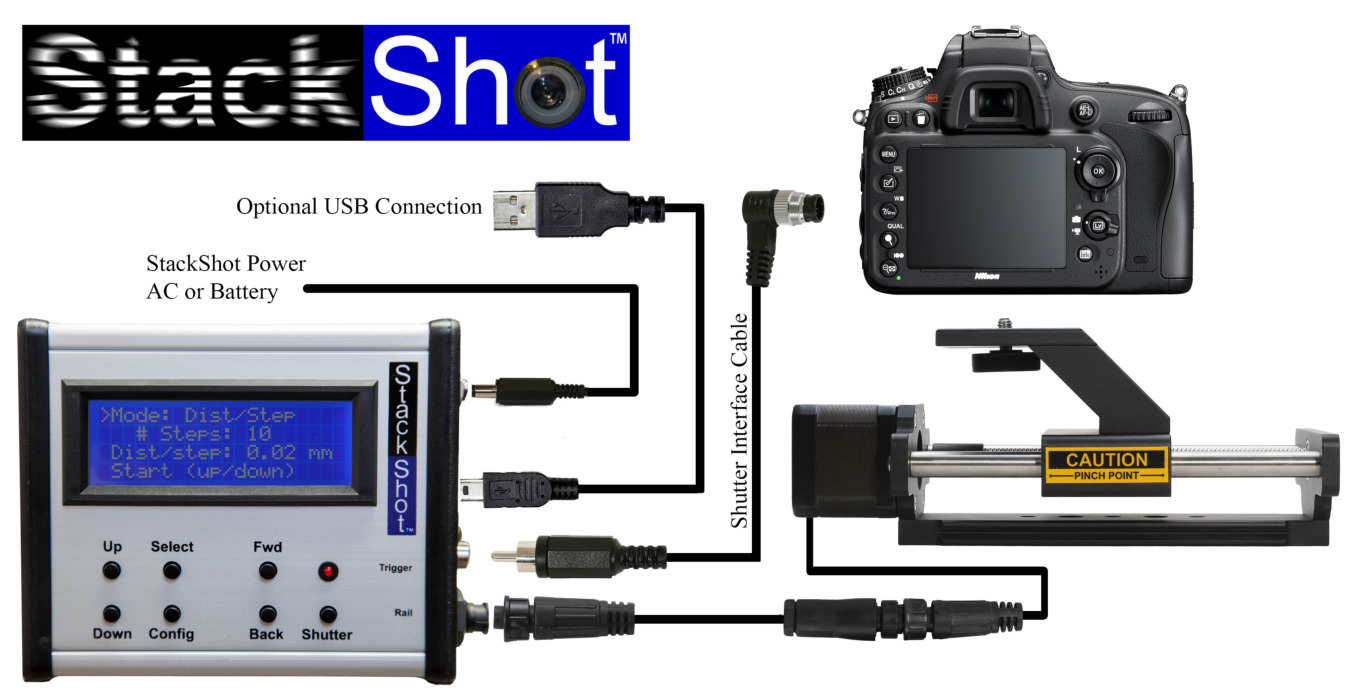
StackShot Electrical Connections
Connecting StackShot is very simple. First connect the macro rail to the controller with the supplied 4 conductor cable. Next, StackShot requires power. This can be accomplished with the supplied AC adapter or an optional Li-Ion Battery Finally connect the shutter release of the camera to StackShot. This is the mechanism StackShot uses to control the camera. The cable that goes between the camera and StackShot needs to be purchased separately, you can find the cables here. If your camera does not have an external wired shutter release we do offer a Universal IR Remote that works with most cameras that are equipped with an IR input.
Single Image
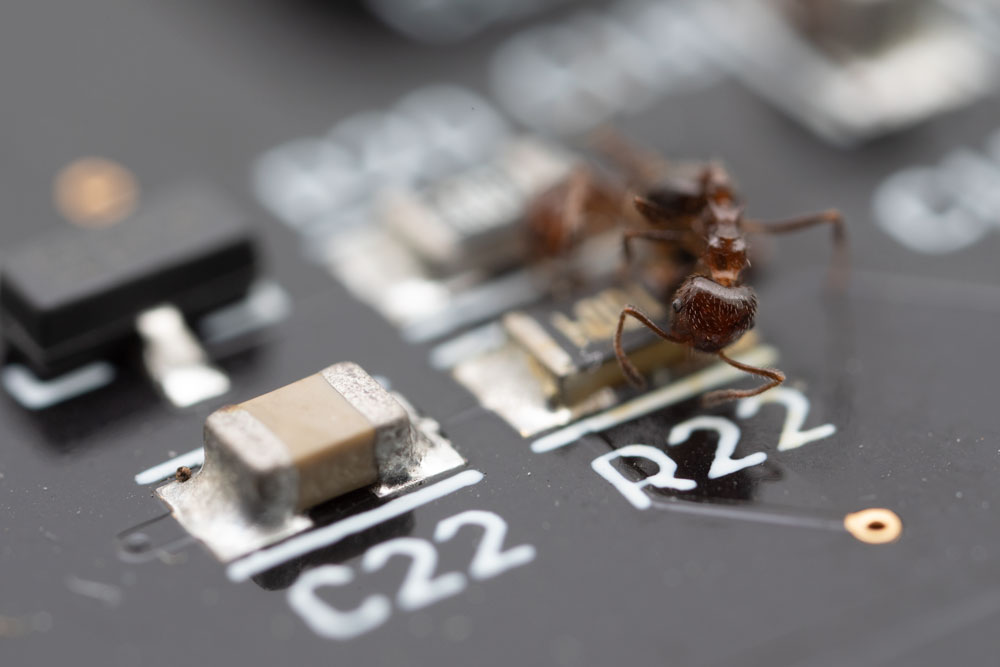
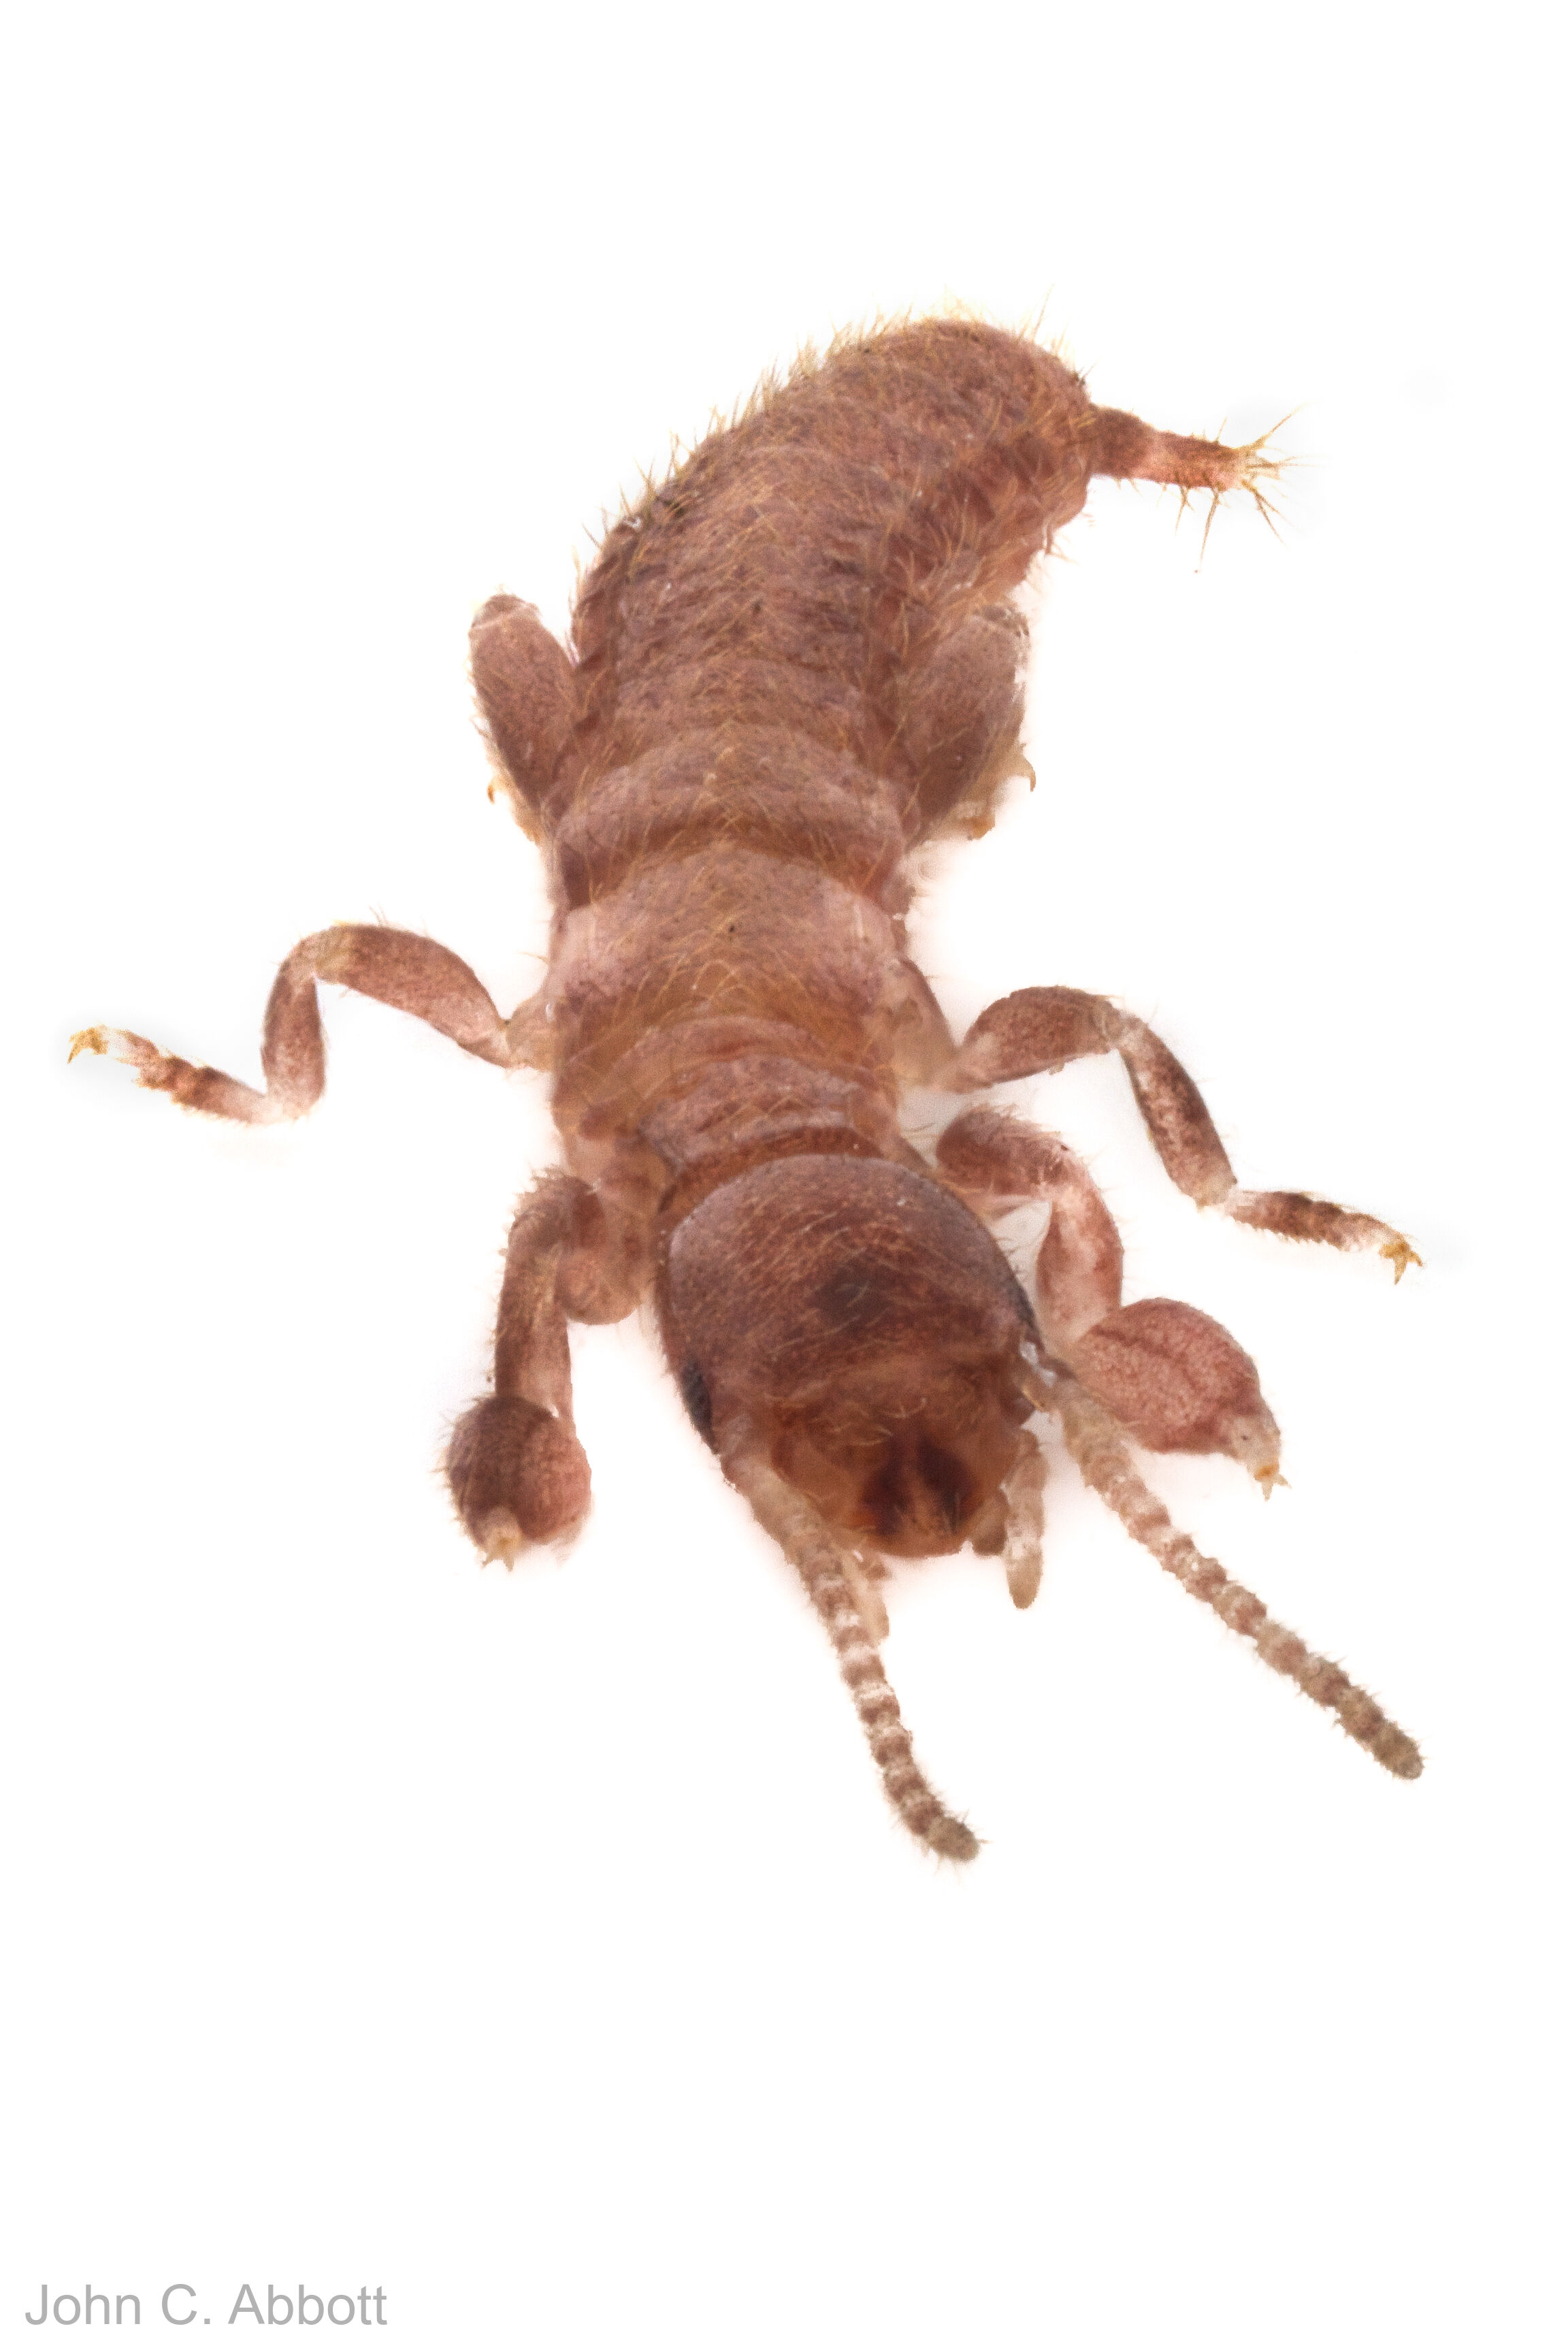
The Equipment. There are plenty of options in the photographic world for taking macro photographs; macro lenses, microscope objectives, bellows, inverted lenses, extension tubes, etc. Use whatever lens and camera setup you are comfortable with. Regardless of the setup you choose you will want to have a feel for the depth-of-field (DOF) of your lens and aperture setting. Consult your lens manual as this information is often published there. In the ant example below the manual states the depth of field for the Canon MP-E 65mm, at 3x magnification and f/5.6 is 0.176mm or 176um. Rik Littlefield of Zerene does an excellent job of explaining how to best determine the step size for focus stacking in an article here.
The Process. The first step in the stacking process is to adjust your camera and flash settings to get proper exposure. The one difference for focus stacking is that you will want to use full manual mode for both the flash, shutter and aperture. The auto exposure modes tend to meter the scene a bit inconsistently causing a significant variation in brightness of the photographs over the range of images in the stack.
In this example we're going to use the "Auto-Distance" mode in StackShot. Since the DOF of our lens at f/5.6 is 0.176 mm, the "Distance per Step" variable in the controller is adjusted to 0.150 mm. It is desirable to have some overlap of in focus depth between photographs. Next, using the FWD and BACK buttons the position of the camera is adjusted to the initial starting point for the first picture in the stack. StackShot will travel in both directions so it can stack from the foreground to the background or visa versa. Pressing the Up/Down button sets the starting point for the stack. Then the position of the camera is adjusted to the final position of the stack. One more button press initiates the capturing process and the camera is moved by the distance entered (0.150 mm) with a picture taken at each step. After the rail takes a step there may be some unintended motion in the camera due to the setup. A configurable "settle" time may be adjusted to meet the specific needs of the shooting environment. What about exposure bracketing? StackShot can be configured to generate multiple shutter pulses (exposures) per step. This feature may also be useful for cameras that require a preliminary shutter press to activate mirror lock-up. A configurable delay between pulses allows additional fine-tuning. At the end of the process StackShot defaults to returning to the starting position. This lets you experiment with different camera and/or flash settings for subsequent runs. You might want to shoot a place holder shot of your hand between runs to act as a book-mark.
Stacked Image
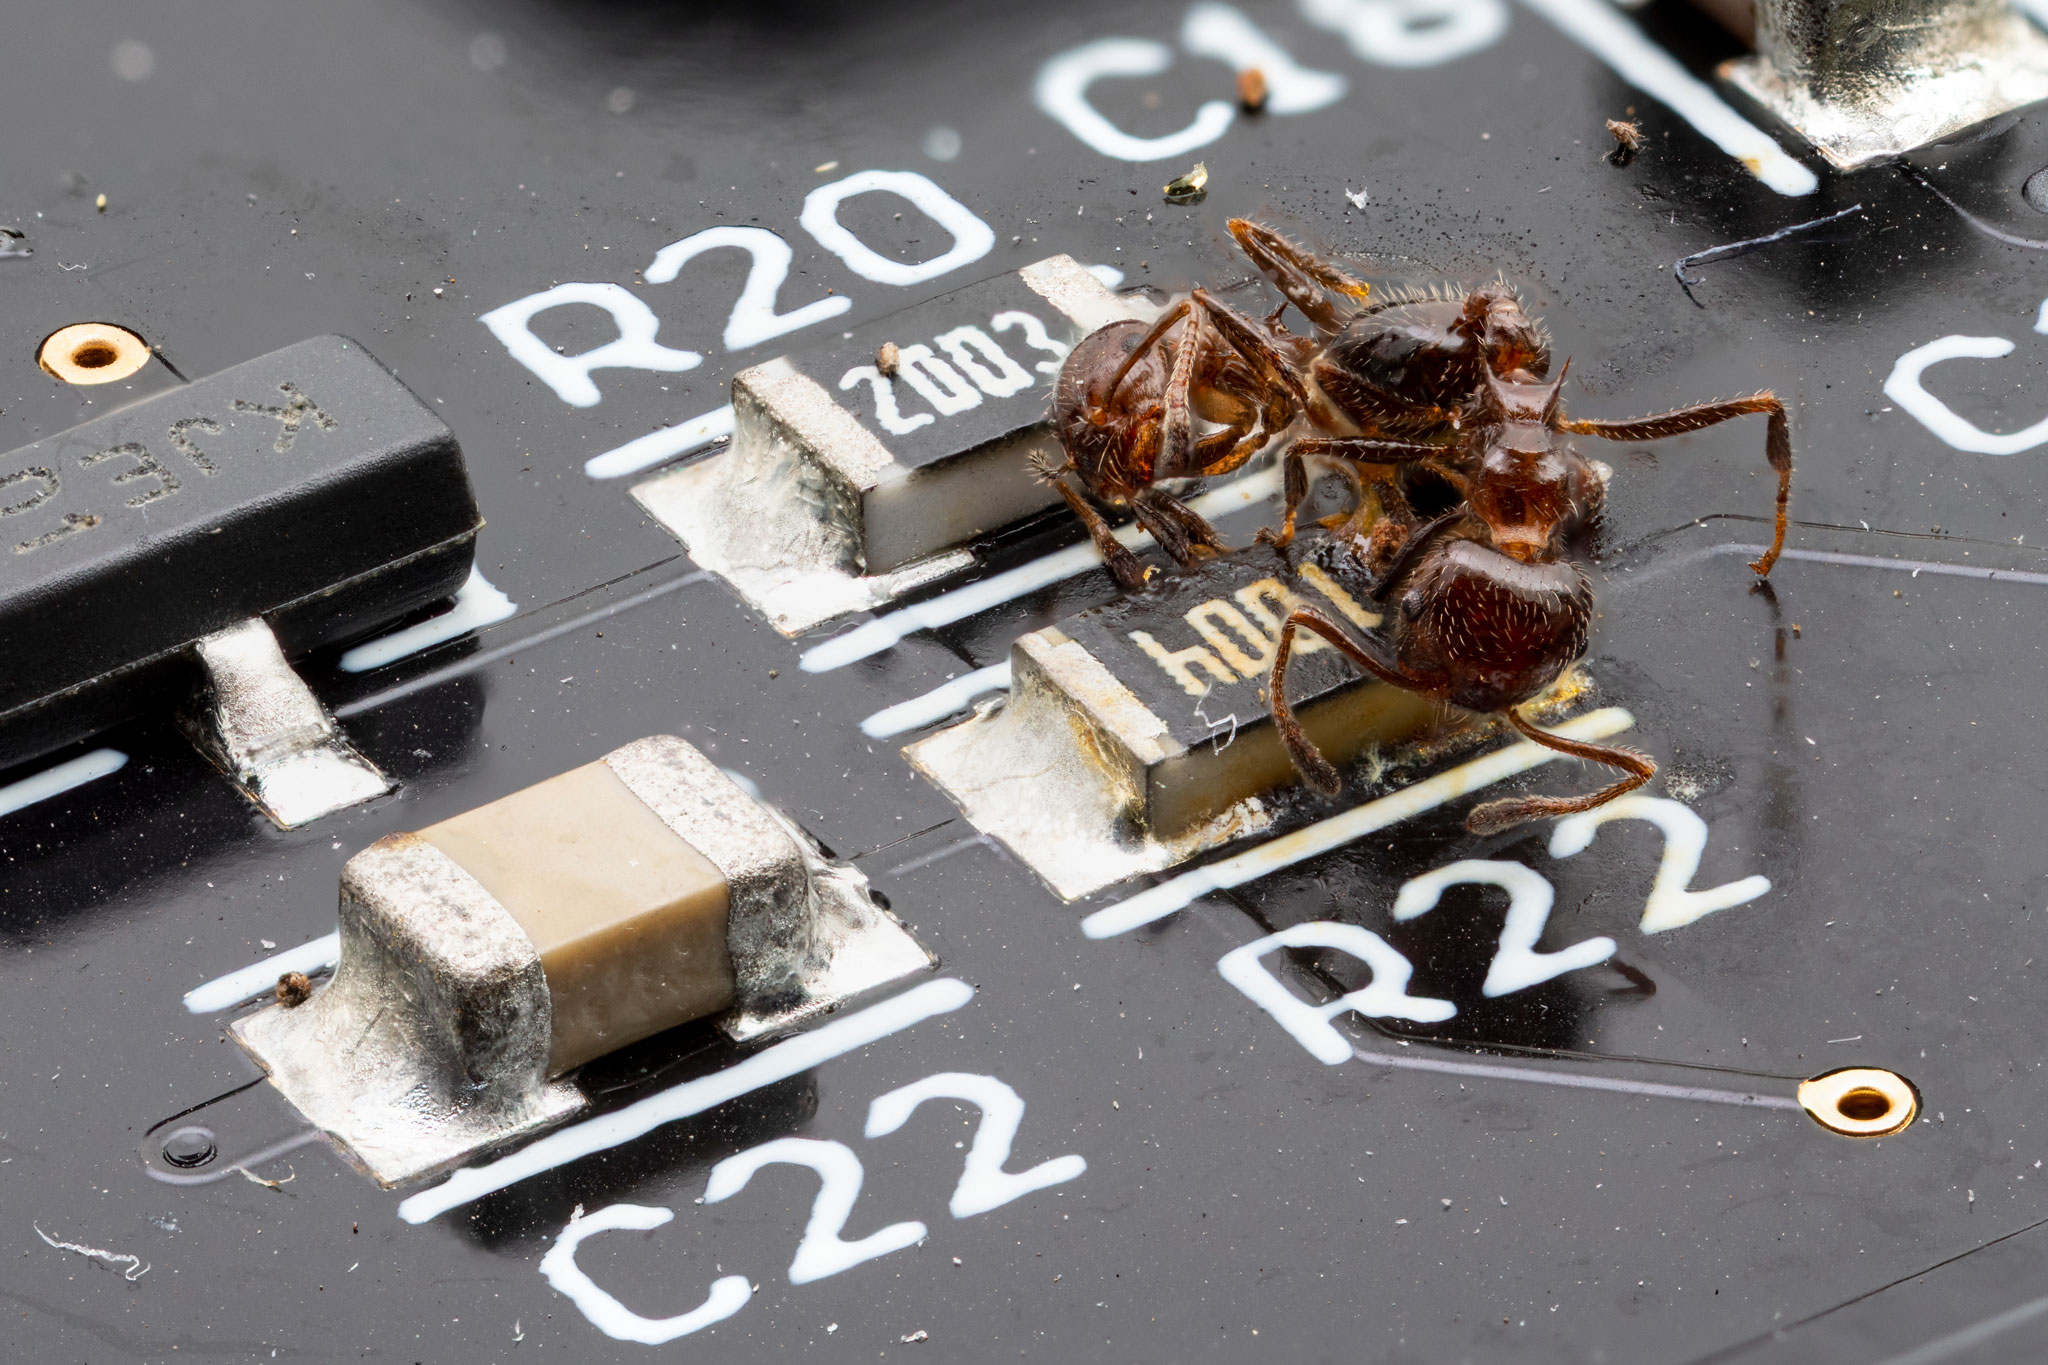
Stacked Ant Details:
Lens: Canon MP-E 65Flash: Off Board
Magnification: 3X
Aperture: f/5.6
Shutter Speed: 1/200
Camera Mode: Manual
Flash Mode: Manual 1/32 power
StackShot Mode: Auto-Distance
Stacking Step Size: 0.15mm
Settling Time: 3sec
Images in Stack: 30
Software for Stacking: Zerene Stacker
We Have a Stack of Images. Now what?
Software. Now it is time to use the software of your choice to combine the images. There are several possibilities including Helicon Focus, Zerene Stacker, Photoshop, or Combine ZM. Both Helicon Soft and Zerene Stacker offer 30-day evaluation versions, they can be downloaded here:


Other Resources.
Photomacrography Forum - Great forum for anything related to macro photography - This forum is run by Rik Littlefield the author of Zerene Stacker. Well worth a visit.
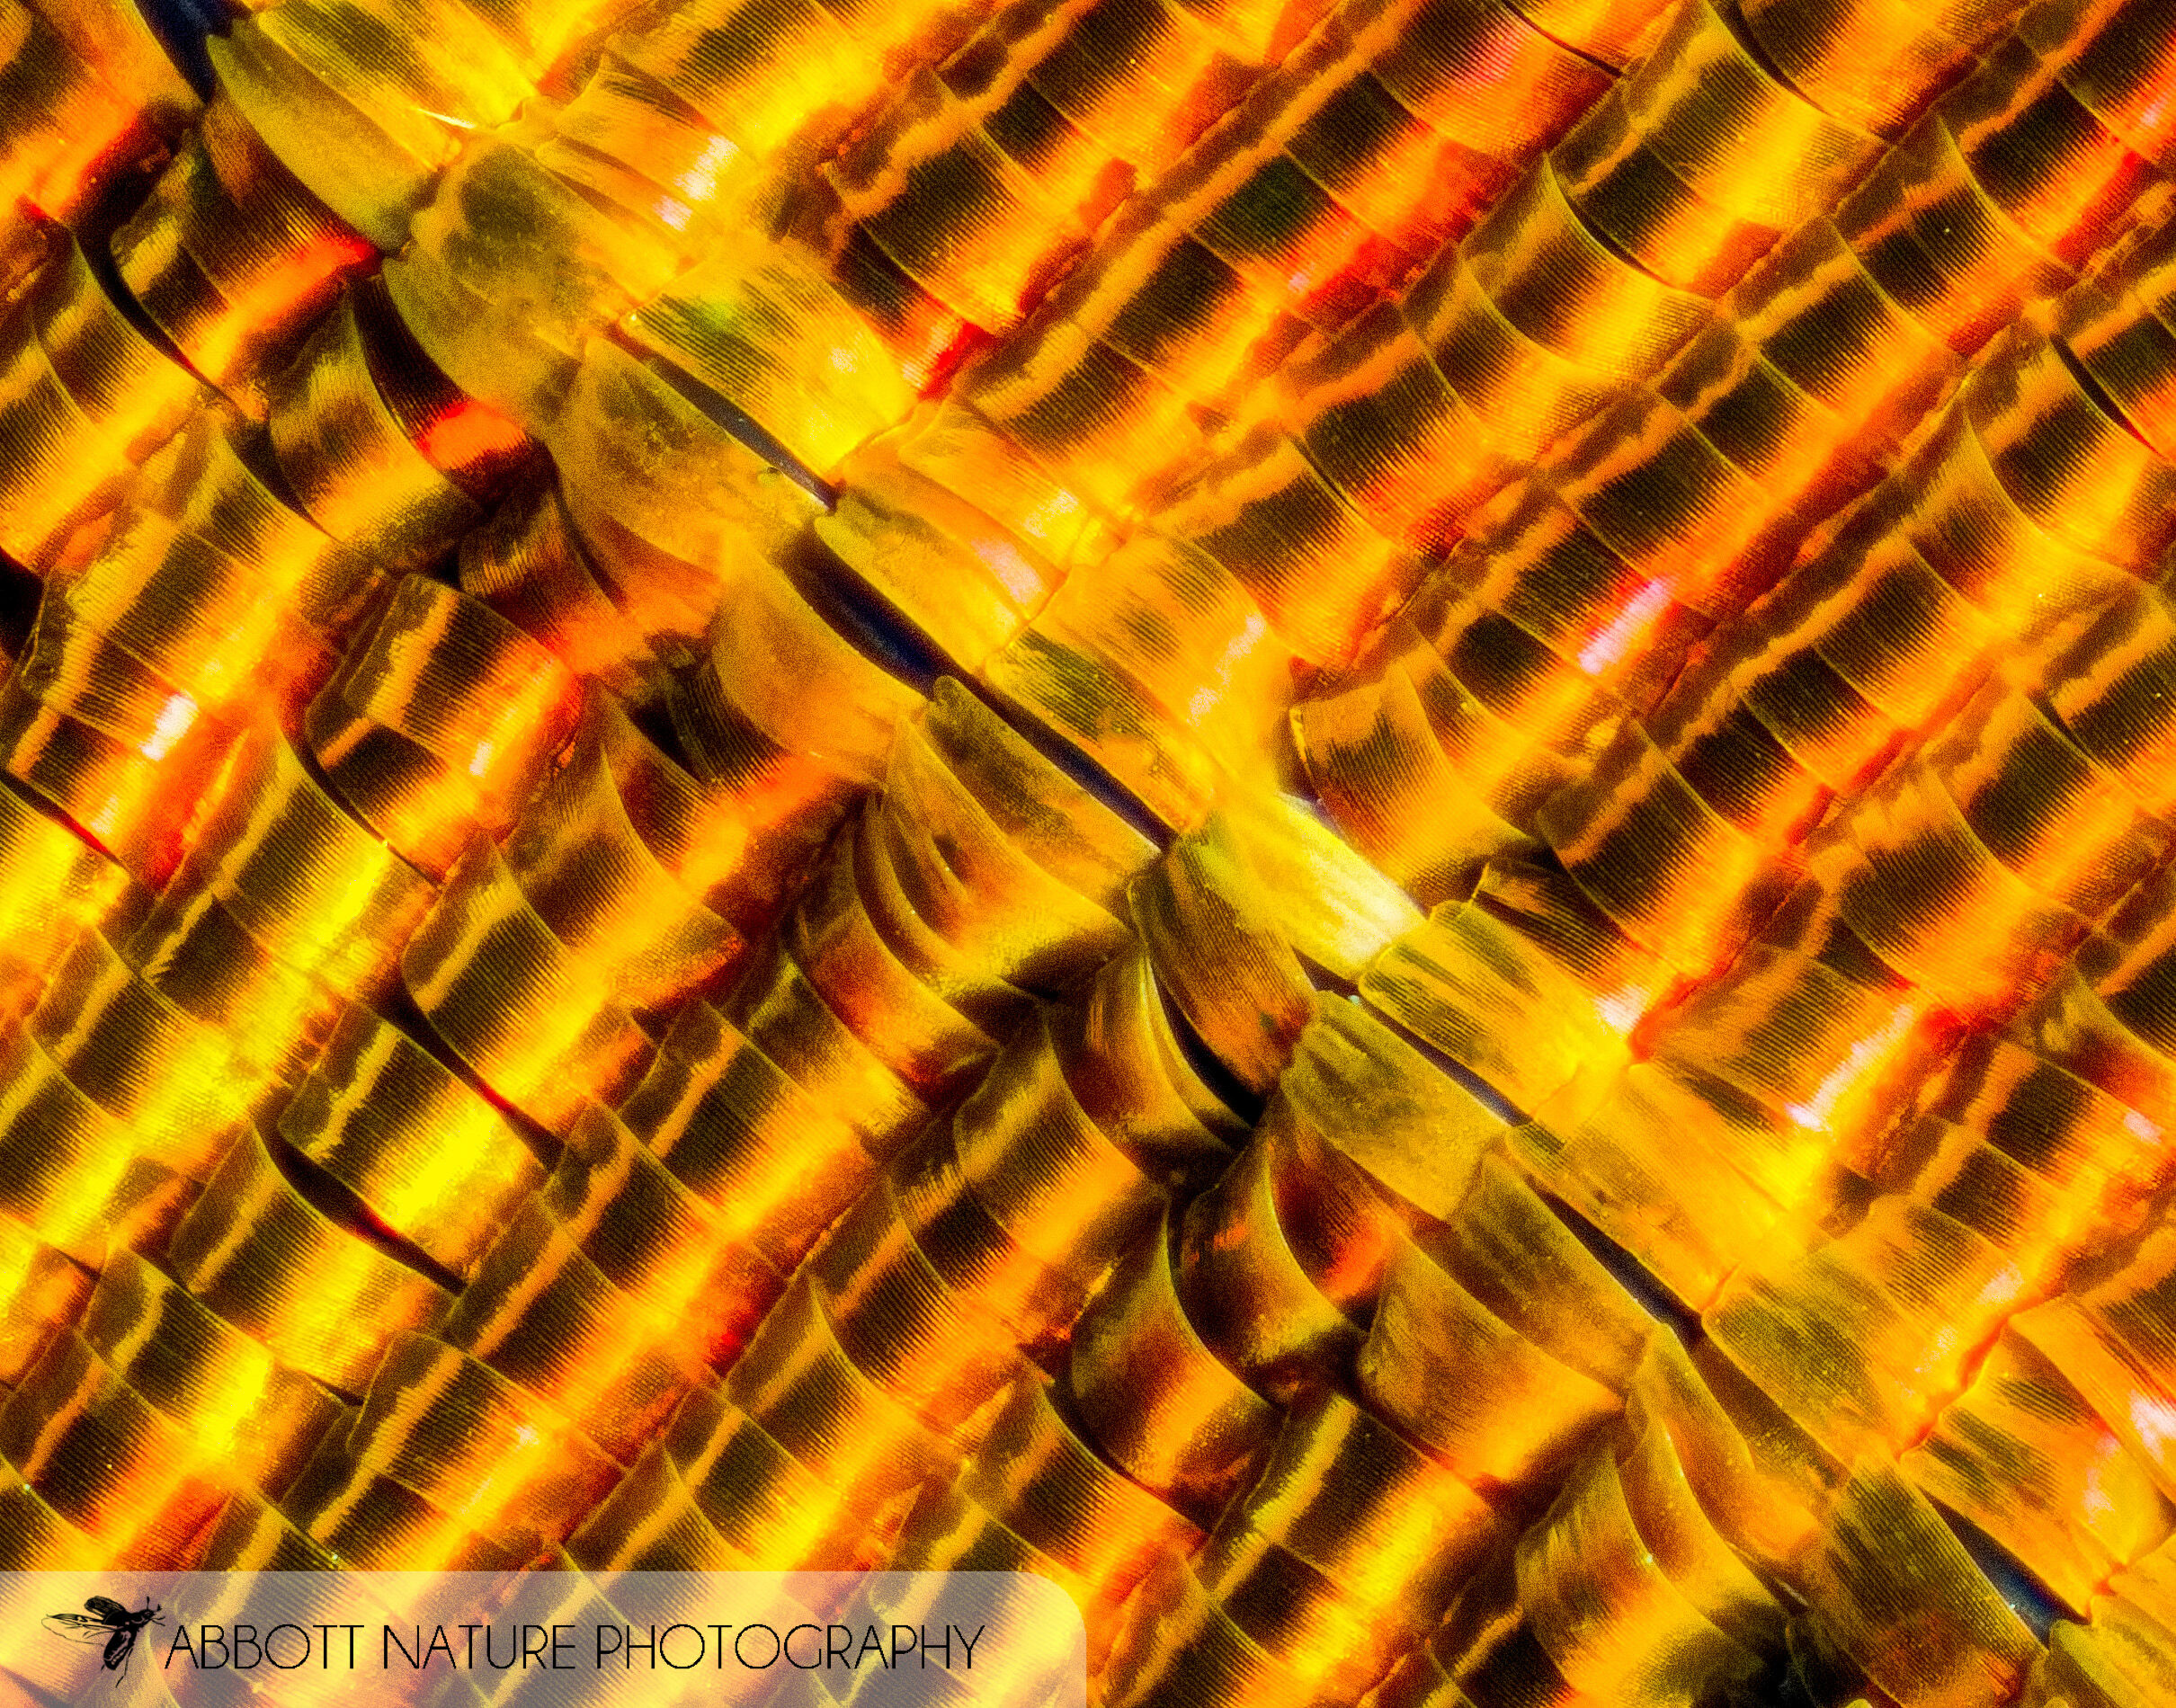
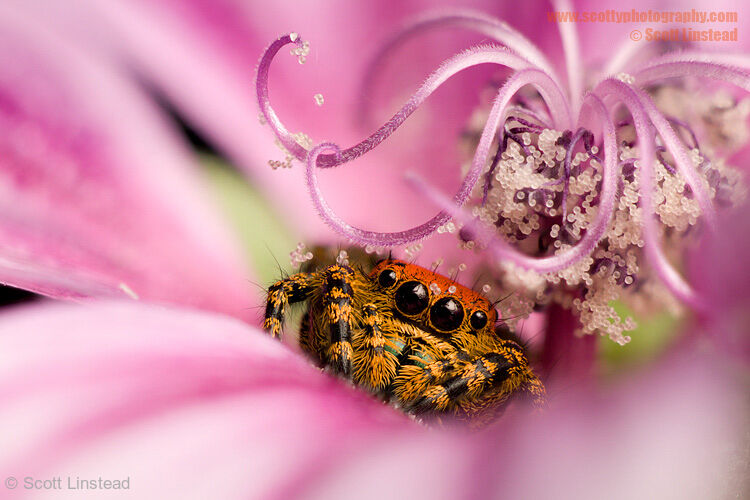
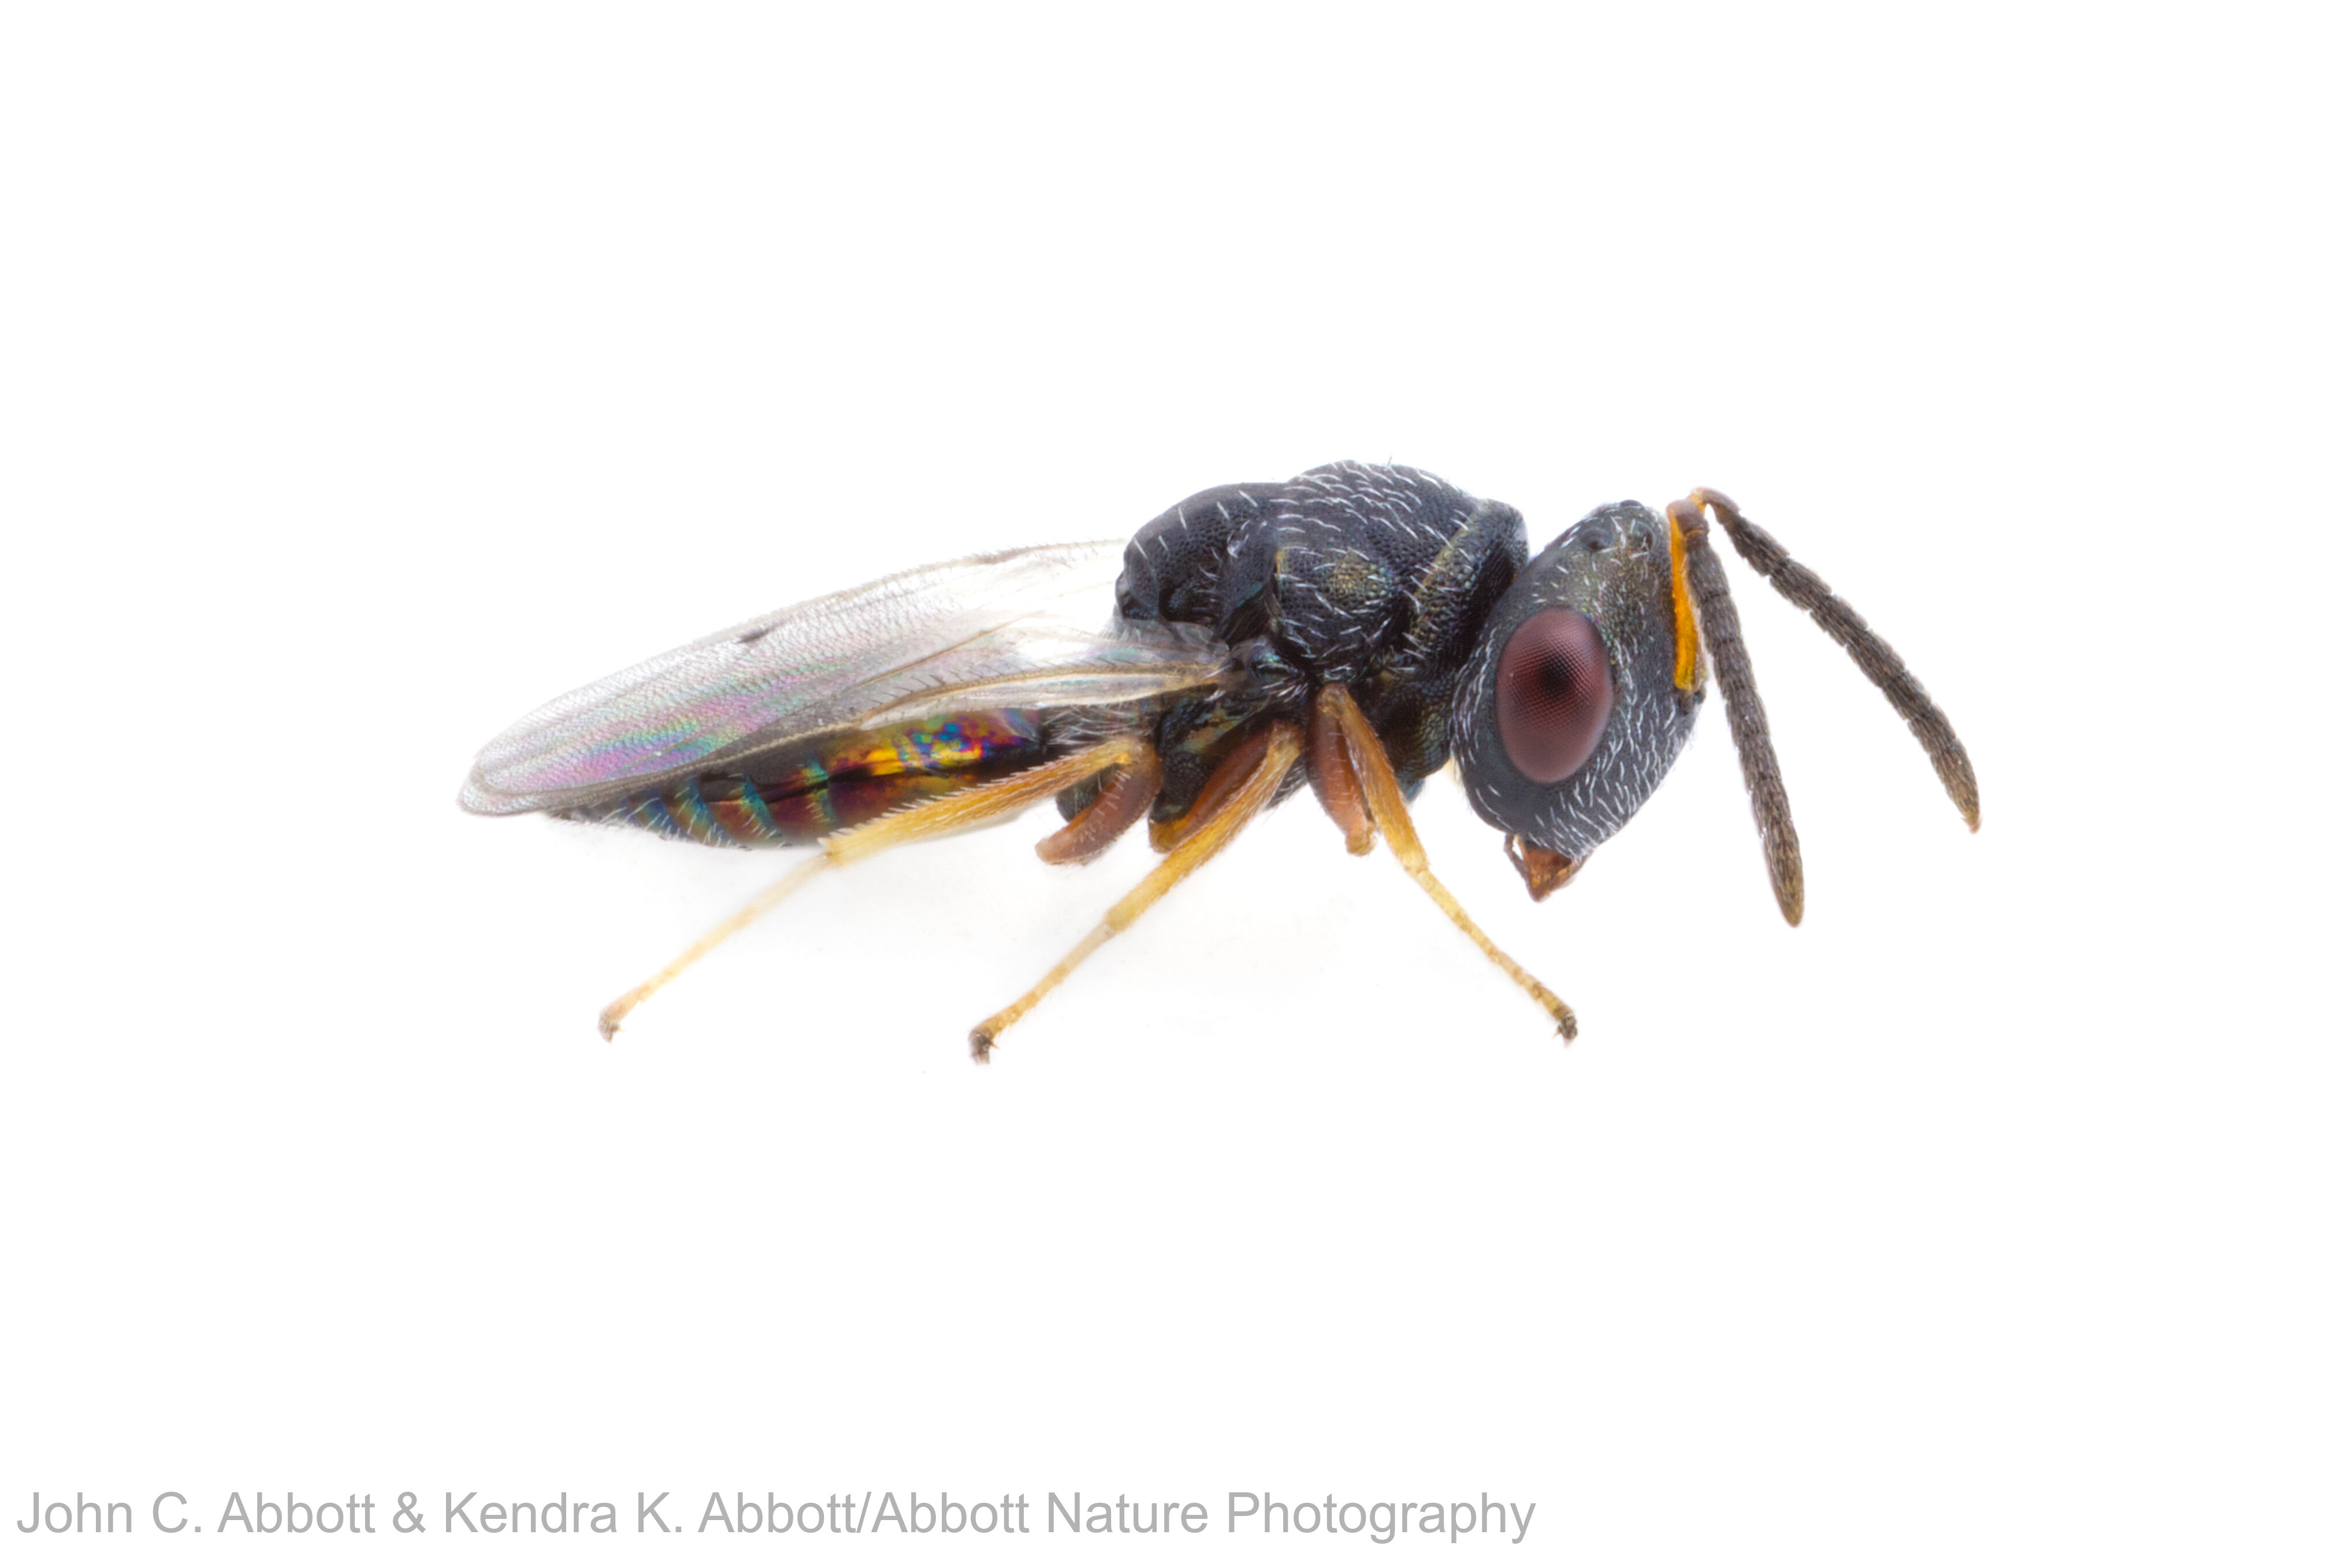
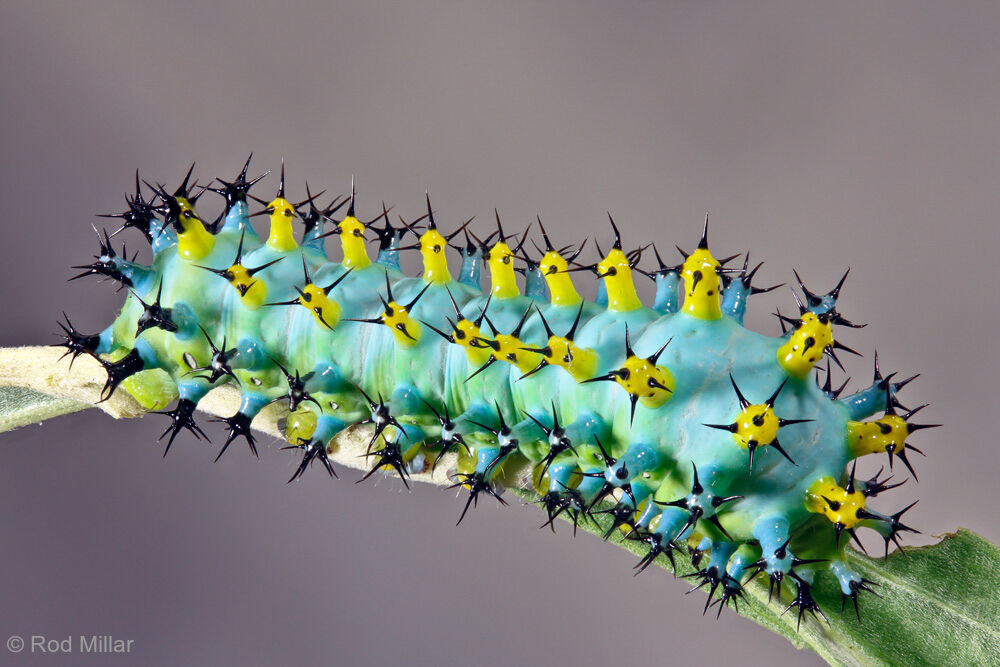
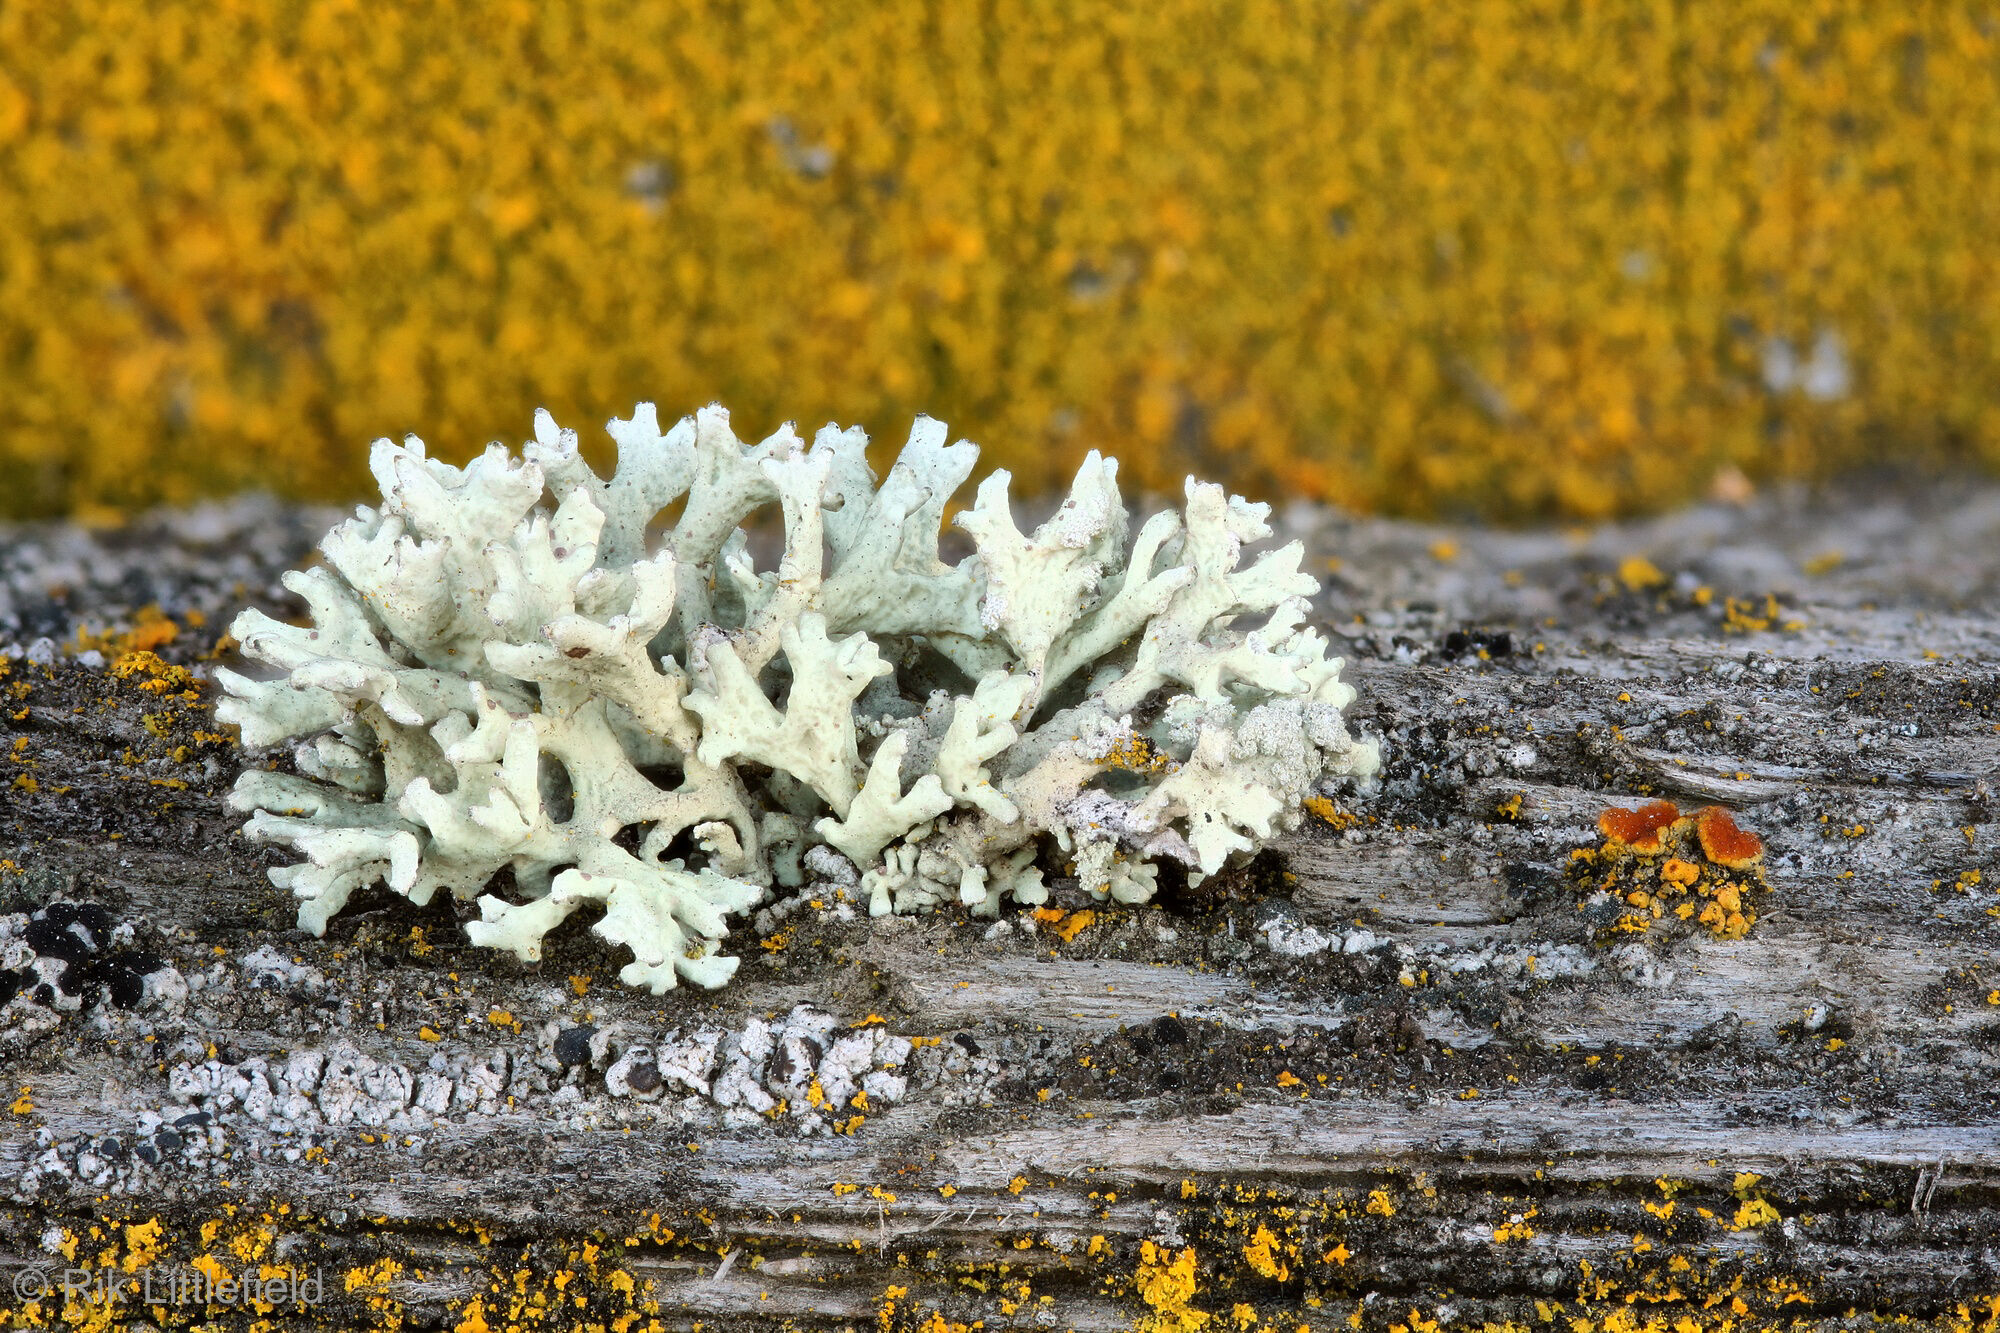
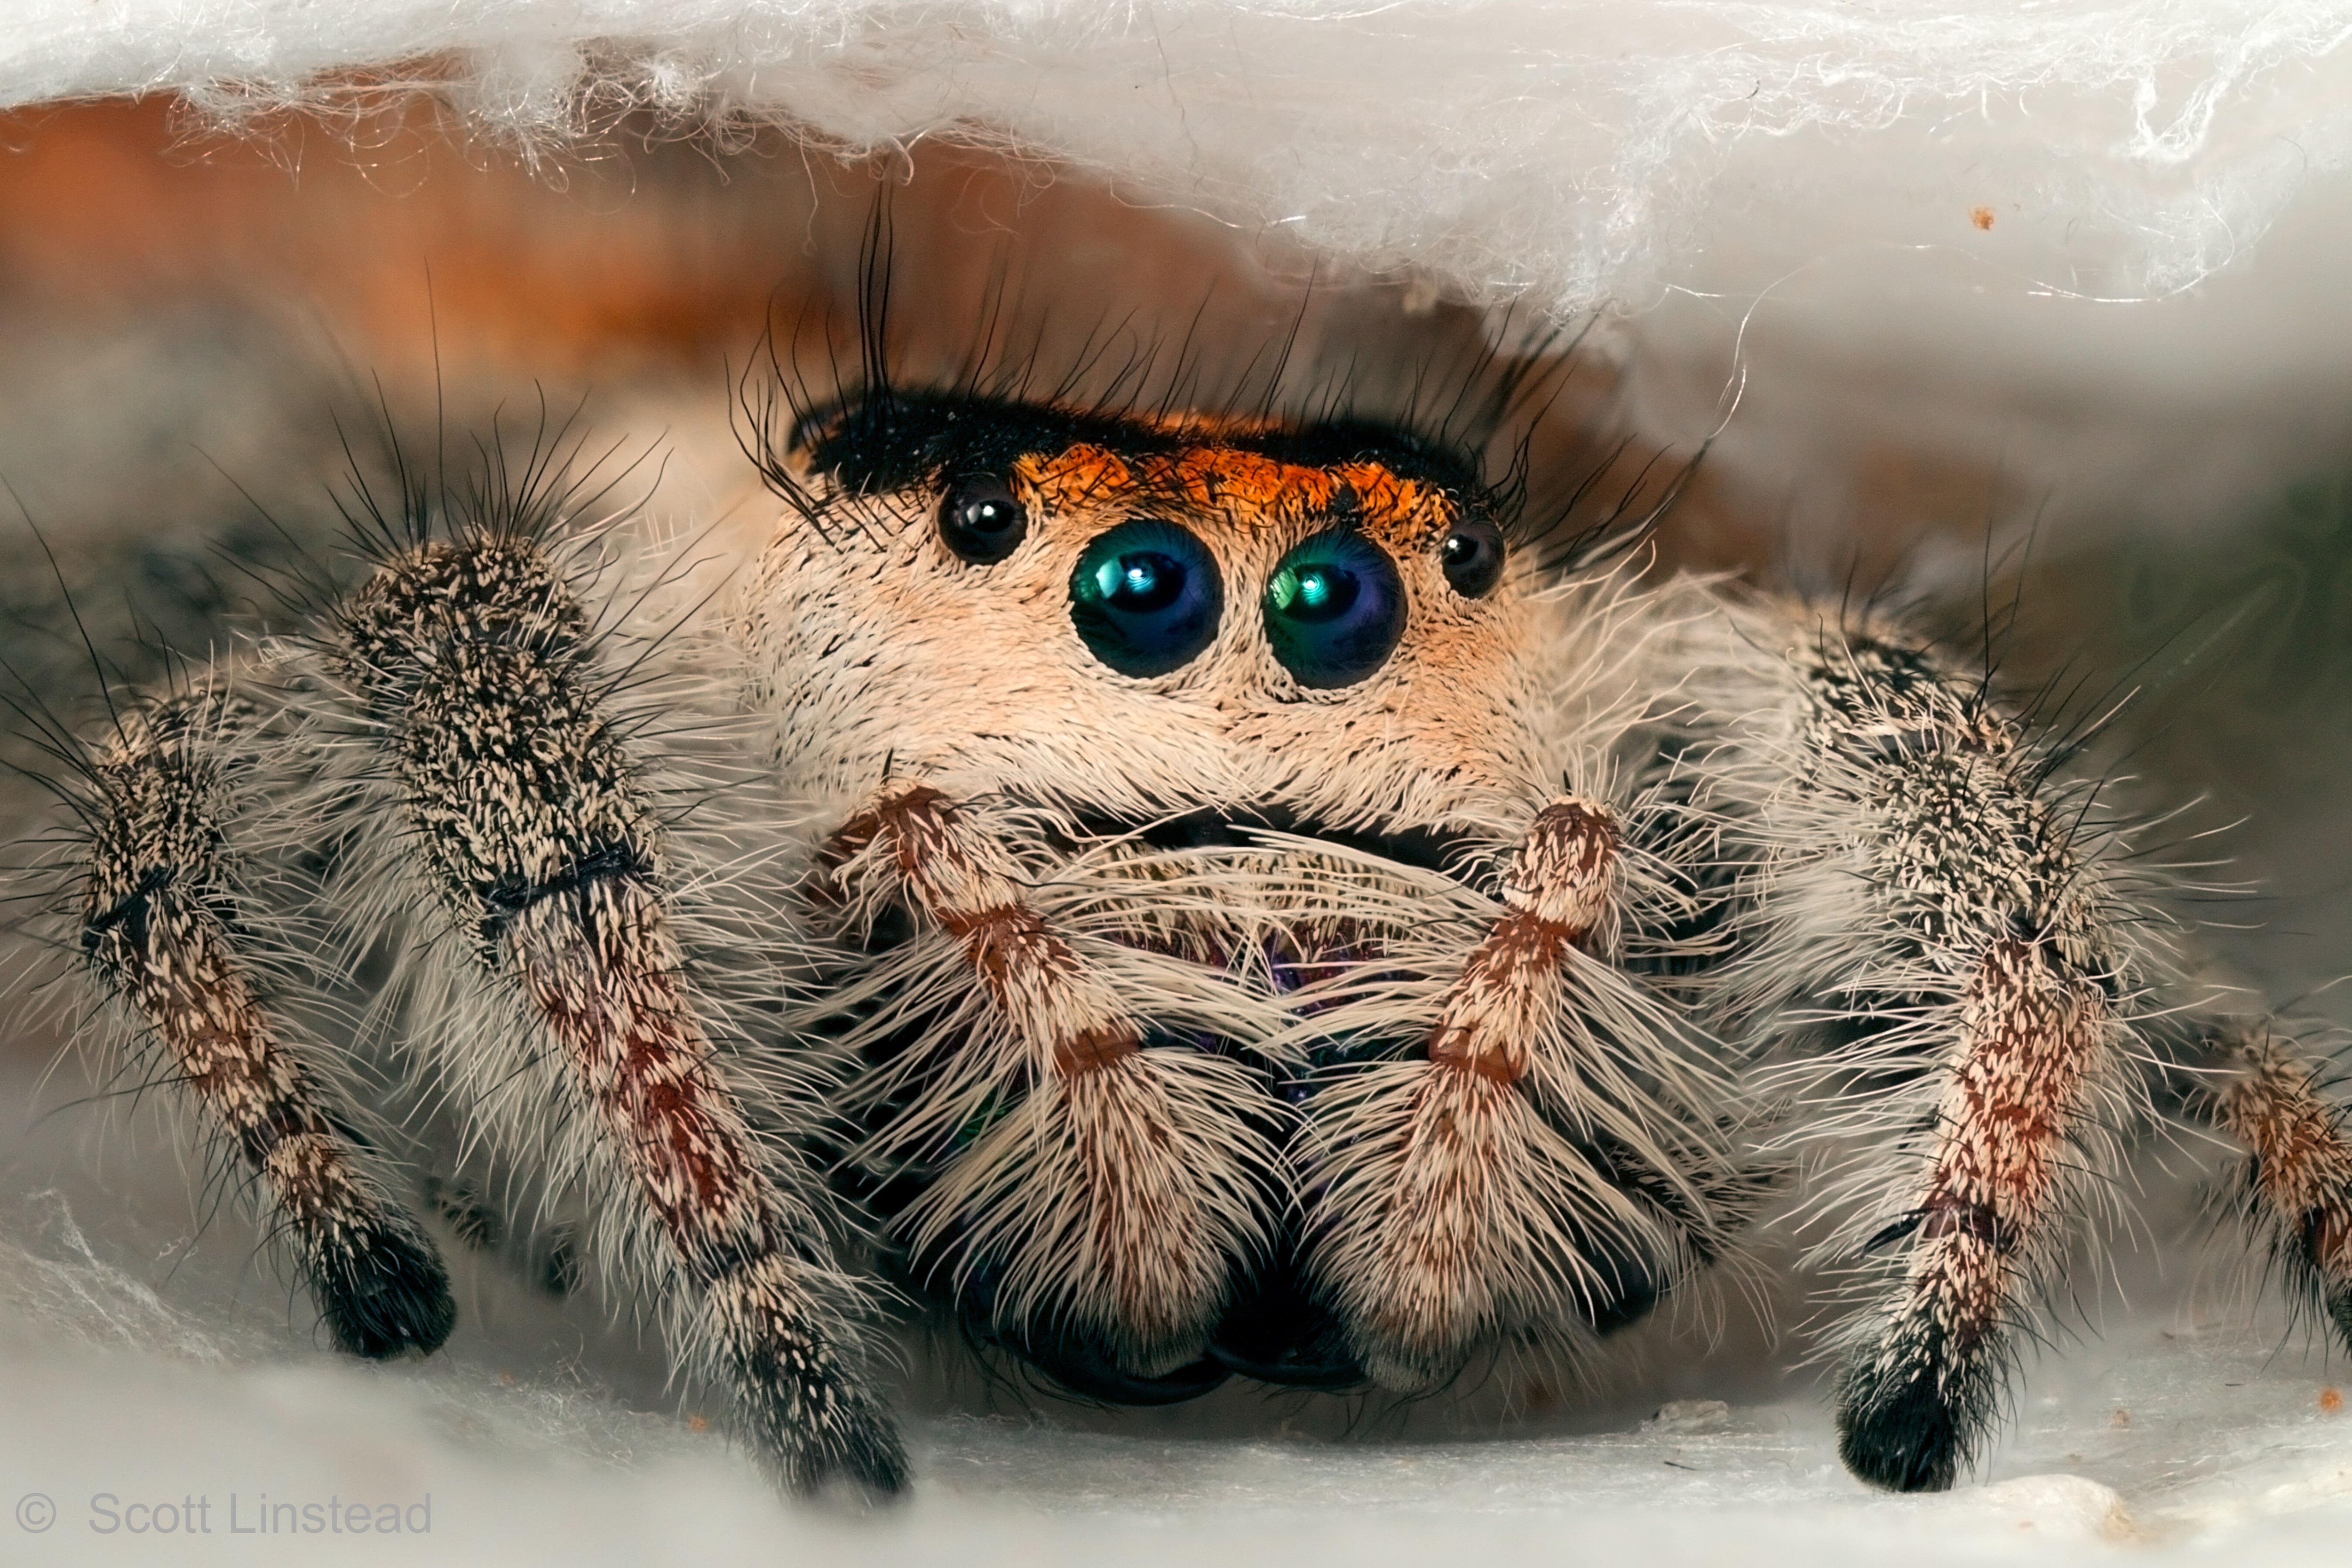
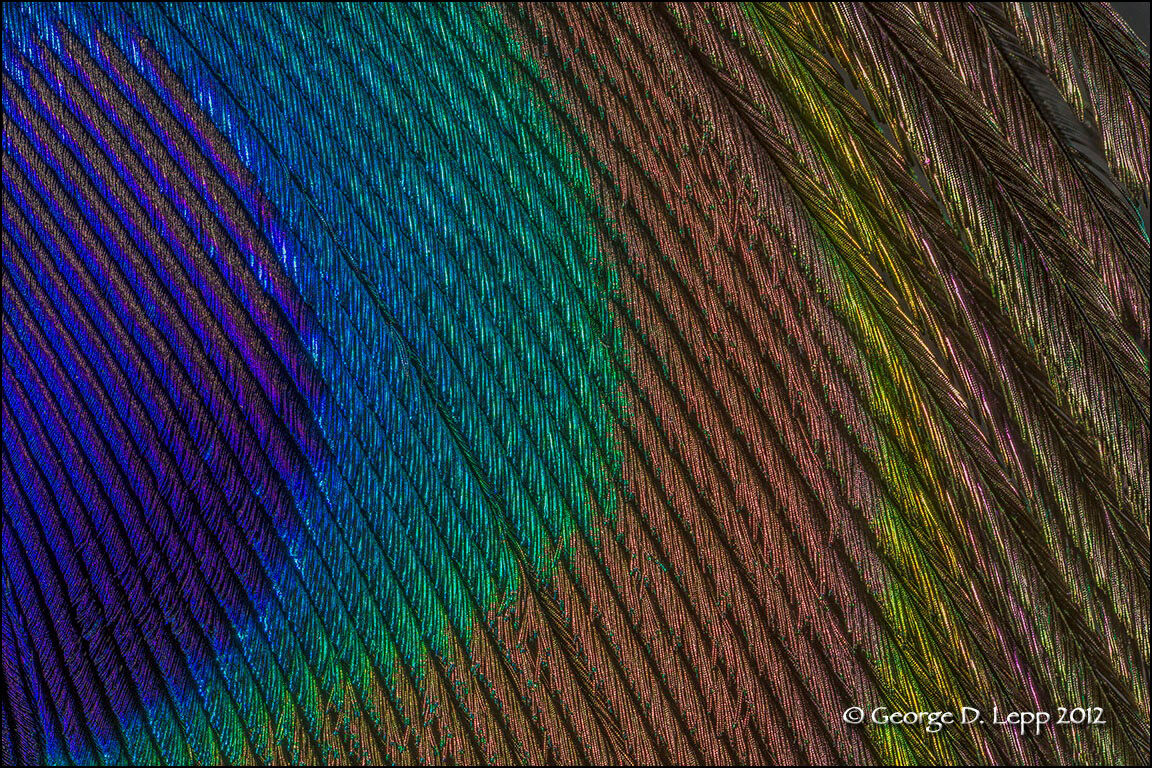
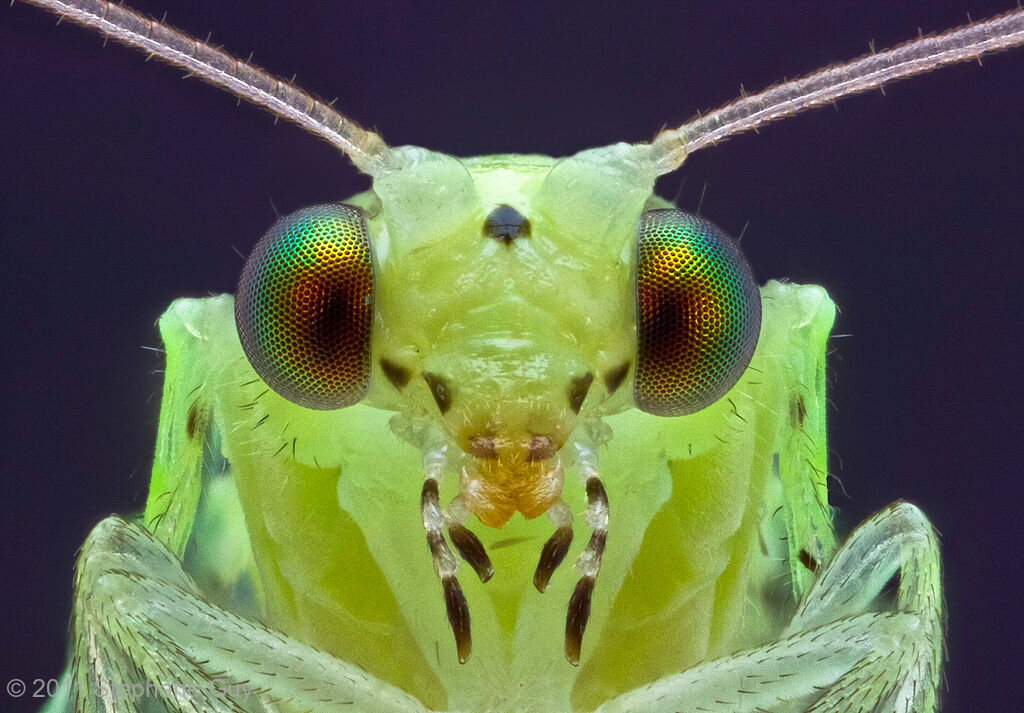
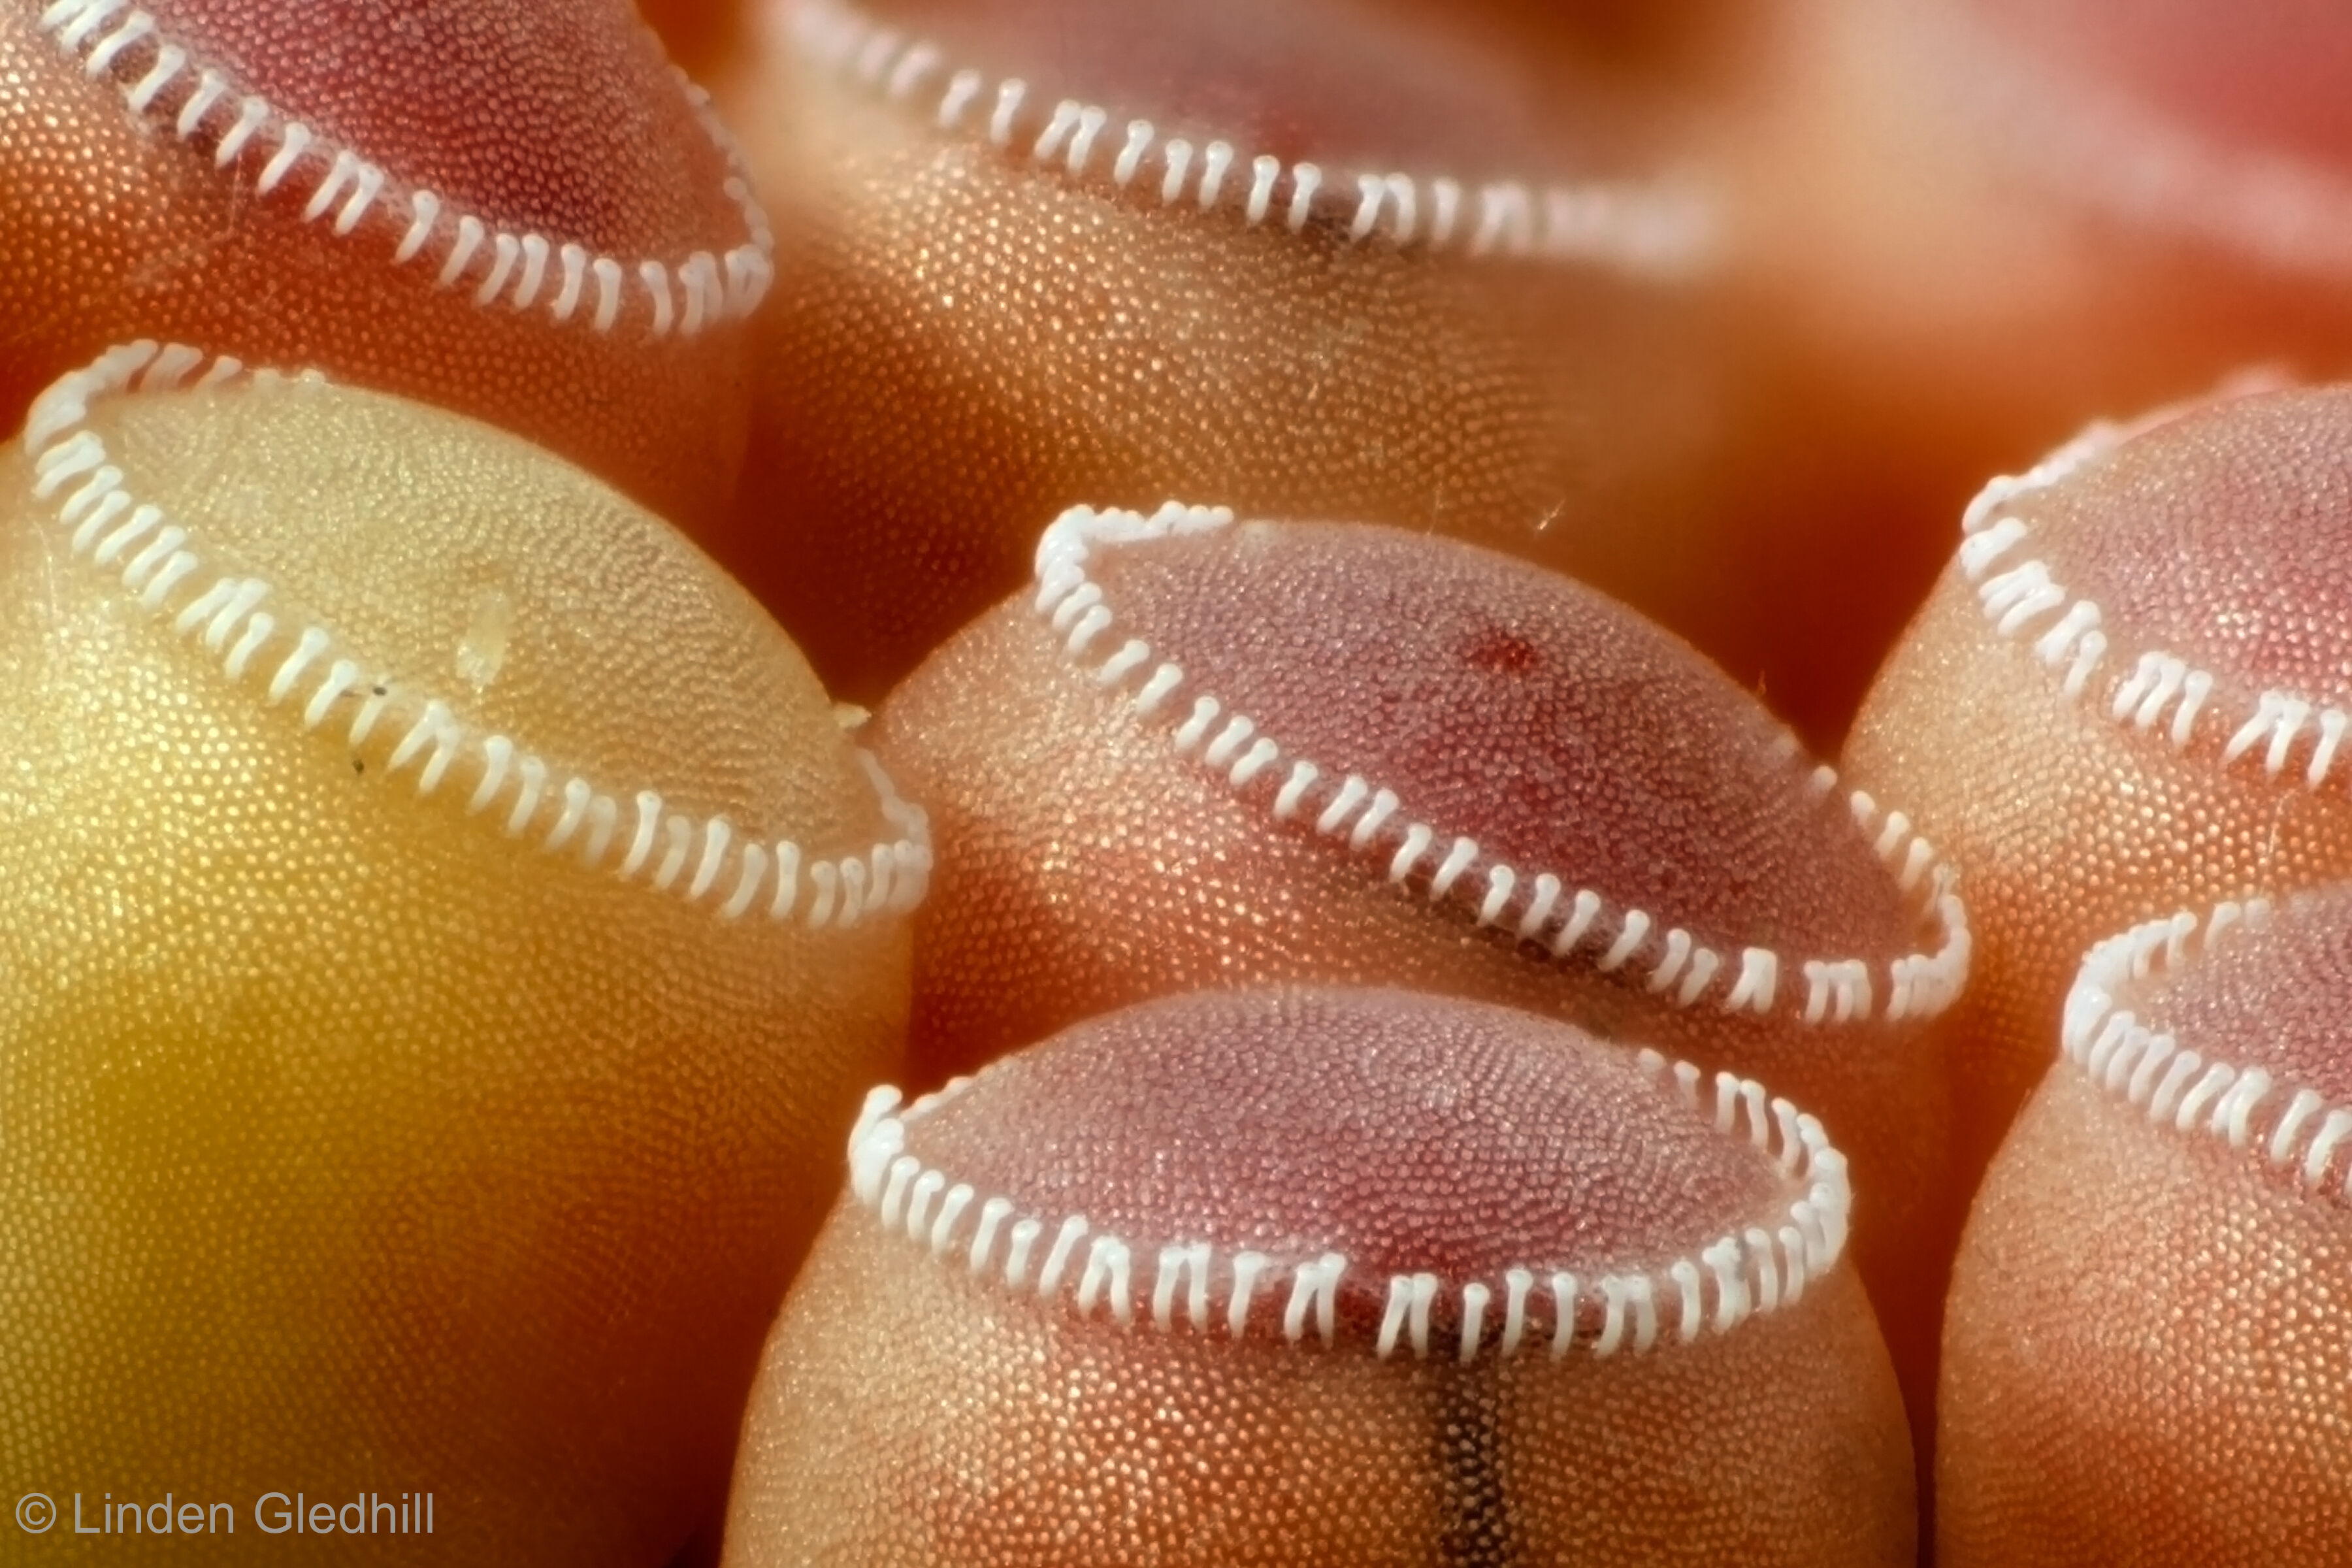
Some Focus Stacked Images from Our Customers


As low as $639.00
As low as $729.00
As low as $879.00