Connecting Sabre to your Android Device
Connecting Sabre to your Android Device
The Sabre app for Android is available in the Google Play Store for $10 here.
You do not need to install this software to use Sabre, but you might appreciate the portability of a phone or tablet to configure it. Additionally we offer a free version for PC or Mac. Sabre also has two built-in modes, such as auto-mode or manual mode that can be used right out of the box with no additional configuration.
The following instructions and screen shots may vary slightly due to operating system versions, phone/tablet sizes, orientation, etc. The basic functionality and process remains the same. The screen shots were captured on a phone but the tablet version is very similar. You can see some of the tablet screen shots at the bottom of this page.
The first step is to turn on your Sabre. Sabre uses Wi-Fi (802.11) to communicate so be sure Wi-Fi is turned on (the blue light above the Wi-Fi button on Sabre will illuminate). If it isn't, press the Wi-Fi button.
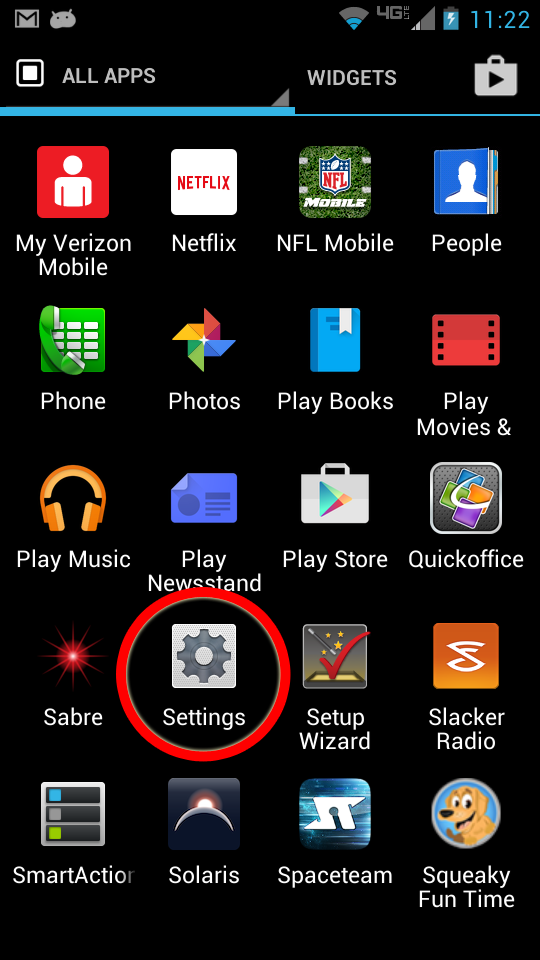
On your Android device, go into your apps and then click on settings.
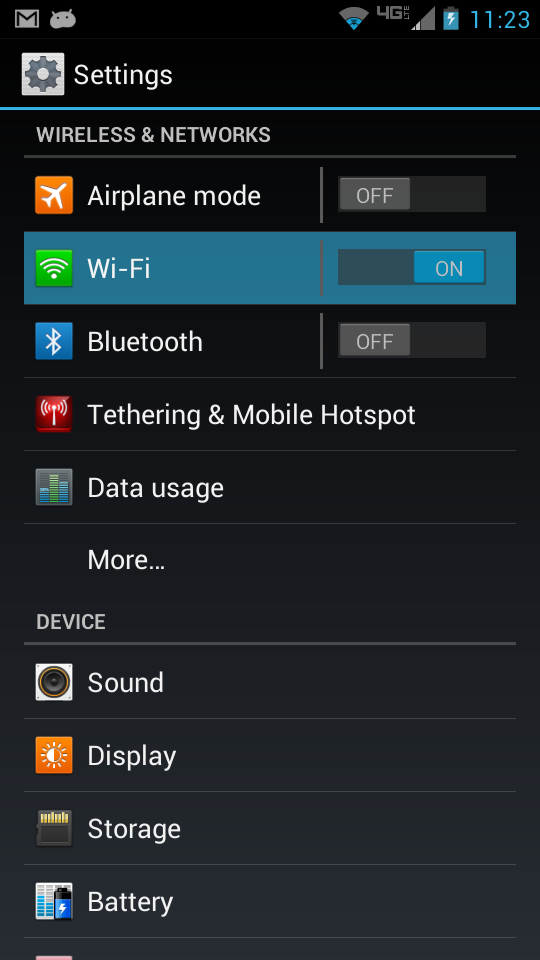
Now go into your Wi-Fi settings.
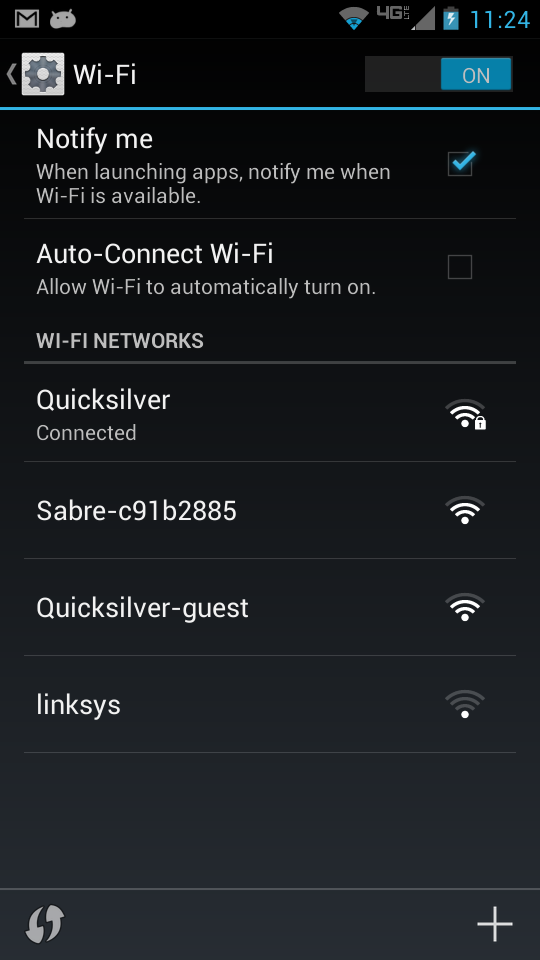
Here you will see a list of available networks.
In this case the device is connected to “QuickSilver”.
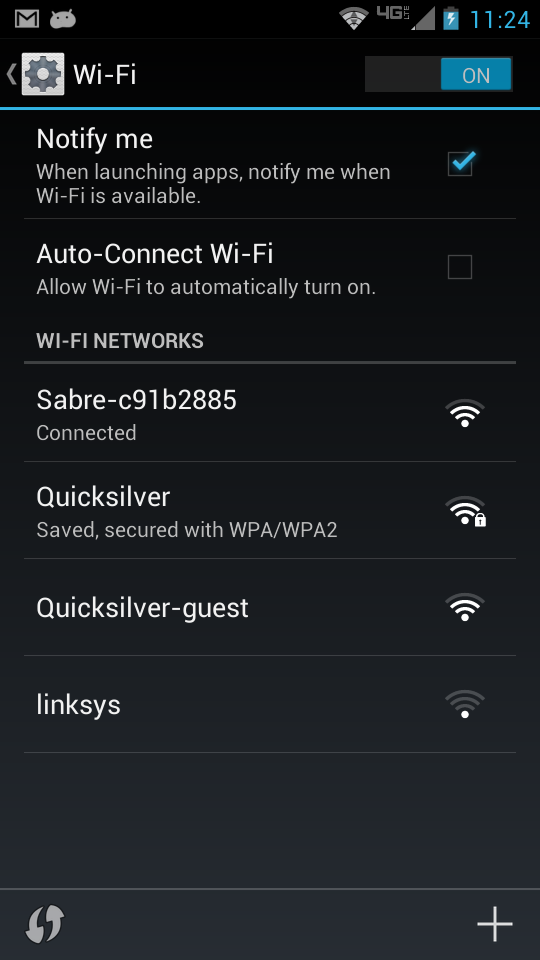
Press the “Sabre” wireless device to connect to it. Your Sabre will have numbers and letters after it that uniquely identify it, so it will not look exactly like the one shown. Once connected you should see this:
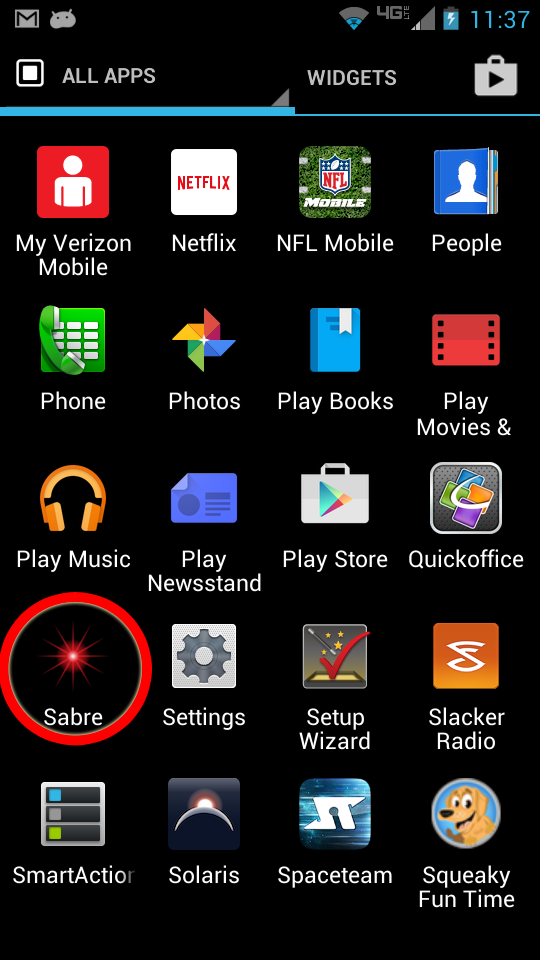
Now we need to run the Sabre app. Press the “home” button and launch the Sabre app.
A splash screen will appear, and depending on the speed of your device, it may take a couple of seconds for the app to load.
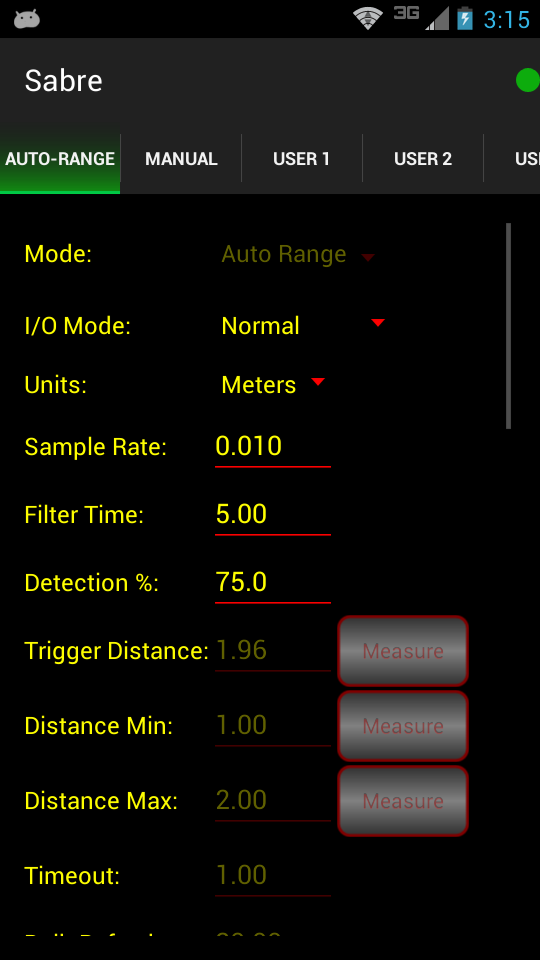
You will then be presented with the “Auto” tab.
App Icons and Navigation
Icons
You’ll notice a small colored circle in the upper right hand corner of the screen. This indicates if the app is currently communicating with Sabre.
- Blue: Connected
- Red: Not connected
- Yellow: Sabre detected an object
Depending on the device you are using, you may also see three “dots” to the right of the connection indicator. If you don’t see this, your device has three dots or bars on its keypad. This is the “options” button. Go ahead and tap it.

Here you will see six options available:
Save Settings: Permanently save the current settings, and change Sabre to the current tab you have selected.
Read Settings: This will read all the settings from Sabre and display them in the app. You do not have to press this button for each tab – all the information will be read with one button press.
Load Defaults: Load the factory defaults into Sabre.
Change Color: This will switch the color scheme from light to dark for day and night use.
Help: A pop-up window will show up explaining the settings on the current tab you are using. Shutter: Activate the shutter outputs on Sabre per their settings.
Navigation
To move from tab to tab, you can press the tab indicator at the top, or swipe your finger sideways to get to the next tab.
For details about each of the settings, please refer to the owner’s manual.
Note: Once you go through the Wi-Fi setup and save Sabre as a device, you should not have to go through that process again. The app should automatically change your Wi-Fi connection to Sabre the next time you launch the Sabre app. We say “should”, because there are over 8,500 different models of Android devices, many having their own unique implementation of hardware and software. If your Android device does not automatically connect to Sabre when you launch the Sabre app, you will have to select your Sabre from the available Wifi networks prior to launching the app.
Another interesting note about Android in general: The “return” or “back” button closes an app. The home button, on the other hand, will just put the app in the background.