Photograph Birds in Flight with Sabre
Capturing Birds in Flight with Sabre
Sabre is an ideal sensor to capture birds in flight. It is single ended (no separate transmitter and receiver) easy to setup and unaffected by ambient light. Backyard bird feeders make a great place to set them up. For most bird applications no settings need to be changed - it can be used successfully right out of the box.
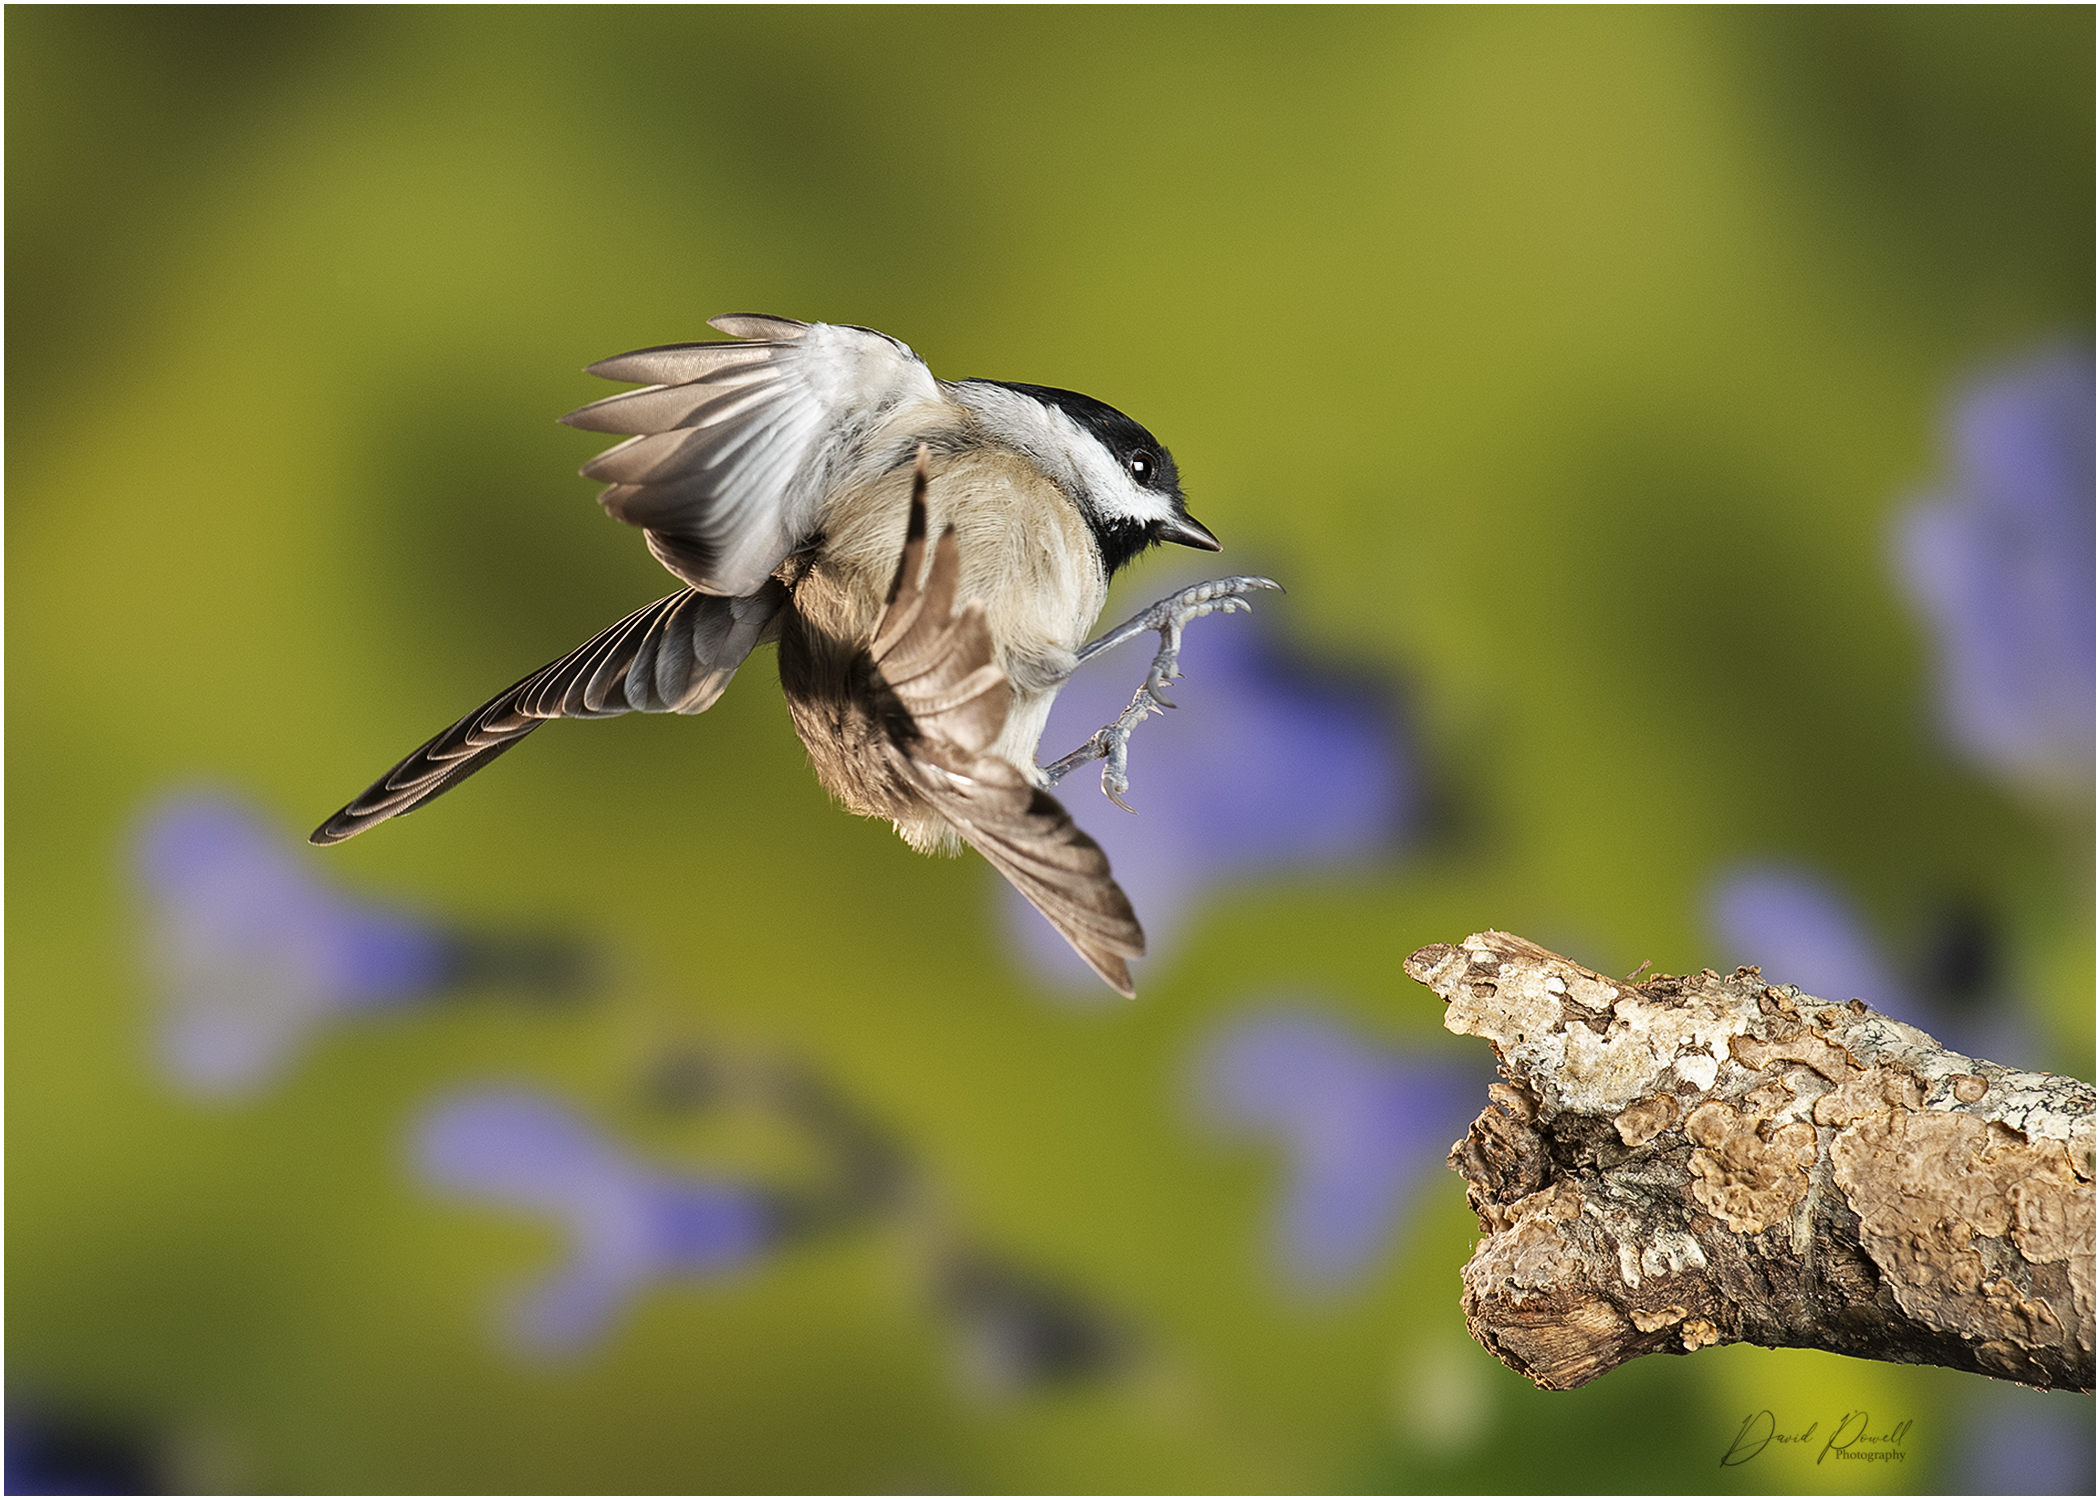
Image courtesy of David Powell
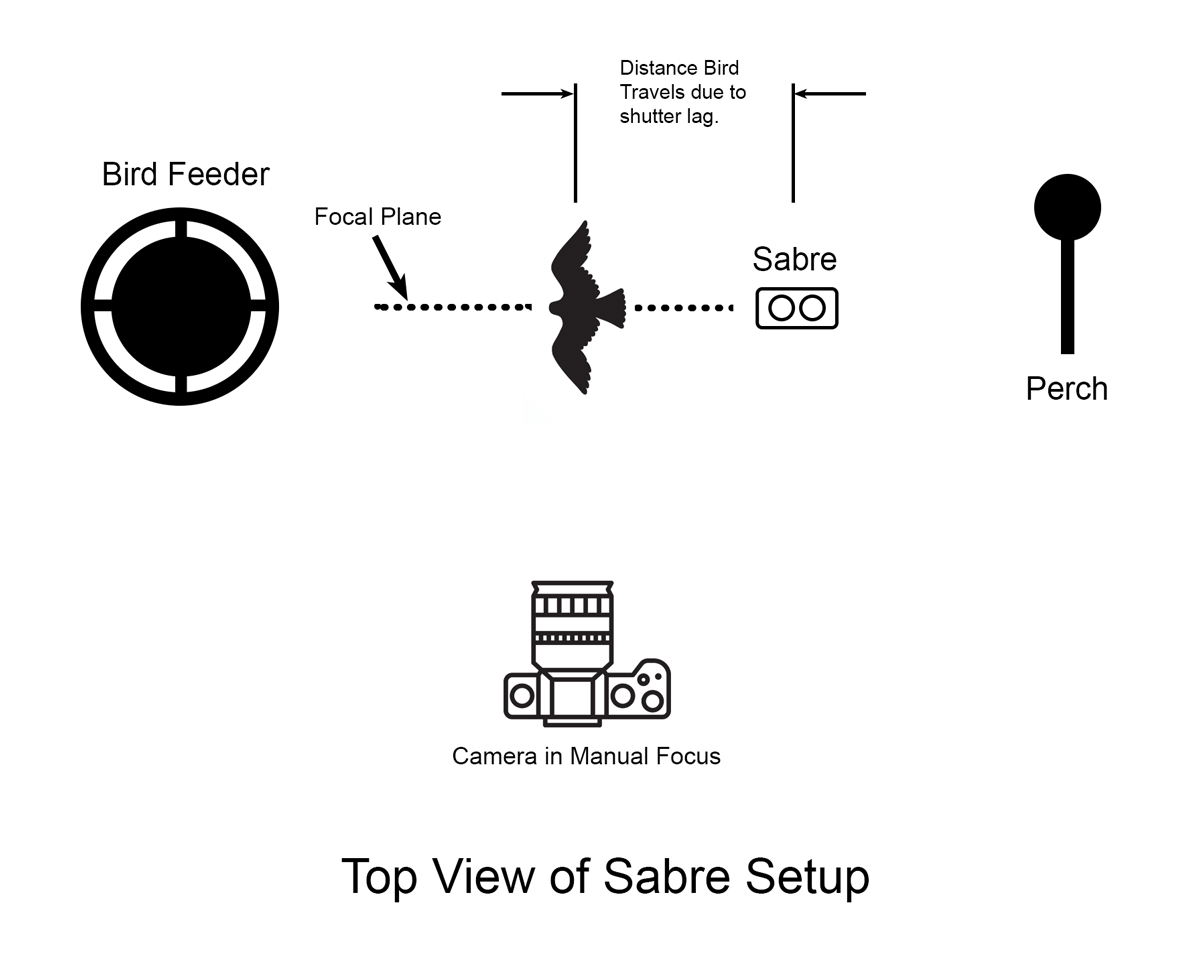
The image to the right is a perfect example of how to use Sabre to capture birds in flight with Sabre. This image was captured by David Powell in South Carolina. The image does a excellent job of demonstrating a couple of key considerations when using Sabre to capture birds in flight. The first thing to note is the placement of the perch (out of frame to the left), the Sabre and the tasty snack the bird is after. All of these things are lined up parallel to the sensor plane of the camera. Using the Sabre in this fashion greatly increases the odds of the bird being in focus - the camera is focused on the beam of Sabre. This is further demonstrated in the line drawing below. People often want to place Sabre over there camera pointing in the same direction as the lens. The problem with this setup is where do you focus? Most cameras do not have auto focus fast enough to pick up a bird moving across (or towards) the frame, especially when zoomed in. This means we are left with manual focus and we need to know where to set the focal point. The setup David used for this image solves these issues. Focus where you know the bird will be.
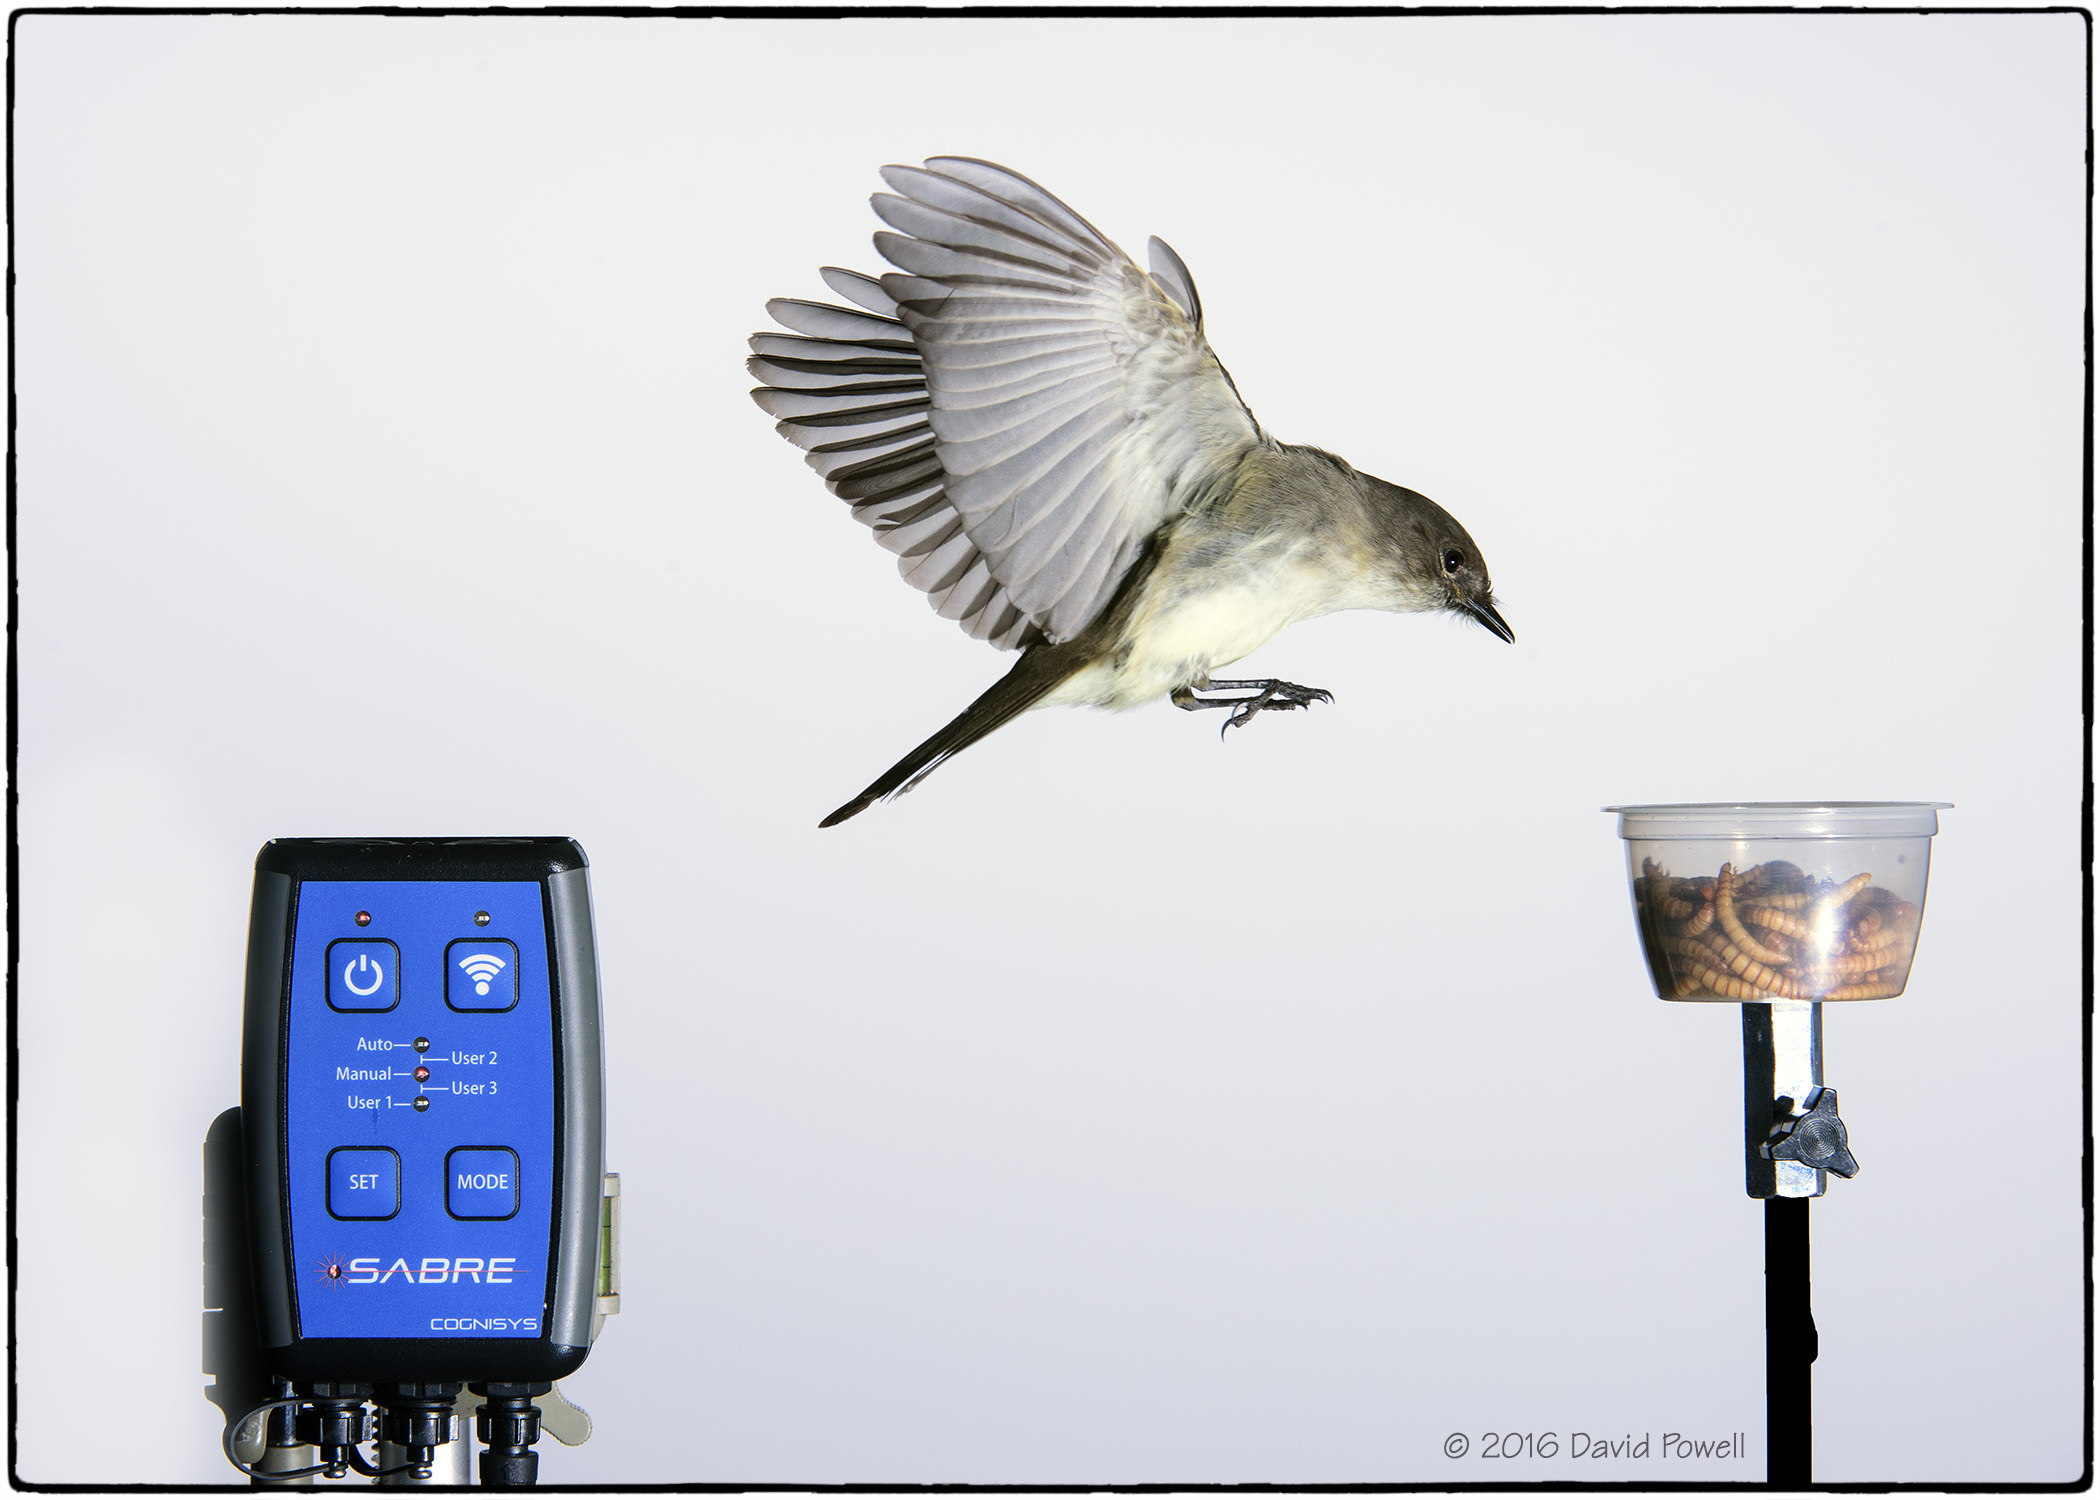
The second thing to note about this image is how far the bird has traveled after the image was triggered. The image was triggered when the bird was directly over the Sabre but the image wasn't captured until the bird had traveled almost its own length. This is due to the shutter lag of the camera. Once the shutter button is pressed (or Sabre electronically pushes the shutter button) it takes at least another 60ms for the camera to go through all of the preparation to take the image. 60mS is the shortest you are likely to find the shutter lag in a modern DSLR or mirror-less camera. Depending on the camera and settings the amount of time that can elapse is as much as 300mS or 3/10 of a second. A flying bird covers a lot of distance in that amount of time and you will want to compensate for that with your camera placement.
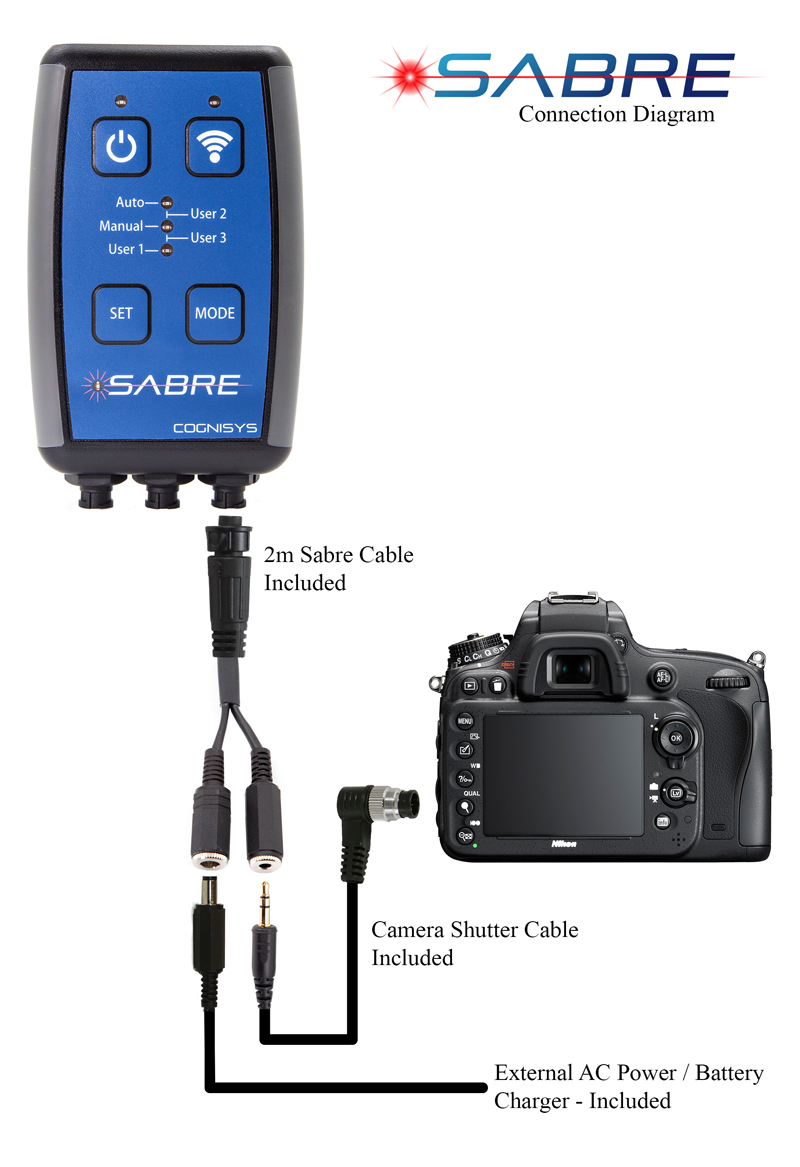
When using Sabre to capture birds in flight the easiest way to fire the flashes is to use Sabre to fire the camera, and the camera will fire the flash. This allows you to use whatever flash setup you use for your other flash photography. The one caveat here is that you probably don't want to use any optical master/slave modes for the flash. Since the slave flashes get their fire command by "watching" for the flash of the master flash there is a slight delay between master and slaves. This will cause ghosting in the final image. Especially on fast moving subjects, pay special attention to the wing tips. For the sharpest photographs it is important all of the flashes go off at exactly the same time.
Another consideration when using flash is the flash power. The lower the flash power setting is the faster the duration of the flash - the shorter the duration of flash used the more stopping power (less motion blur) the flash will have on the fast moving subject. Using a short duration flash allows fast moving subjects to be frozen sharp. Ideally the entire image will be illuminated by flash, the more ambient light is allowed to expose the image the more likely motion blur will be introduced. This generally means stopping down significantly while keeping your shutter speed at the cameras fastest x-sync speed (usually 1/200 or 1/250). Using this technique means you will need to illuminate the background with separate flashes - that is unless you want a black background.
Another option if you don't want to go through the flash setup is to just use a fast shutter speed to freeze the action. A fast shutter speed can't compete with a short duration flash for motion stopping power but for larger birds this method produces good results. In both cases the connection to the Sabre is the same - connect the shutter cable to the remote shutter port as shown below.
For a traditional birds in flight setup as described above the default settings of Sabre will work well. Just pull Sabre out of the box connect it to your camera, put it in position and turn it on. Make certain you are in Auto Mode and then wait for the birds to cooperate. Sabre will take one image for each trigger.
If you are seeing false triggers have a look above the sensor for small swarms of flying insects - Sabre is sensitive enough to trigger on these bugs and this has caused me issues on more than one occasion. The easiest fix is to switch to manual mode and set the distance so the bugs will be out of range. Just keep in mind objects closer than 6" will not trigger Sabre.
You will want to make certain your camera doesn't go to sleep between triggers as this can cause a significant increase in shutter lag. Also make certain you are using Manual Focus - as good as they are, Auto Focus systems will take too long to lock on the bird and take the image. Set the exposure to match your flashes or ambient lighting conditions.
If you are using a Nikon camera turn the LCD preview off as this affects the shutter lag time. If you are using a Canon you may want to use the 1/2 press always on feature of Sabre as this will keep your shutter lag consistent and to a minimum. Without this the shutter lag will be variable and dependent on the amount of time since the last trigger. One consideration for using this mode is that the camera will need to be disconnected or this feature turned off to be able to review images or make camera settings changes.