Water Drops - Connecting 3 Valves
Water Drops - Connecting Three Valves
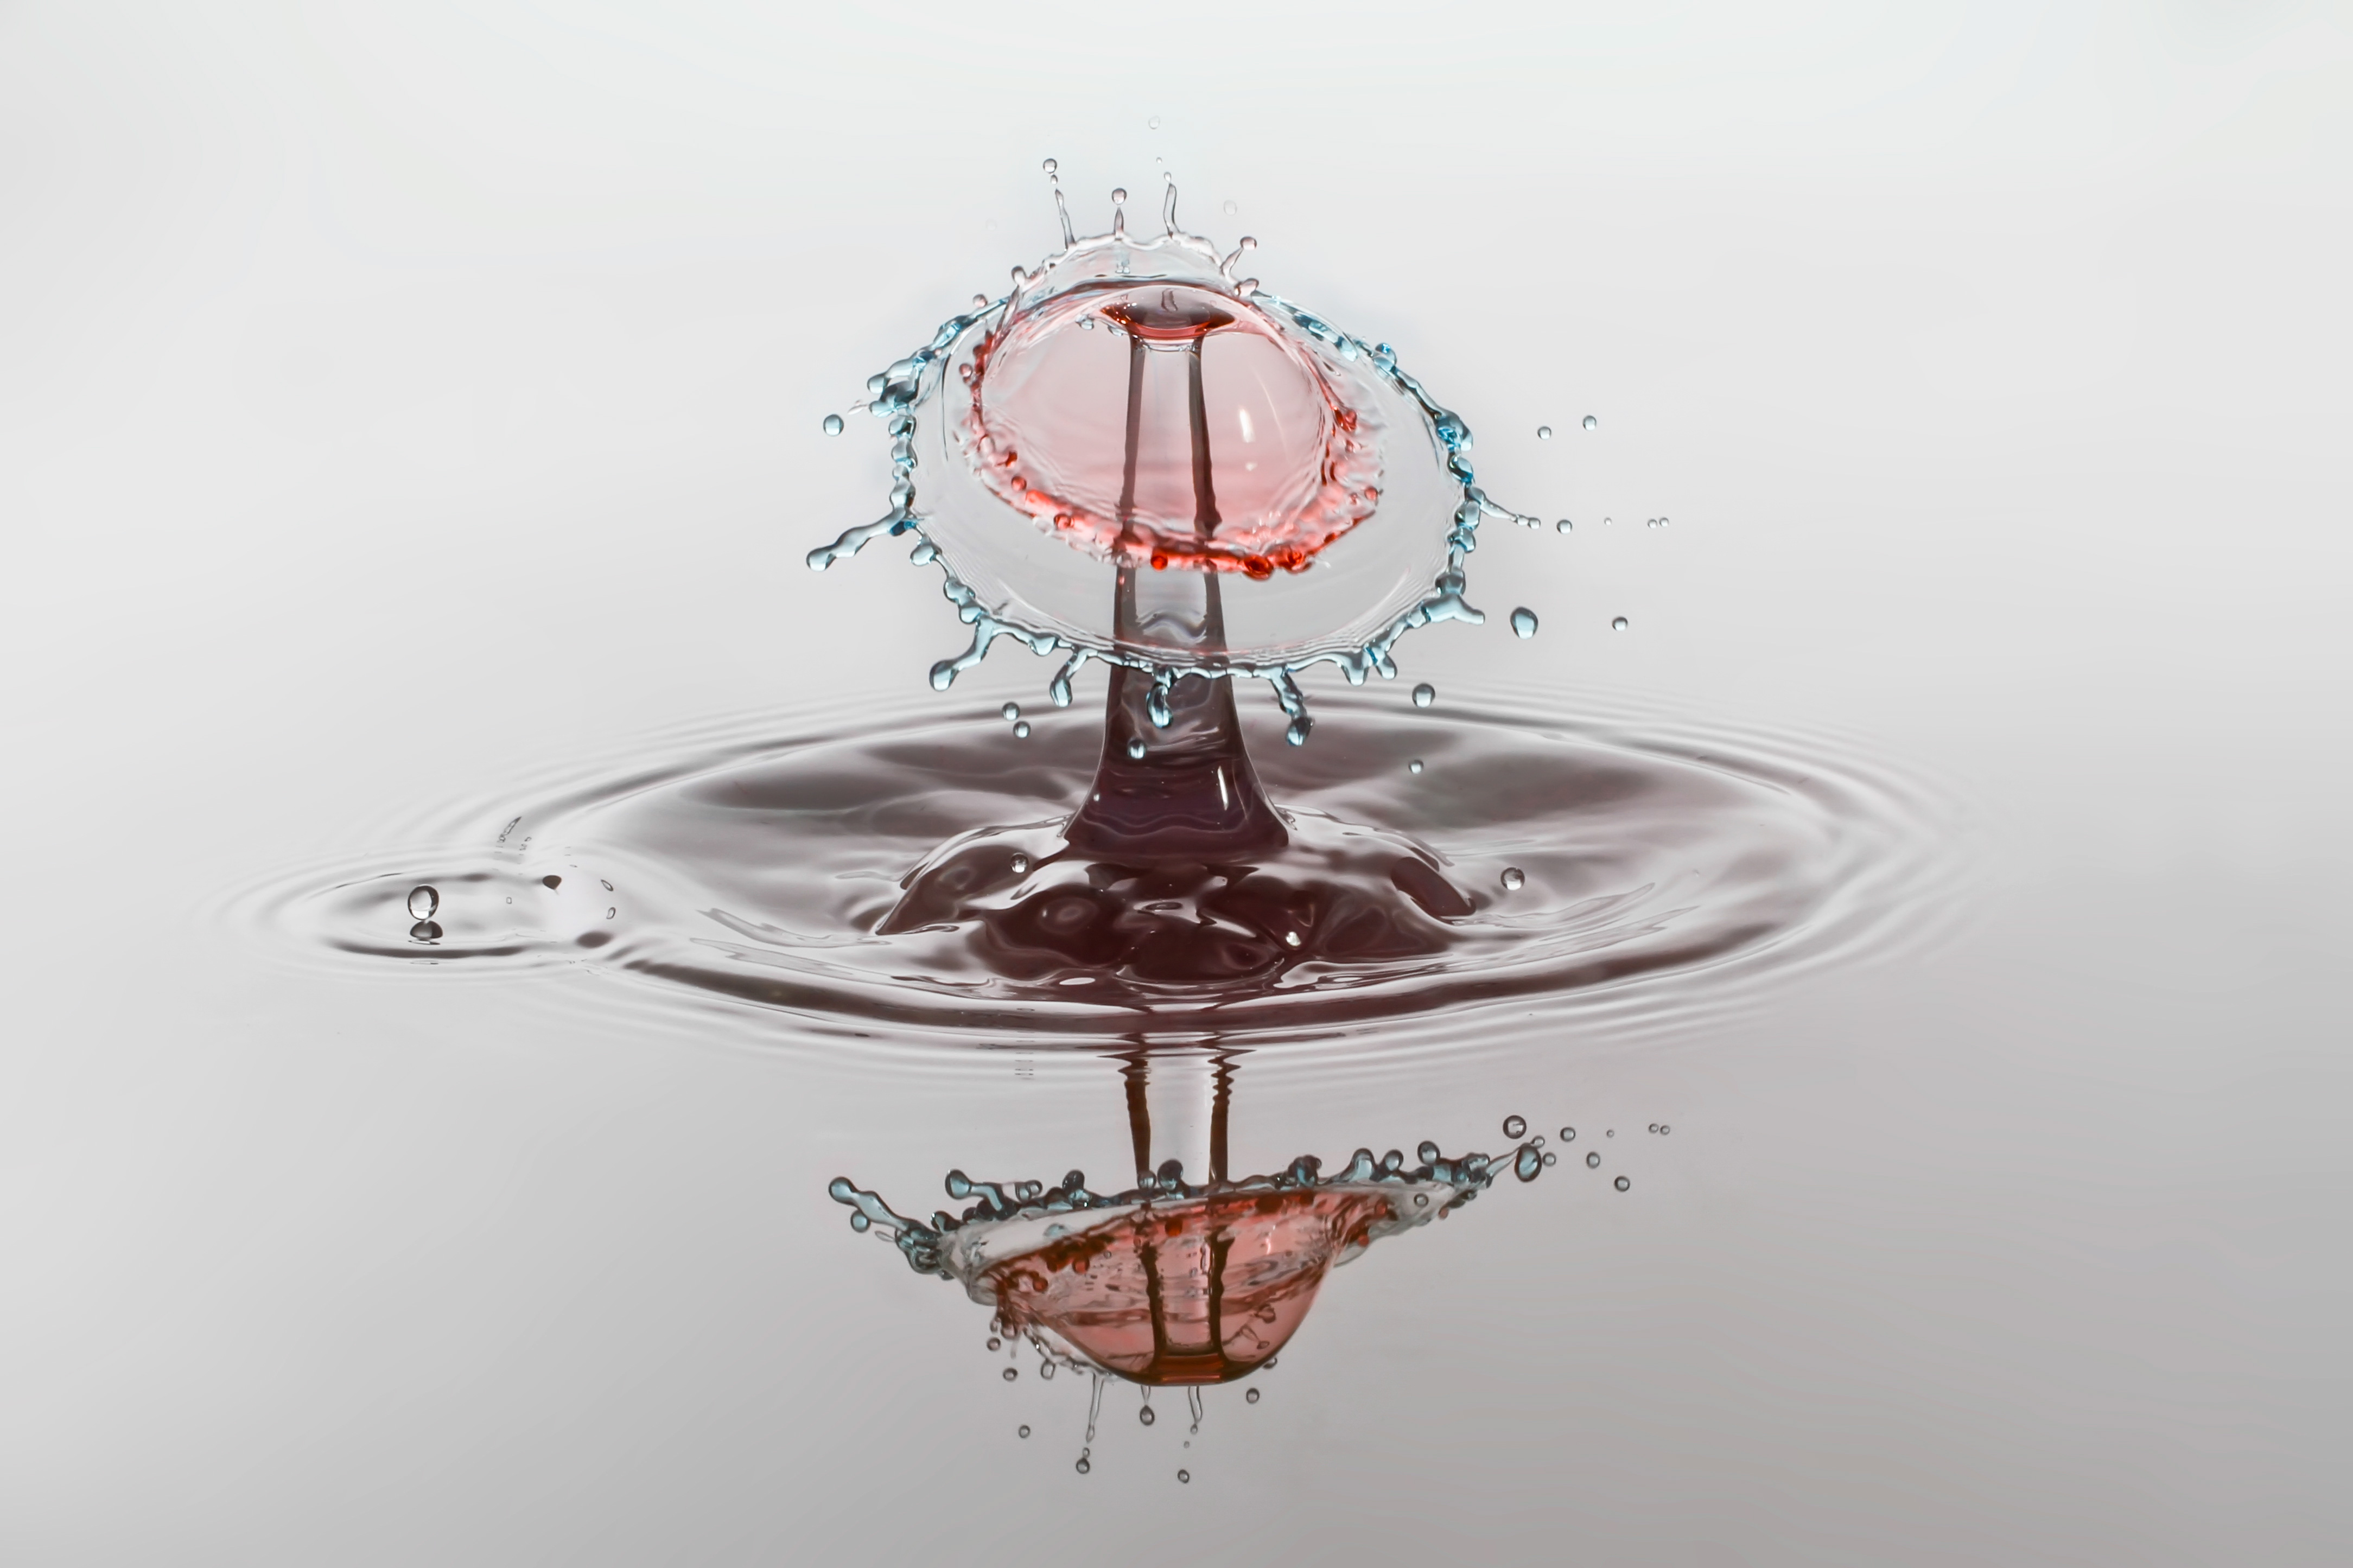
For the ultimate challenge use your StopShot system to get three different color drops to collide. This is not an easy feat but it does make for some unusual images. Once you have worked through getting double drop collisions and two color collisions this makes for a great challenge. The alignment of the valves is critical for this and some patience is definitely required but the results are worth it.

The Setup
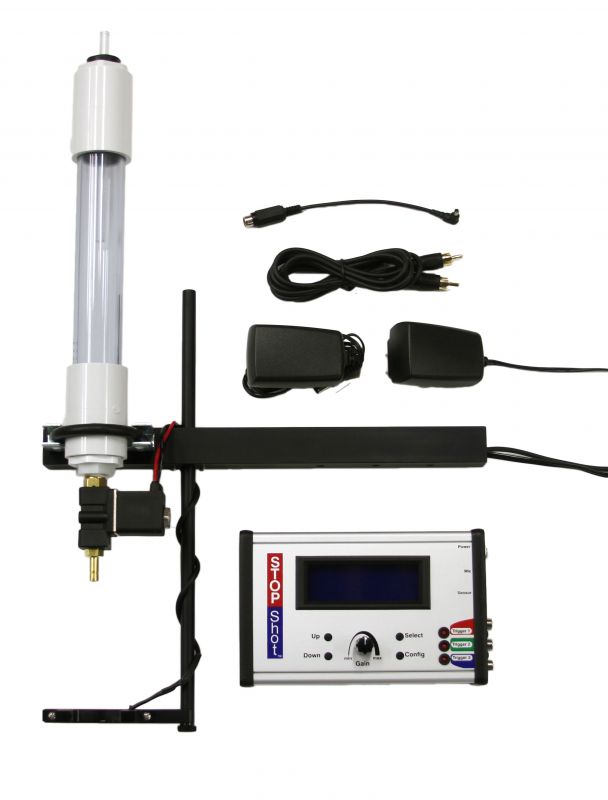
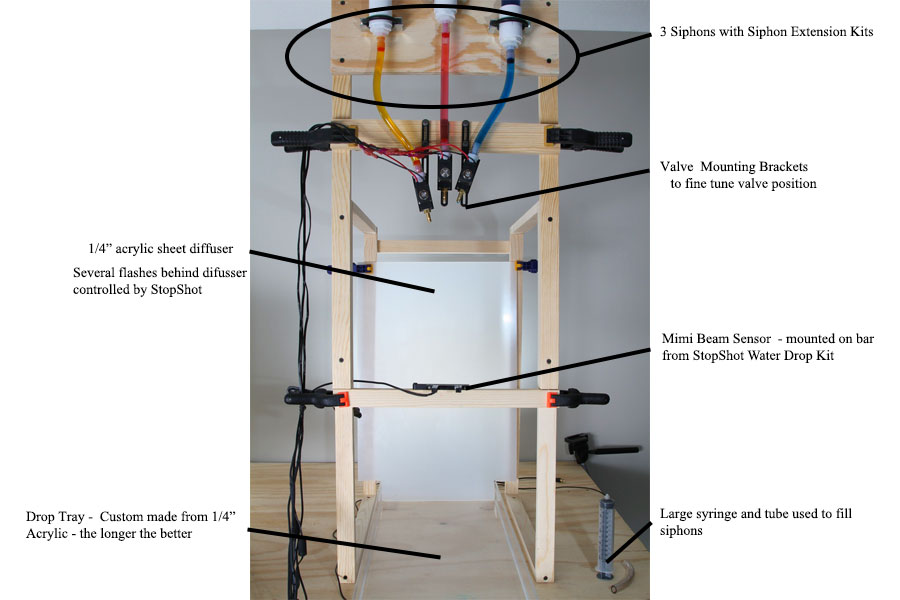
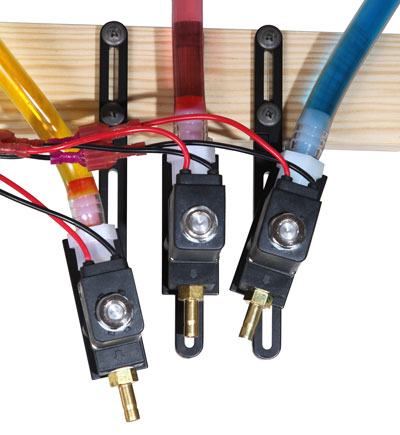
The above image was taken with a StopShot controller, it was captured before the StopShot Studio was introduced. If I was to do it over again I would absolutely use the StopShot Studio. However, it is still worth a walk through on how this image was created with the StopShot. StopShot has 3 outputs and one of those needs to control the flash so how do we get one StopShot to control 3 valves? In order to get this to work with three valves one of the triggers will have to do double duty and fire two water valves. The images on this page were taken by connecting the first valve (blue) up to Trigger 1, and the other two valves up to Trigger 2, leaving the flash to be controlled by Trigger 3. The distance between the second and third drops is controlled by physical height between the two valves. You can see the setup show below.
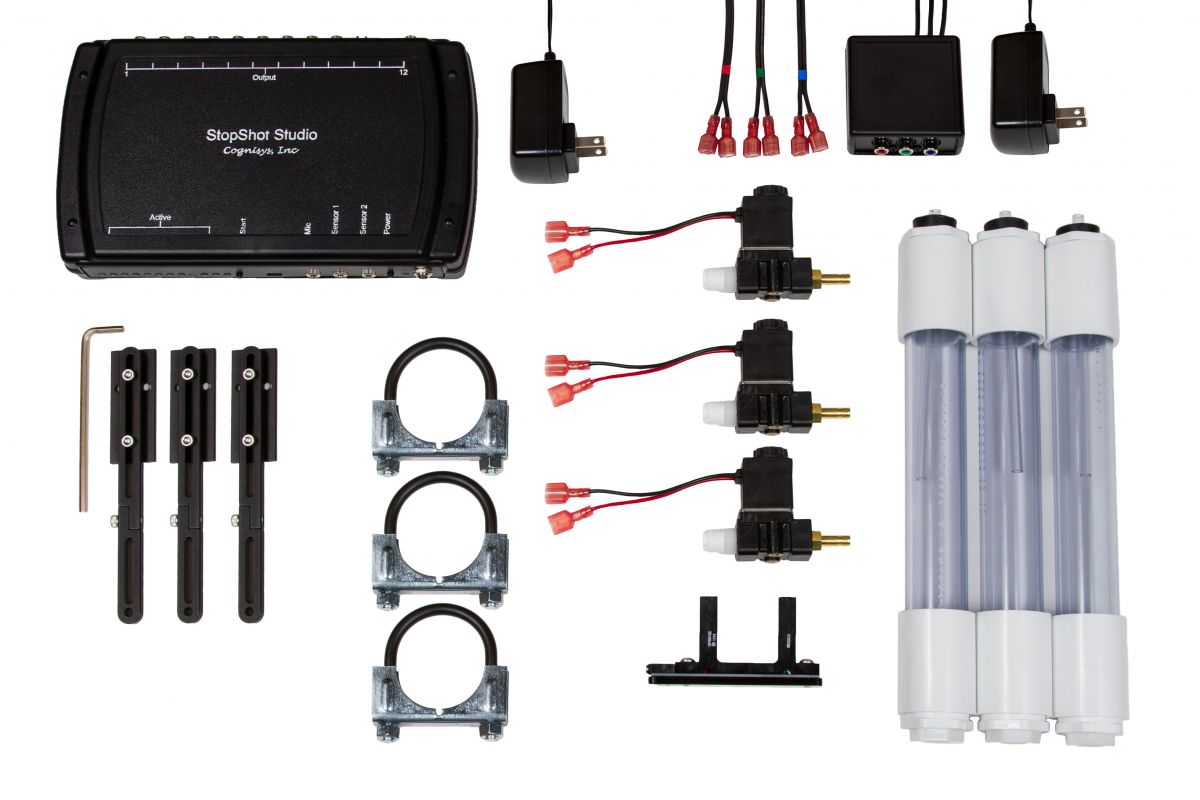
For this technique you will need a StopShot Water Drop Photography Kit, two extra Water Valve Assemblies and Mariotte Siphons. I also used three of the Water Valve Mounting Brackets to make valve adjustment easier. It is also a much easier setup if you remote mount the Siphons from the water valve, for this I used three of the Siphon Extension Kits. You will also need an RCA Y cable to connect valves 2 and 3. For the photograph above, the water valve assembly with Red colored water was connected to Trigger 1, the water valve assembly with blue and yellow water were connected to Trigger 2, and the flashes were connected to Trigger 3. The camera was in bulb mode with the aperture set to f/16. In this particular shot I used two Yongnuo YN-560 flashes in manual mode with the power turned down. The flashes were wired in parallel using a RCA Y Cable and two RCA to PC Adapters.
A Couple of Options for Control Over Each Valve?
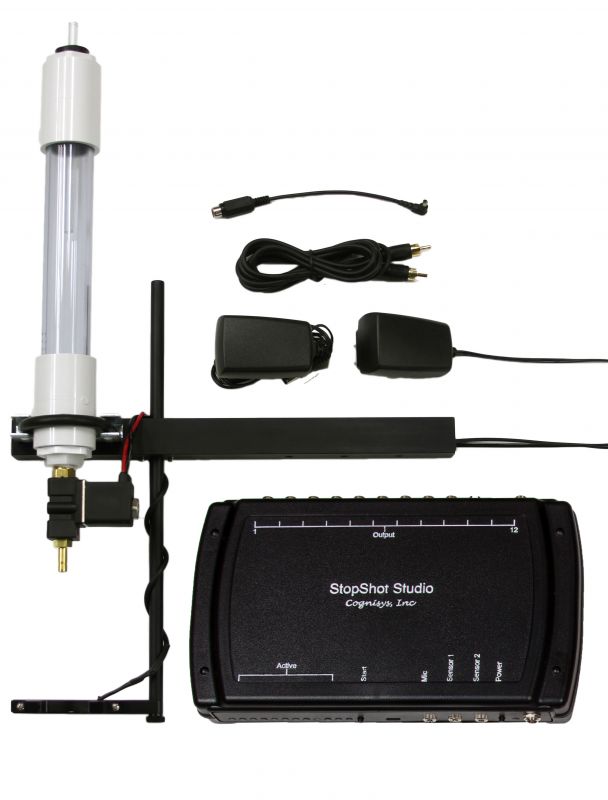
The most elegant way to get complete control over 3 or even more valves is to use the new StopShot Studio, the StopShot Studio is also much easier to operate as it uses the computer as the user interface. It also has 12 outputs that can be configured any way you like.
While it is not nearly as economical as a StopShot Studio controller, independent control over all three valves can be accomplished with two StopShot controllers. Before the StopShot Studio was introduced we had a surprising number of customers do this. The first controller takes care of the timing for the three water valves and the second StopShot takes care of flash and/or camera timing. There is no wires required between the two controllers as the mini beam sensor can be connected to the second controller and the drops will act as the link between the controllers. This method will allow for complete control over all of the devices.
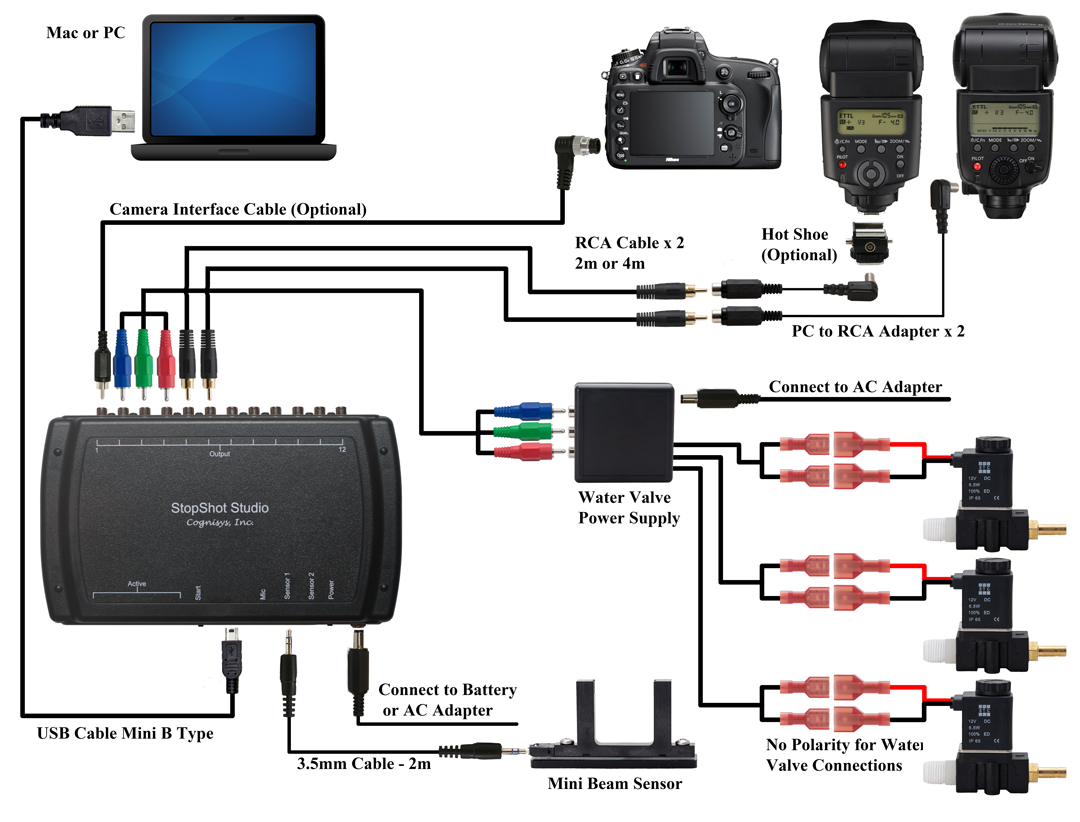
Shown below is the connection diagram for a 3 water valve setup with StopShot Studio. The diagram below has the camera being controlled by the StopShot Studio. This is not necessary but we wanted to show it is possible, controlling the camera manually simplifies the setup and and the results are just as good. If you choose not to control your camera with StopShot Studio you will need to move all of the trigger connections down one trigger. Trigger 1 would control the first water valve.
StopShot Studio Connection Diagram
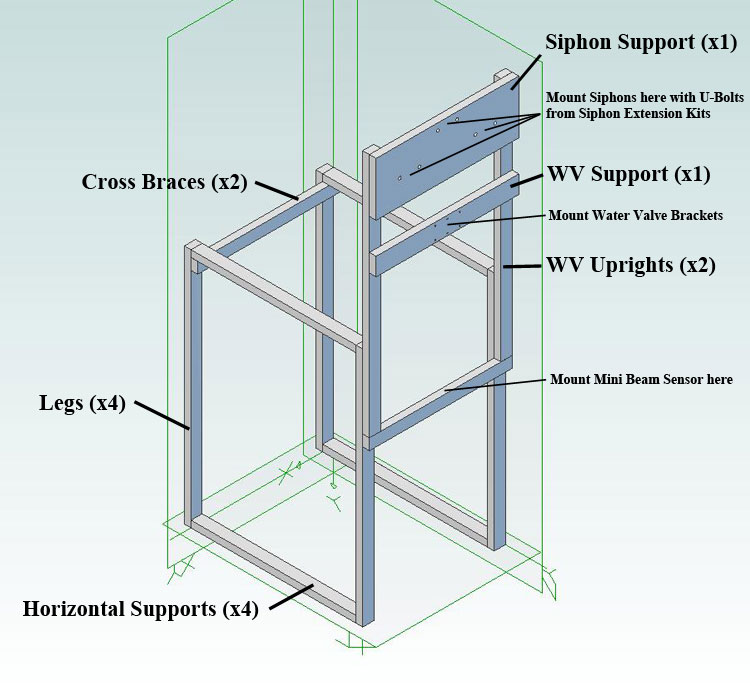
Construction Details for a DIY Water Valve Stand
We have received many requests for the plans to the above fixture so here are the details. If this is something you just want to purchase you can find a complete water drop stand in our store. I'm going to apologize now to all of our European customers but all of the dimensions are in inches. Here is the cut list for th pieces you will need to build the fixture. The 3 valve fixture pictured above is made from standard 1x lumber, except the Siphon support which was made from 3/4" Plywood.
Legs (x4) - 3/4" x 1 1/4" x 27"
Horizontal Supports (x4) - 3/4" x 1 1/4" x 18 1/2"
Cross Braces (x2) - 3/4" x 1 1/4" x 16"
WV Uprights (x2) - 3/4" x 1 1/4" x 27 1/2"
WV Support (x1) - 3/4" x 2" x 16"
Siphon Support (x1) - 3/4" x 6" x 16"
The dripping pan is 12" x 32" x 1 1/2". It is constructed from 1/4" thick Plexiglas. The longer the dropping container the better. The long dimension (32") makes it easier to keep the pan edges out of the photographs. You will notice the back of the fixture allows the tray to slide right on through.
After construction I screwed the entire fixture to my working table as it is very front heavy. If you don't want to screw it down then you will want to make the base pieces extend past the front of the fixture to prevent it from tipping forward.